
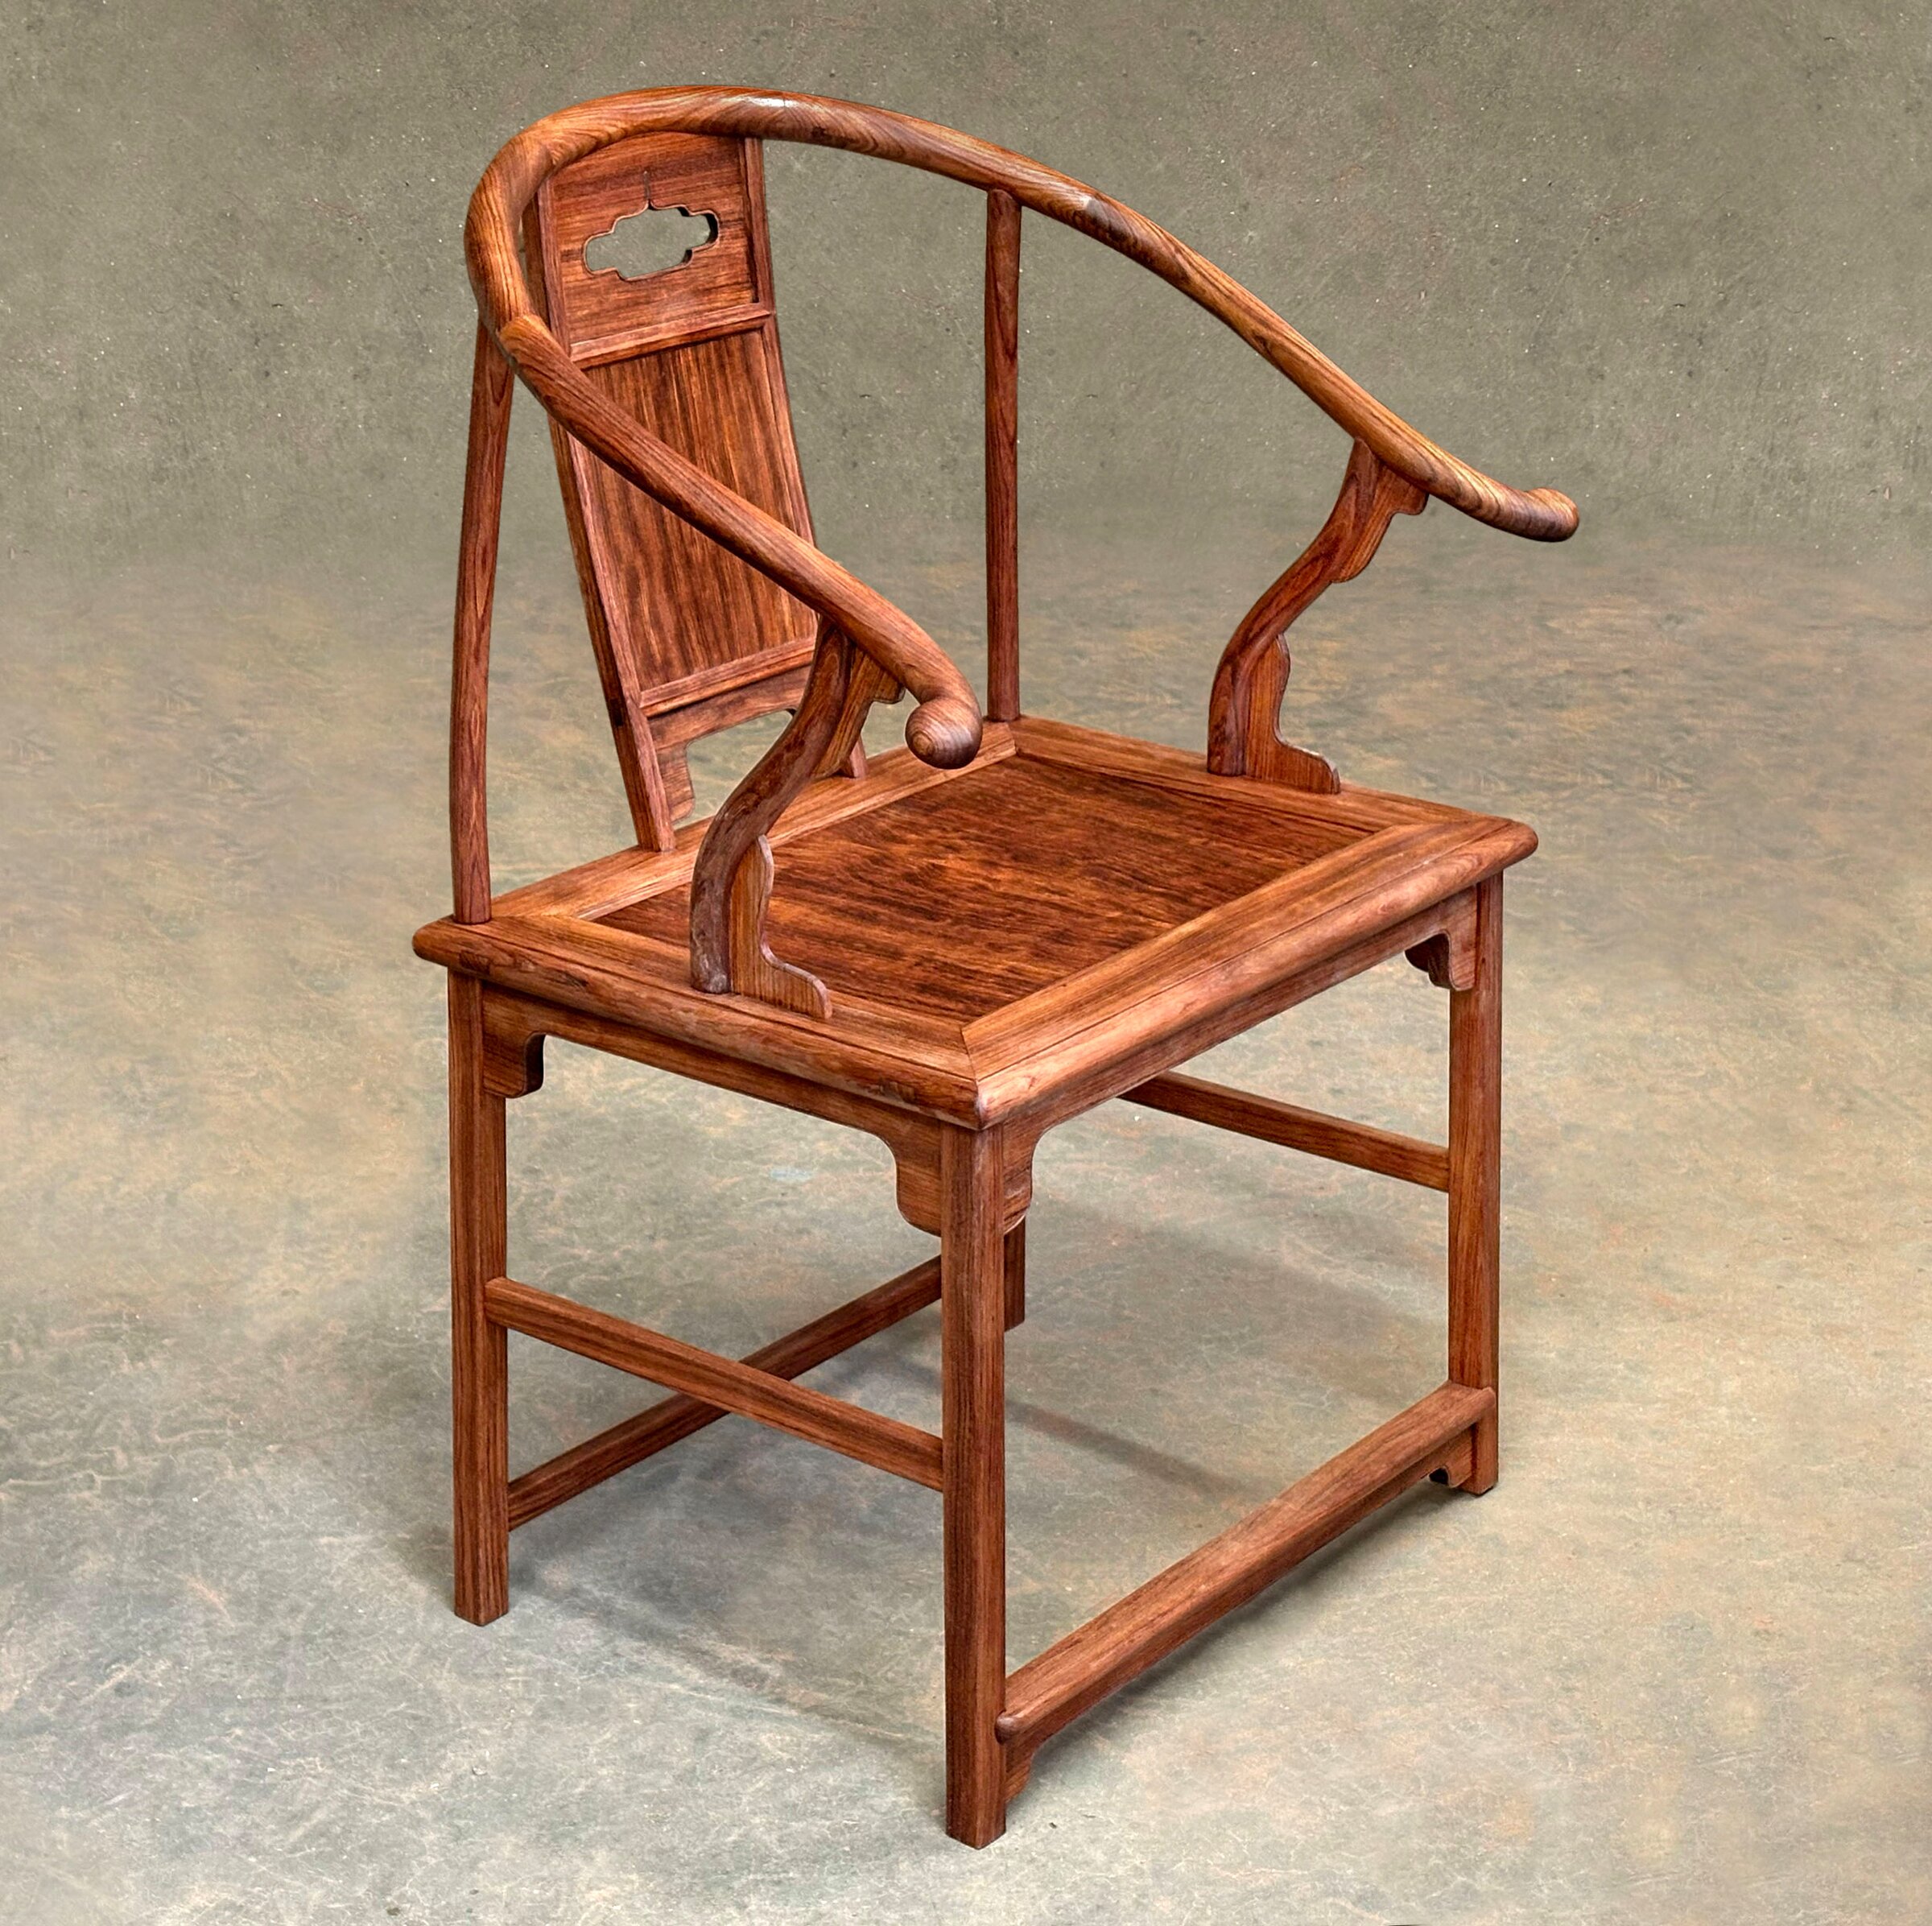
“The sky is round, the earth is square” is an early Chinese saying about the world and our place within it.
The idea shows up in Chinese ethics and design. A good person was said to be round on the outside and square within: easy with others, firm in principle.
Coins were cast round, with square holes.
In Beijing, the Temple of Heaven’s circular forms contrast with the square Altar of Earth.
The horseshoe armchair fits the saying. Above the seat, its curves stand for the sky;
below, its square base stands for the earth.
You, the sitter, occupy the space between.
We’d joke that this chair couldn’t be that hard to build.
What was it, after all, but a few sticks?
A year and 152 mortise-and-tenon joints later, the joke was on us.
The originals
My friend Charlie Palmer and I built two chairs each from scratch. The chairs are copies from a set of four that belonged to Robert Hatfield Ellsworth, a famous New York collector and dealer. His originals were made in the 17th century in China—late in the Ming Dynasty. After Ellsworth’s death, Christie’s sold the set for $9,685,000.
The chairs’ form connects them to a long Chinese tradition. For centuries before these were made, craftspeople had been making horseshoe armchairs, passing their techniques from teacher to student and shaping designs to their patrons’ tastes.
No one left notes on these chairs; to copy them, we had to reverse engineer every curve, every joint. Little about them surprised us, but a great deal had to be worked out: the arm, posts, and splat meet at angles the photographs only hint at.
Making a faithful copy of something is the best way I know to learn from it. Find the best example of what you want to do or make, and reproduce it. You’ll work through many of the same questions and encounter many of the same difficulties its makers faced. Through that labor, you learn what matters to you and earn its conclusions for yourself.
Plans and a prototype
We made our own plans using Christie’s auction photos, Ellsworth’s description of the chair in his 1971 book Chinese Furniture, and examples of similar chairs in books by Gustav Ecke and Wang Shixiang. Charlie straightened and scaled the auction photos in Photoshop, then traced them to produce front and side elevations.

See it in your room
On an iPhone or iPad, tap the chair to stand it in your room at full size.Scan with an iPhone or iPad to stand it in your room at full size.

See the corner on your table
Tap the corner to stand it on your table at full size, then tap it to take it apart.Scan with an iPhone or iPad to stand it on your table, then tap it to take it apart.
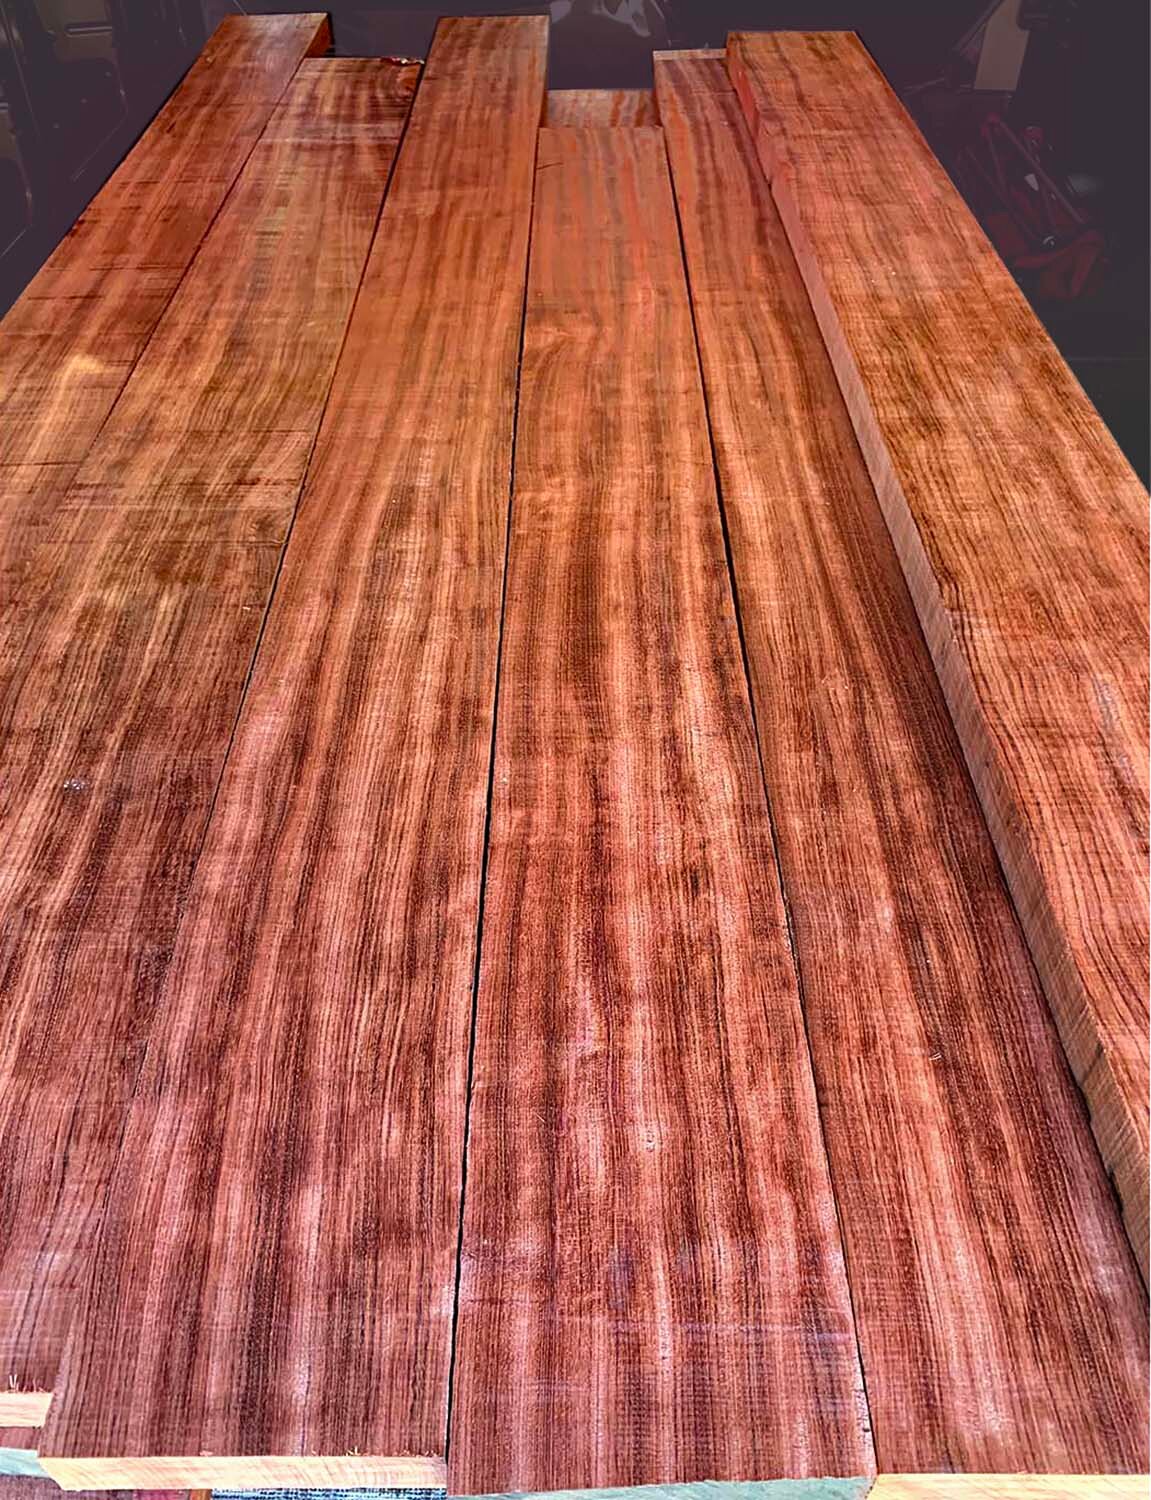
The originals were made of huanghuali, a prized rosewood now restricted for import into the US. Old stock cost far too much for us, so we used bubinga instead: Charlie had bought a “lifetime supply” a few years earlier. Our stash was quartersawn and two inches thick.


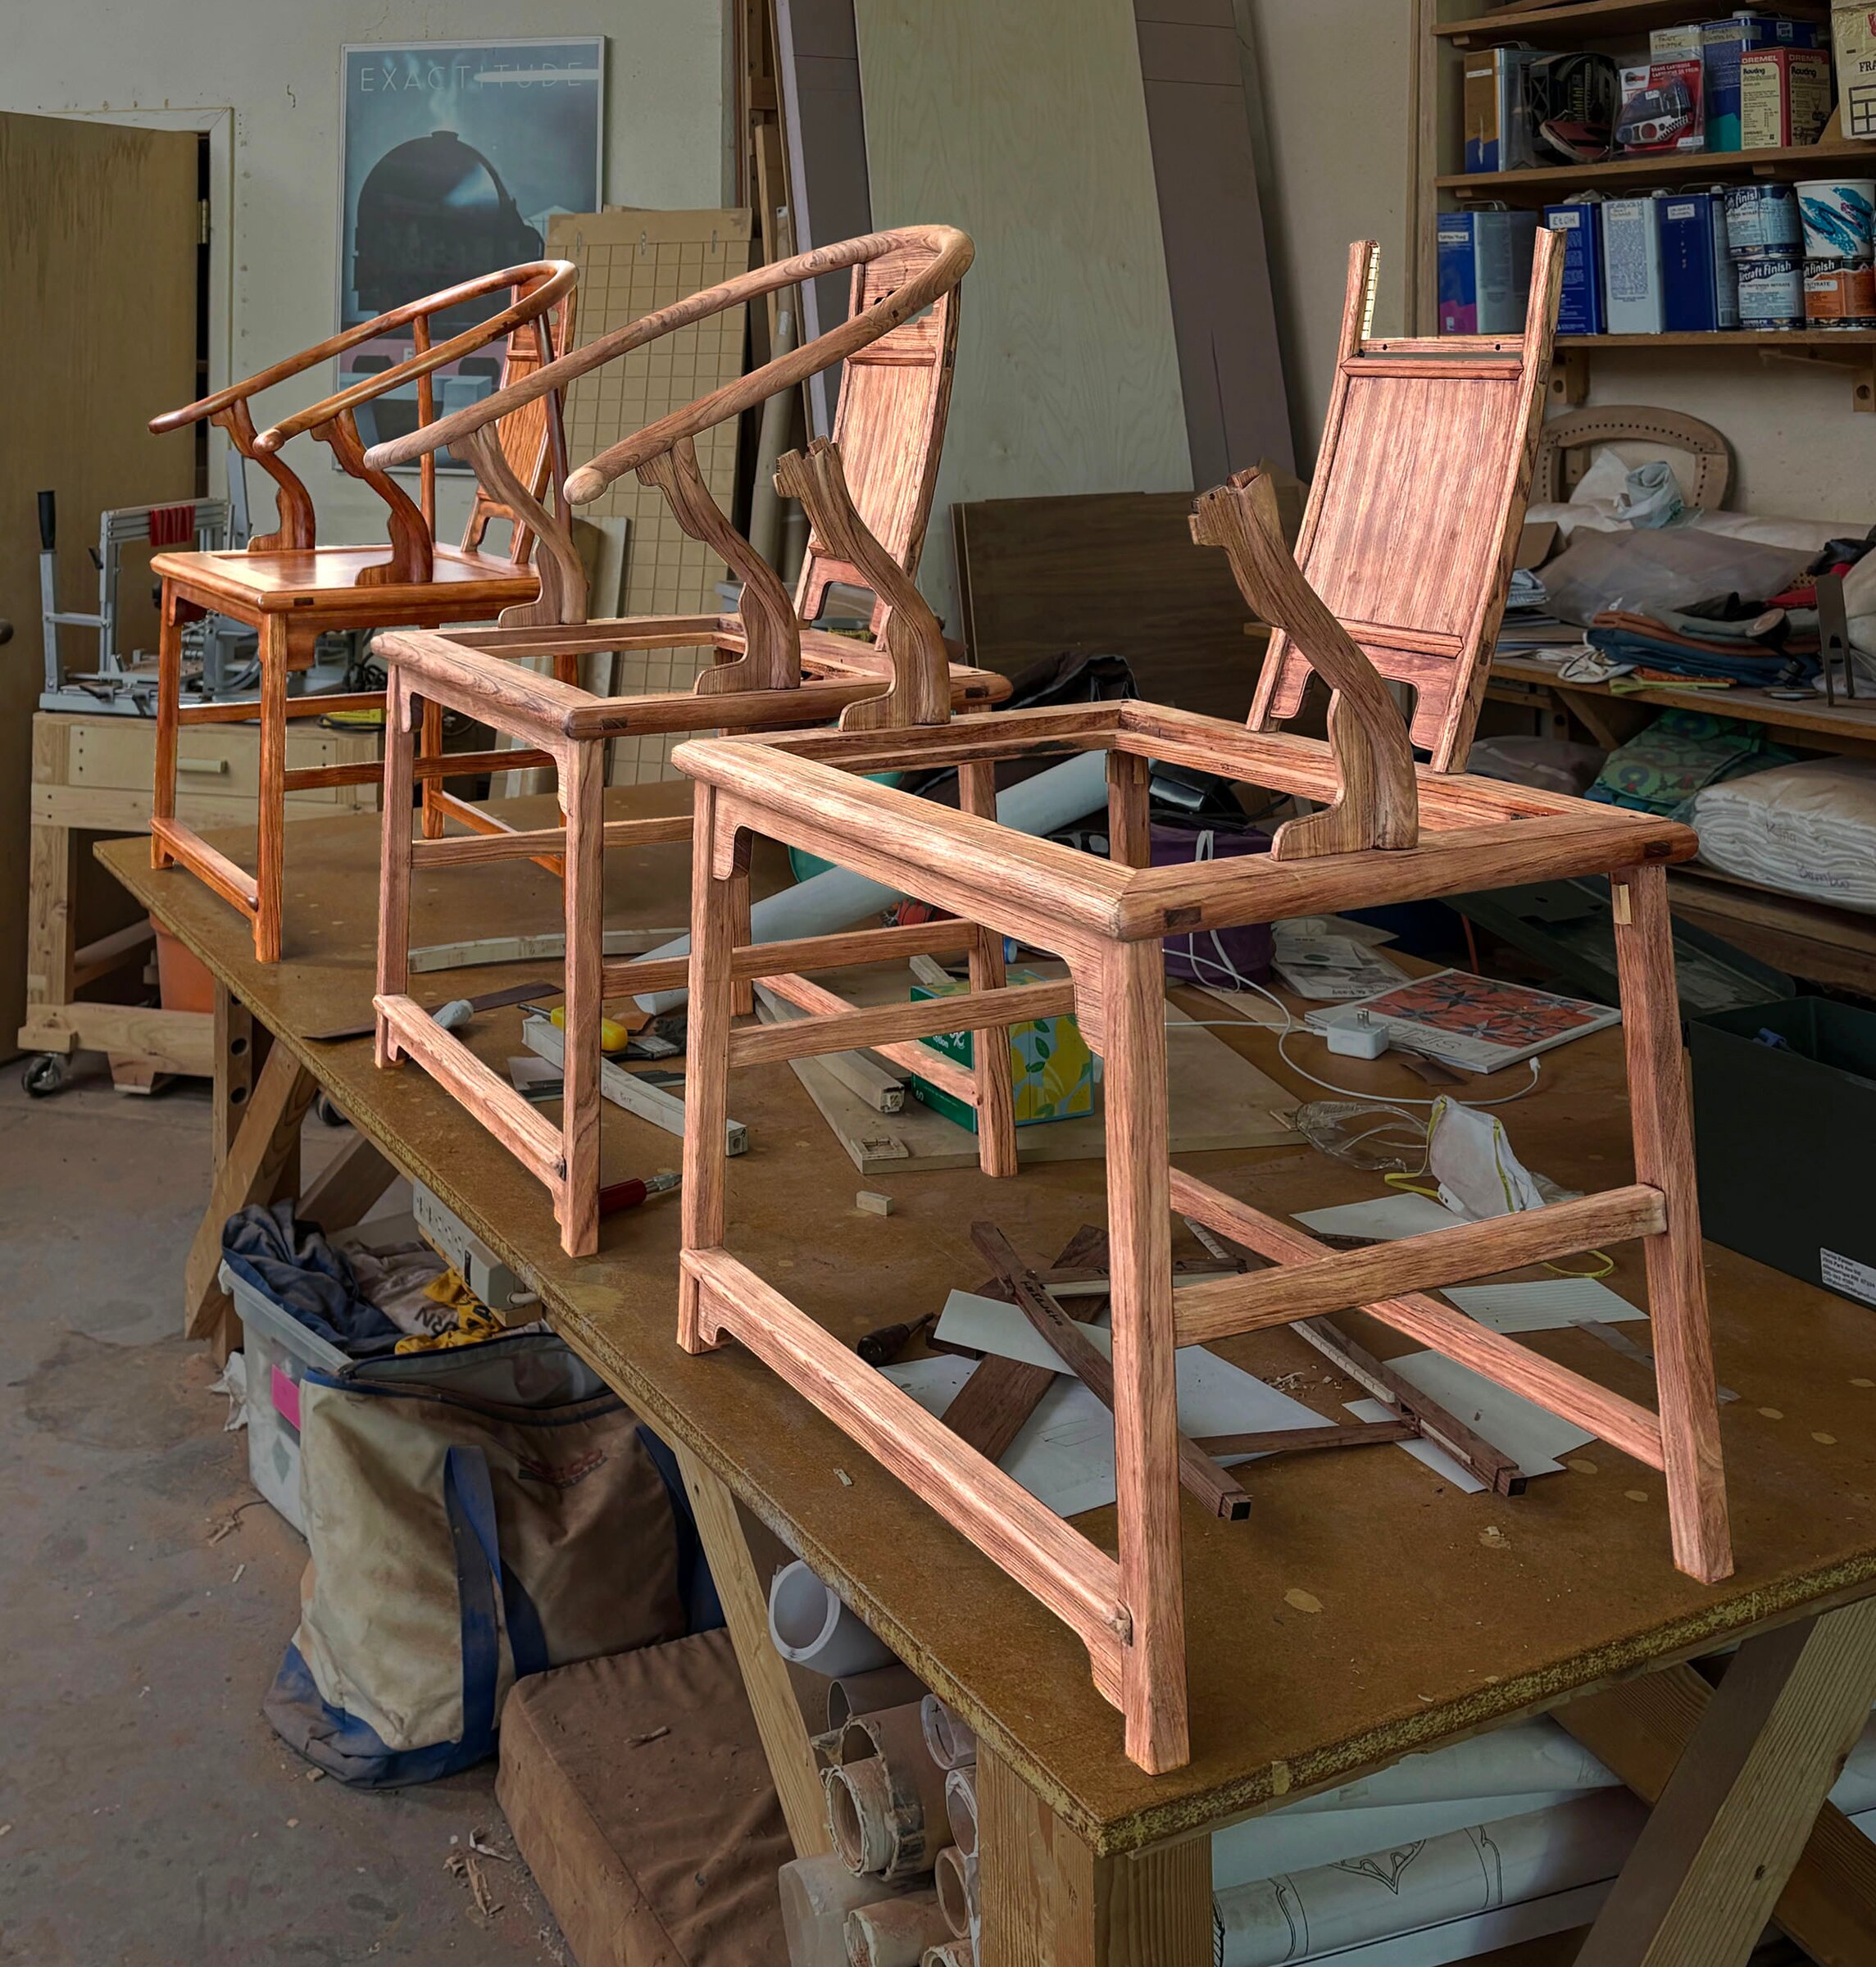
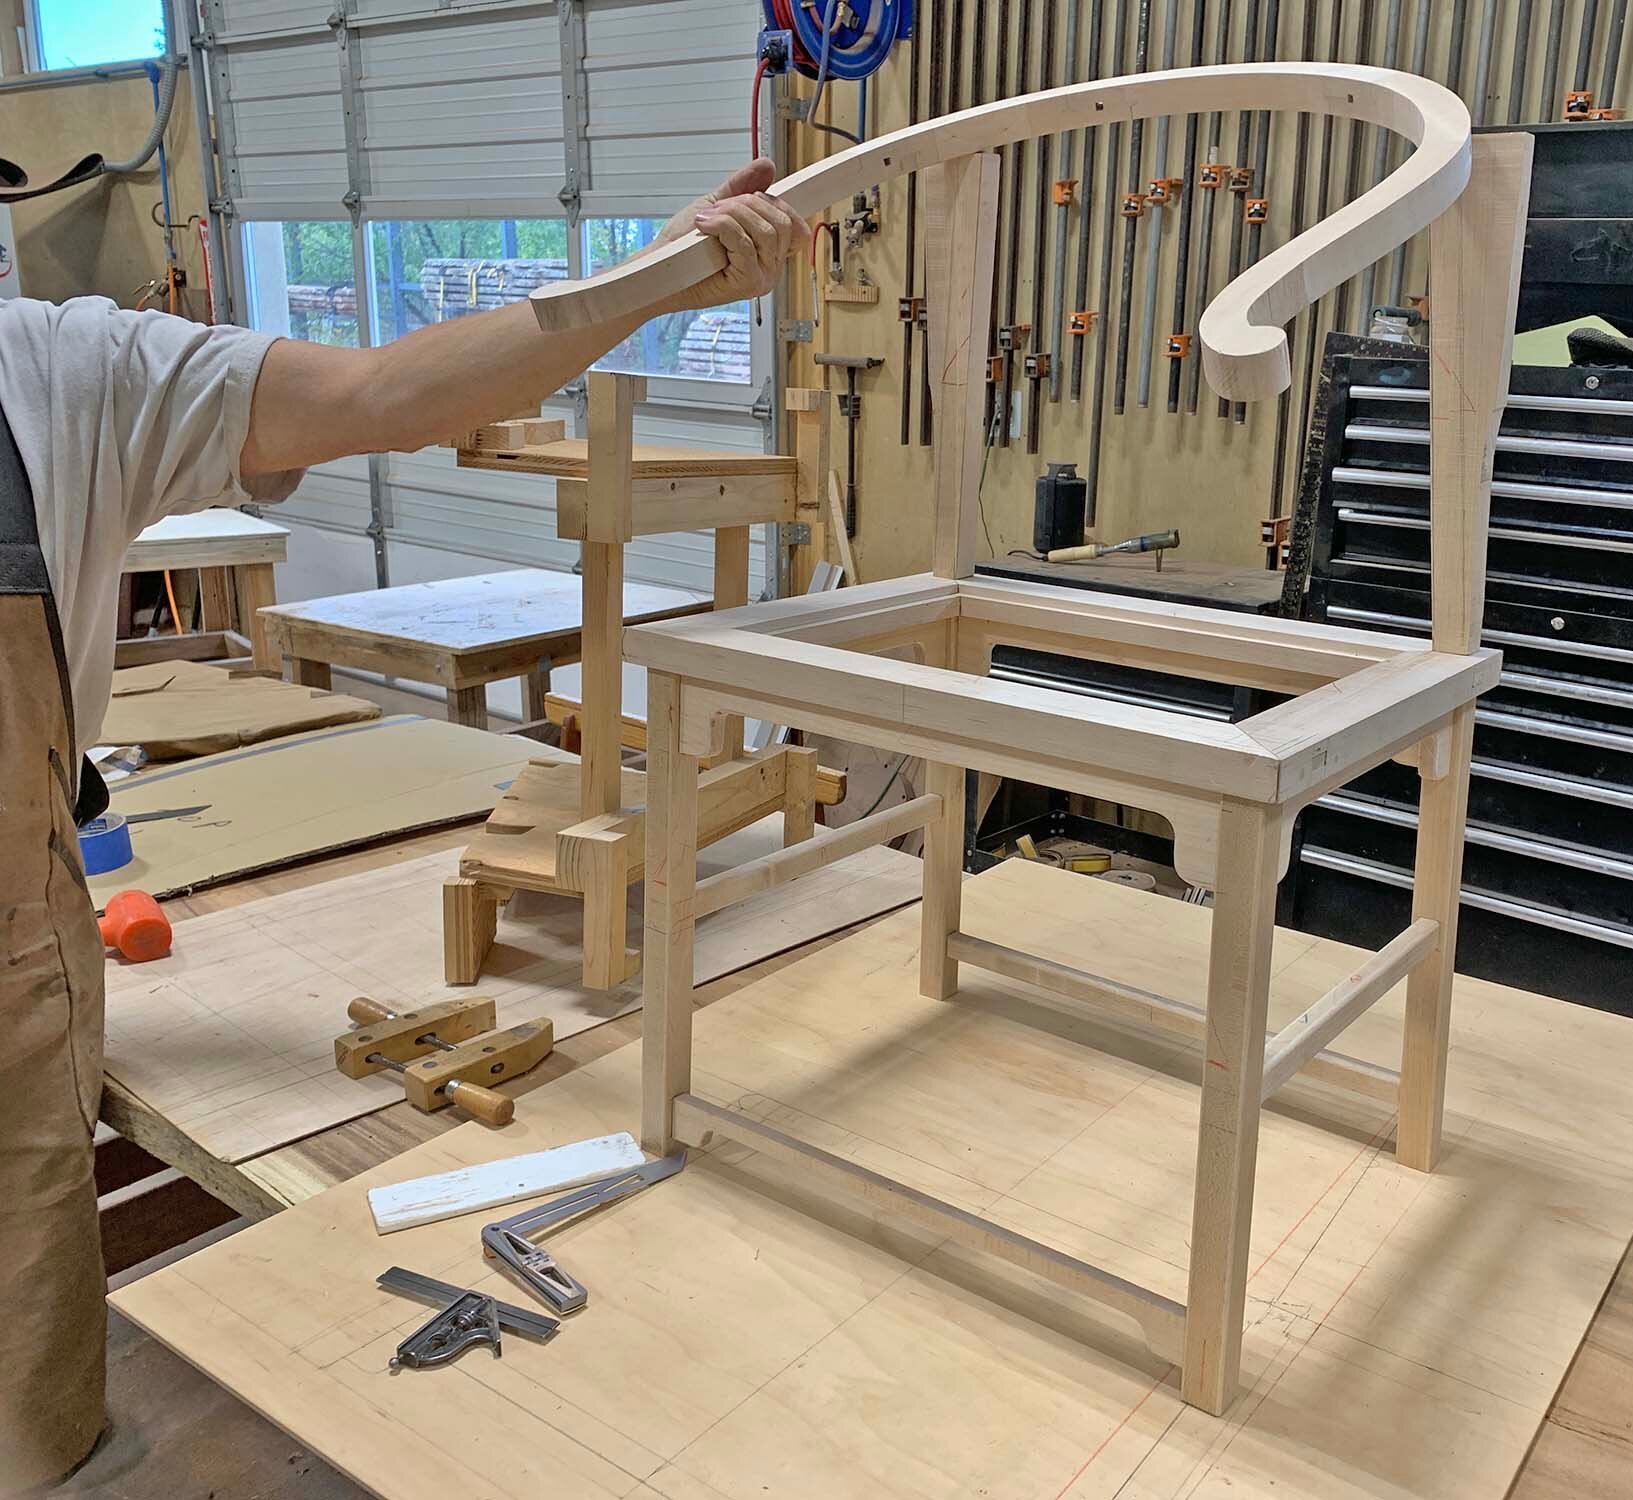
We built a basic maple prototype and worked out many of the joints in poplar before making any bubinga dust.

The arm
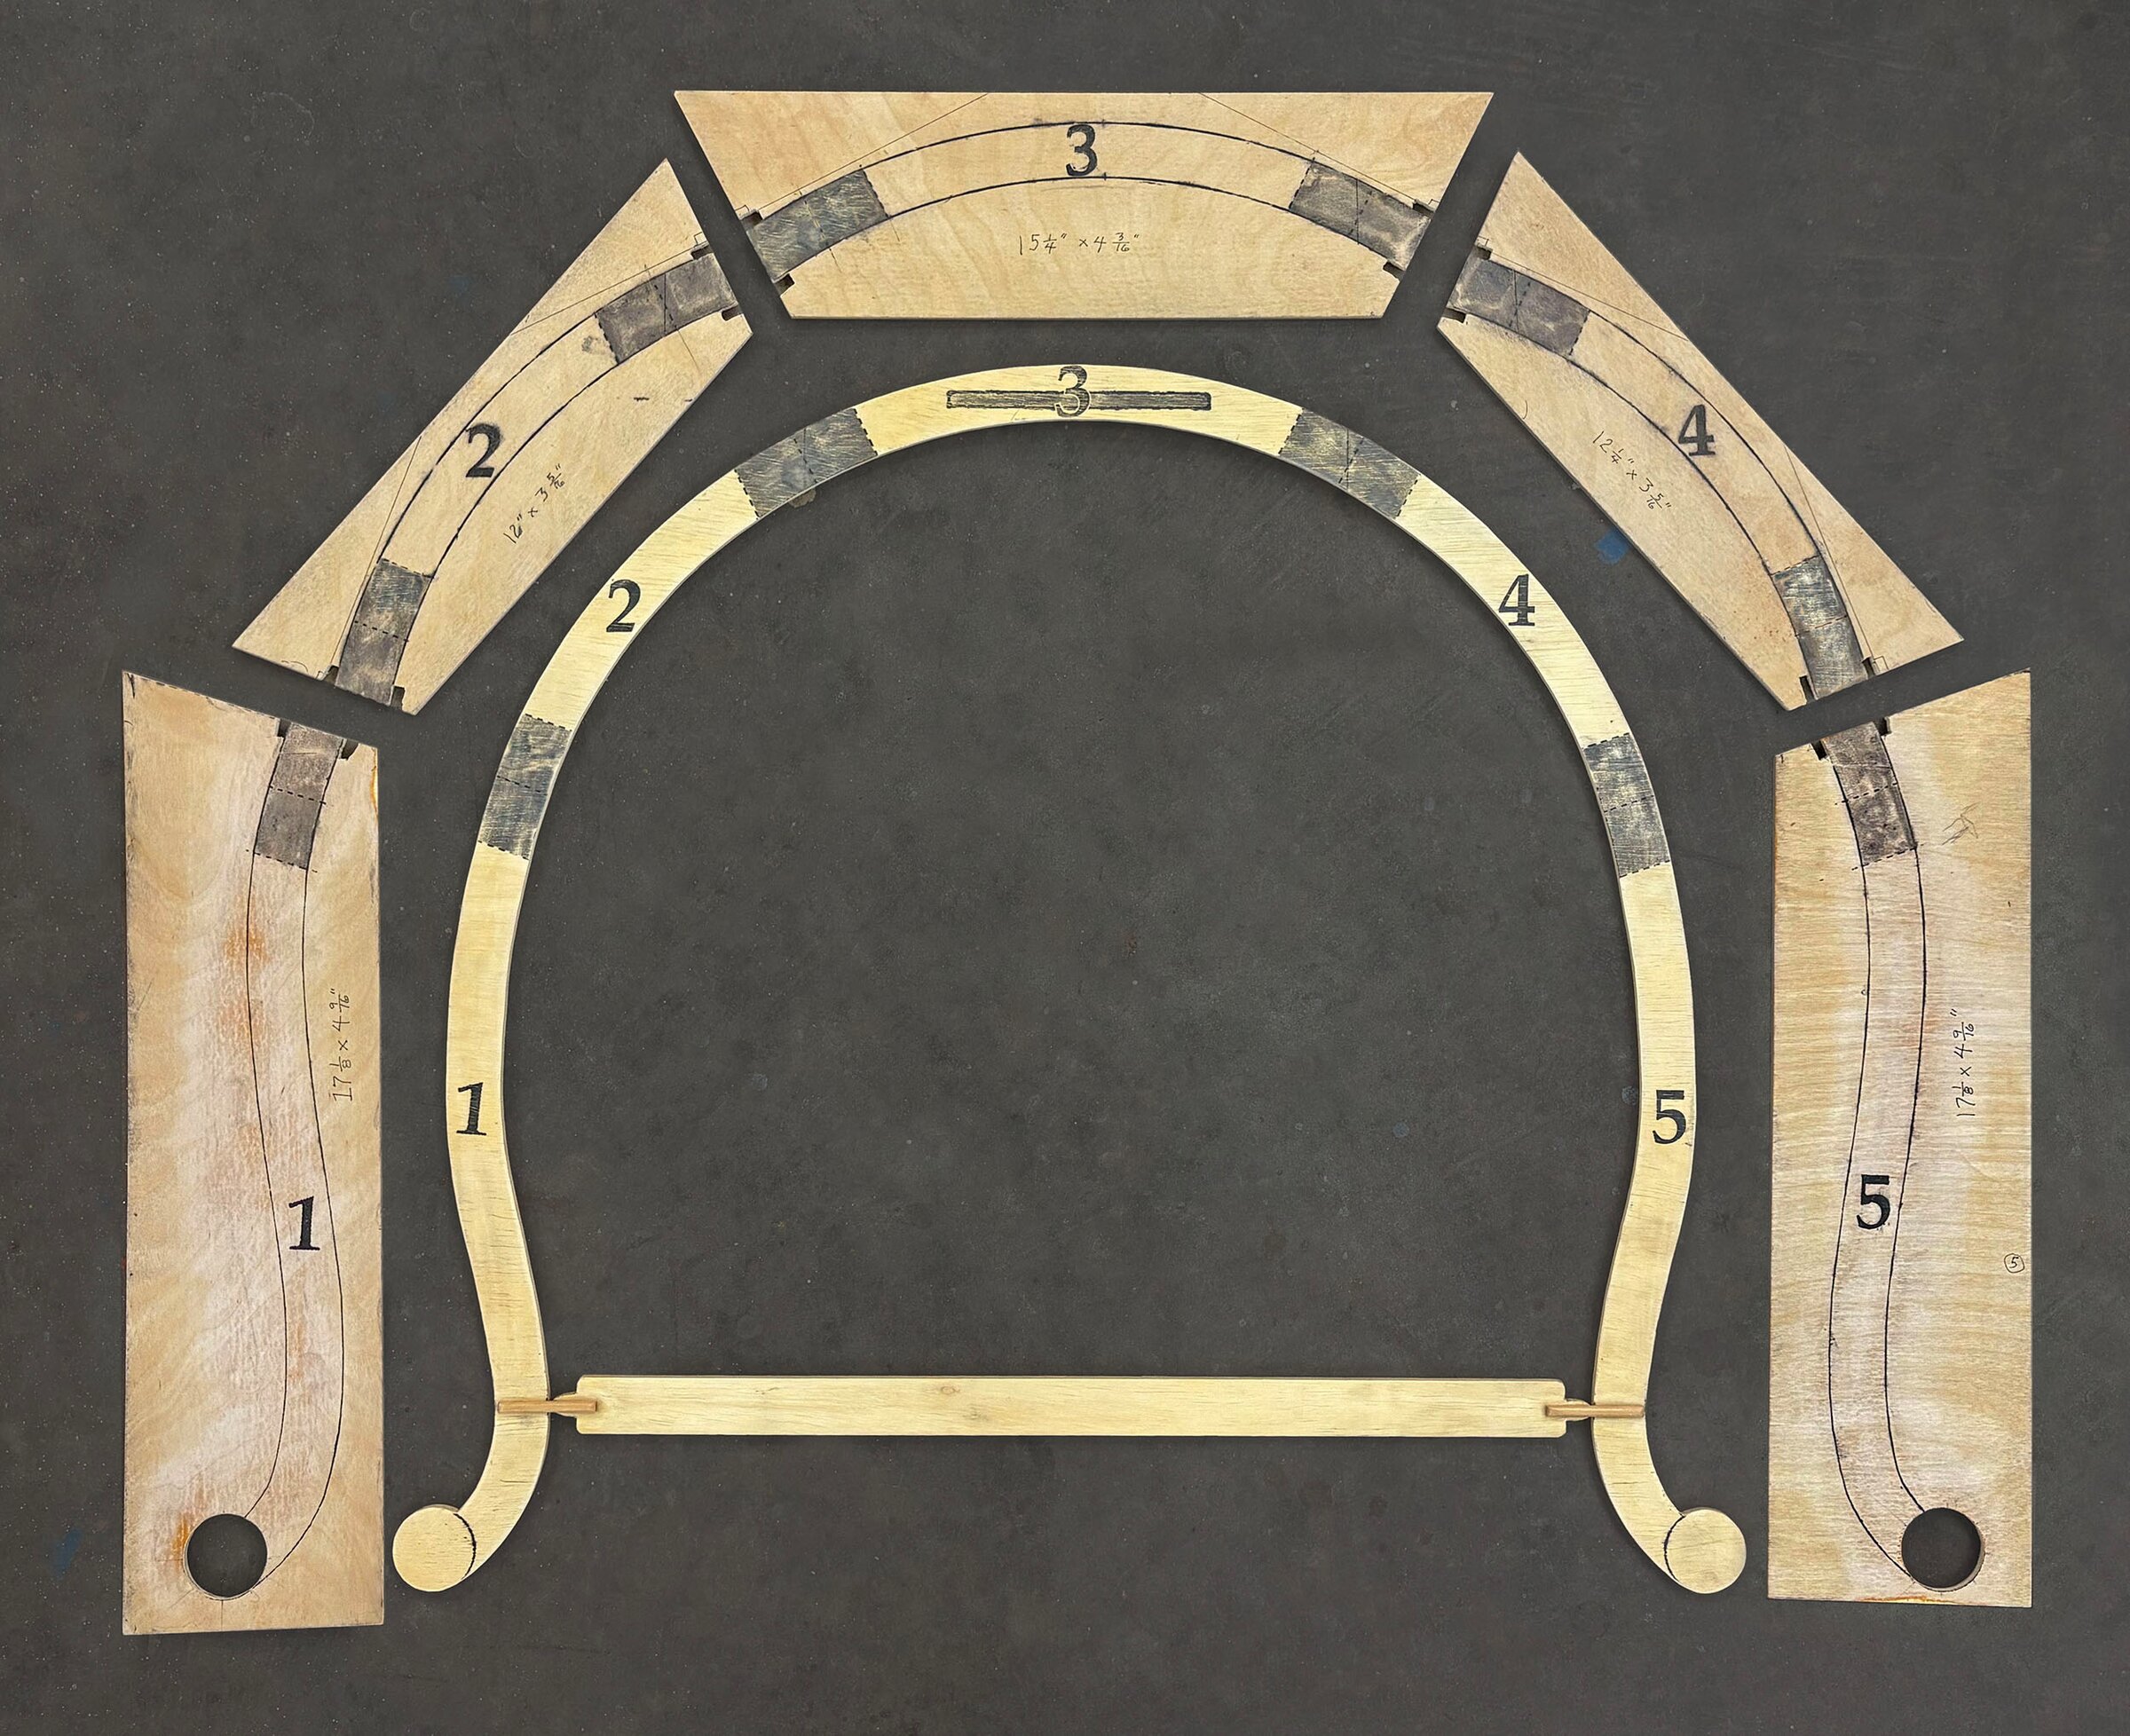
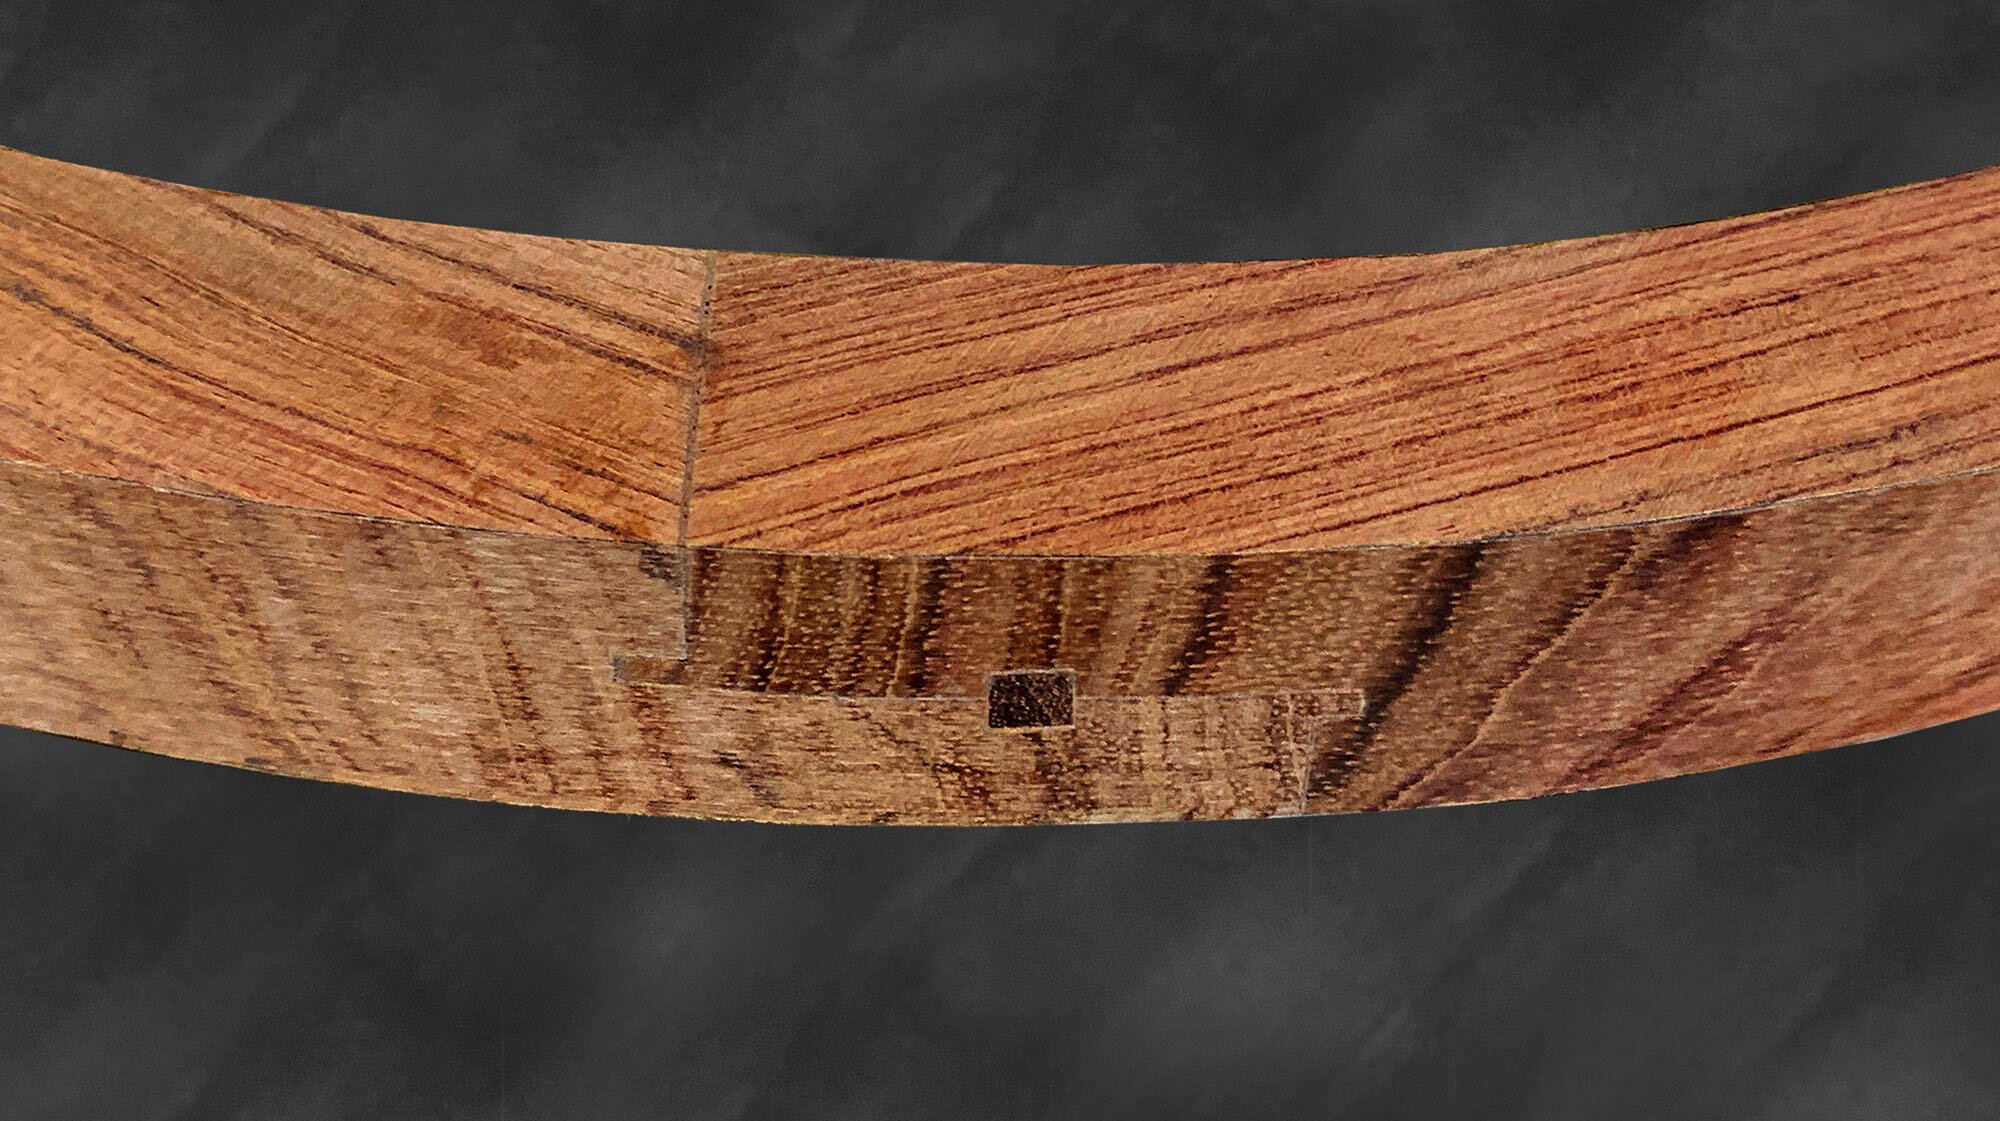
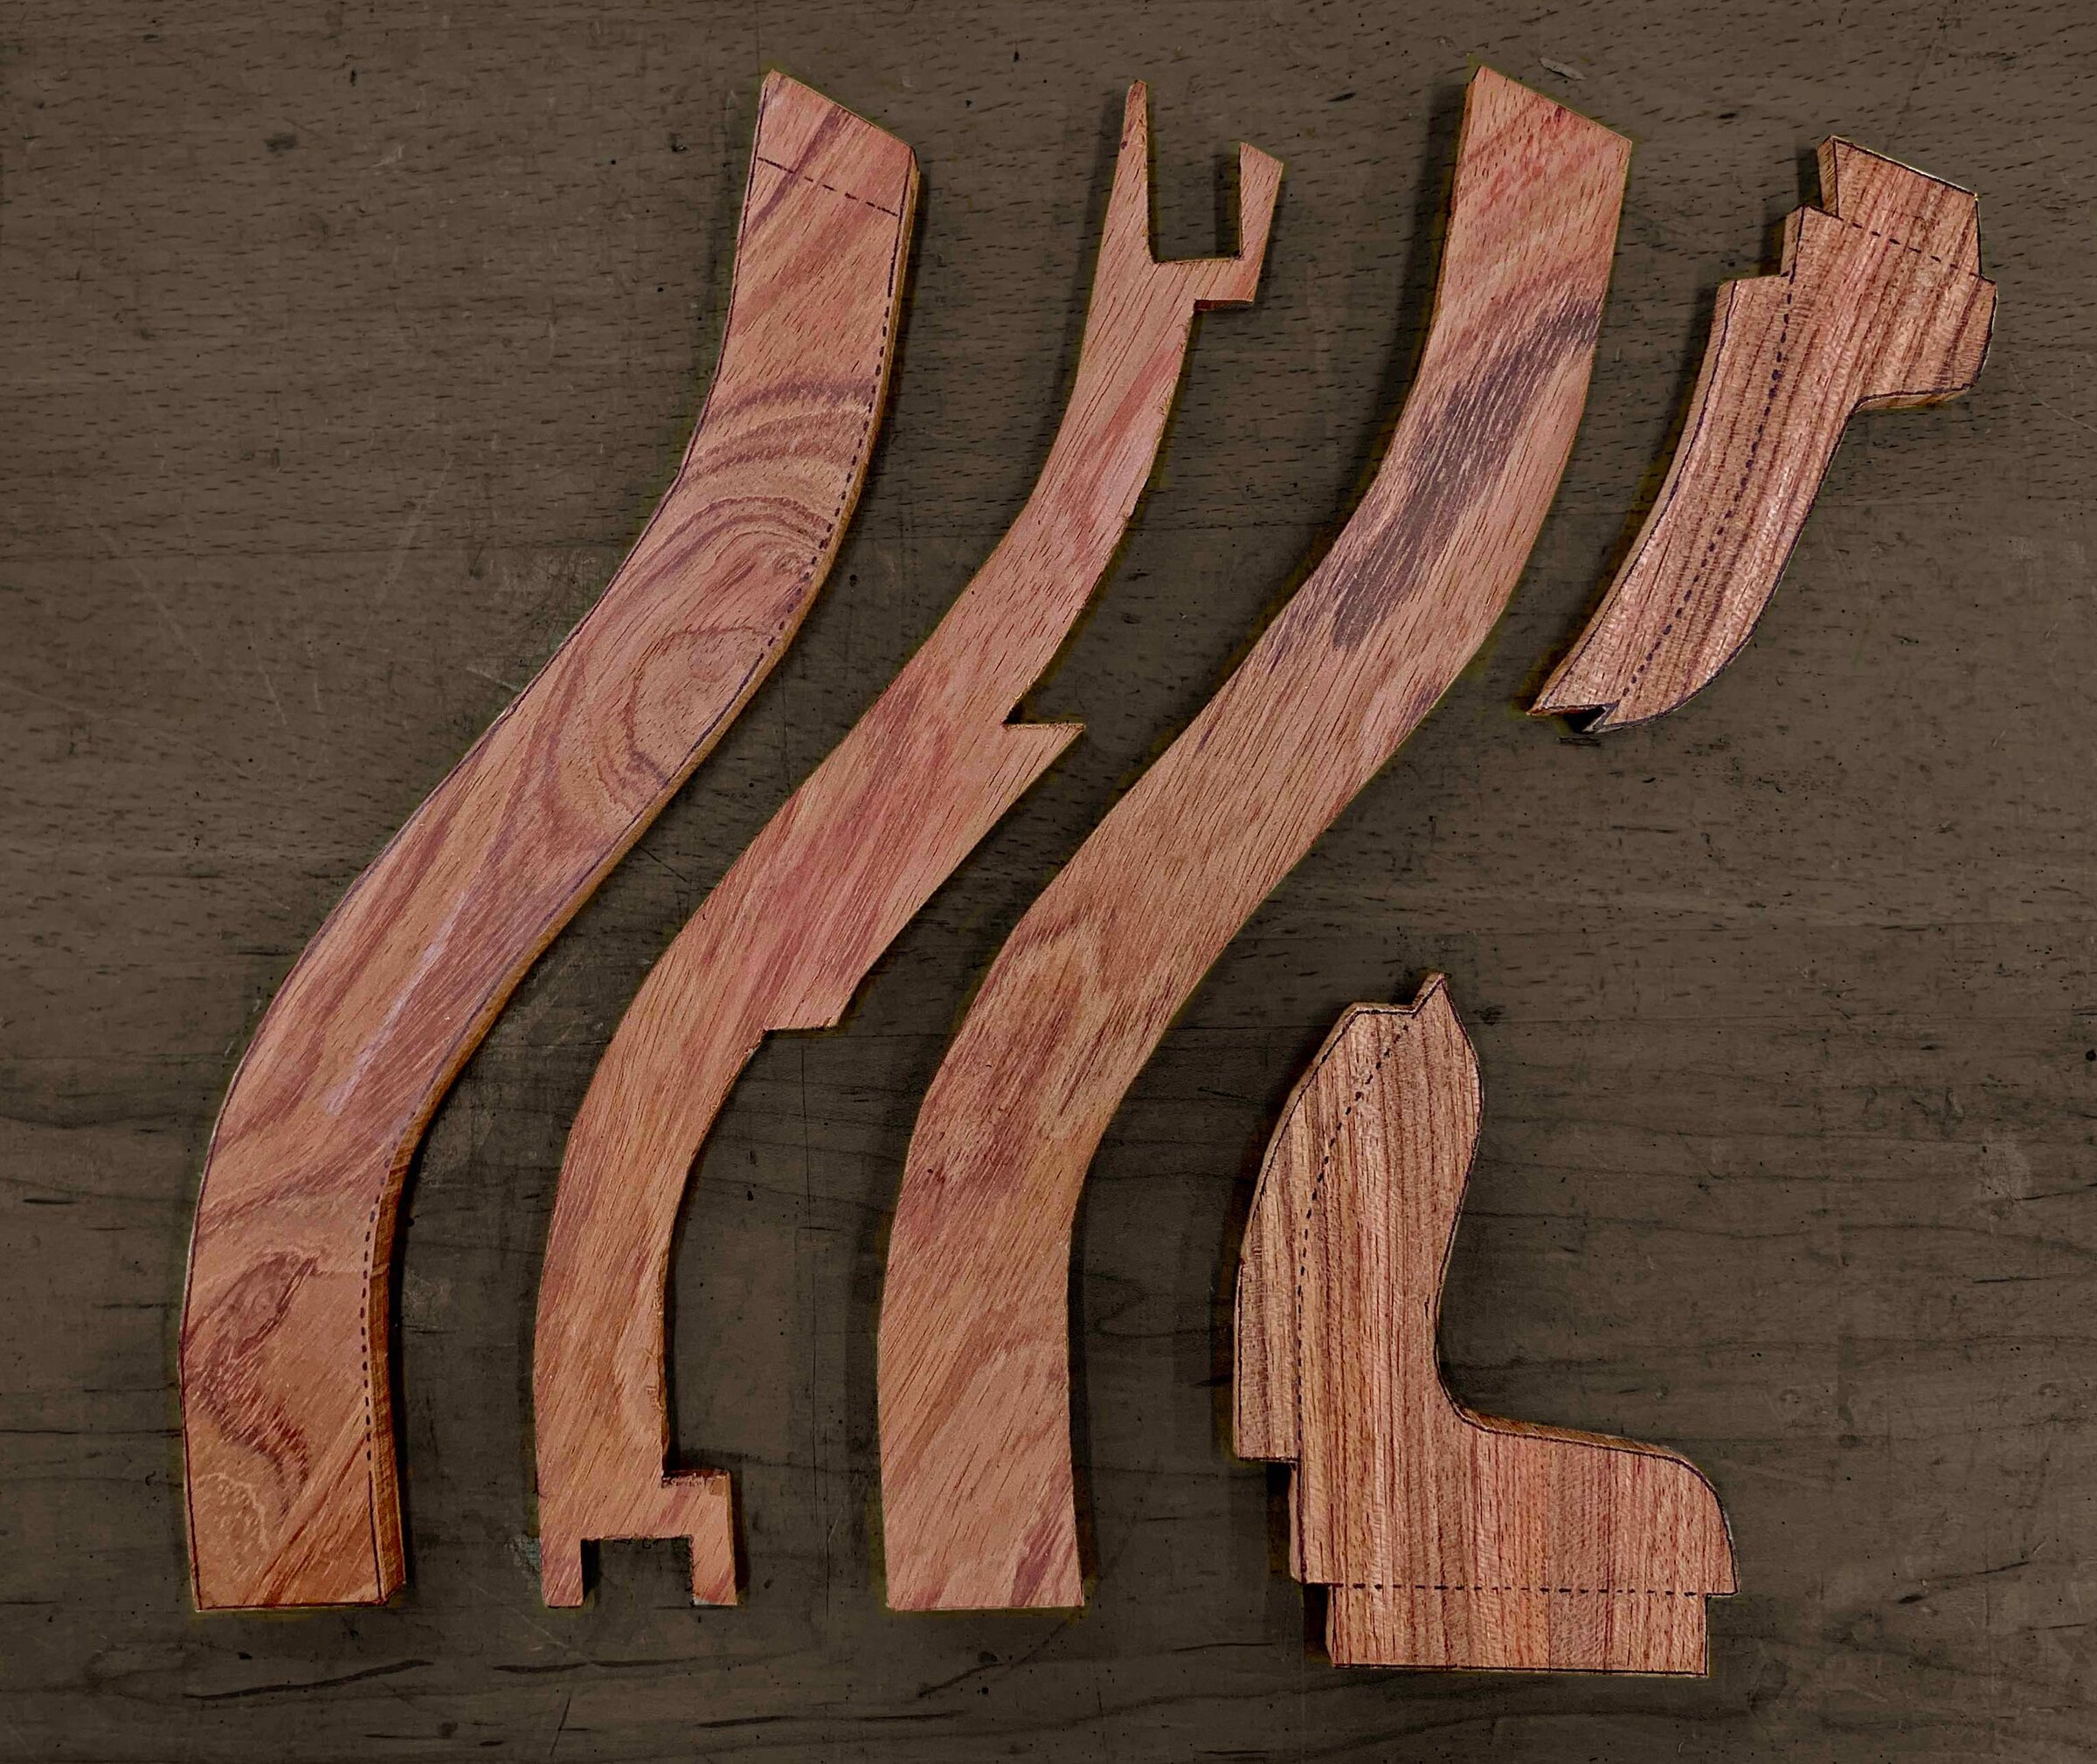
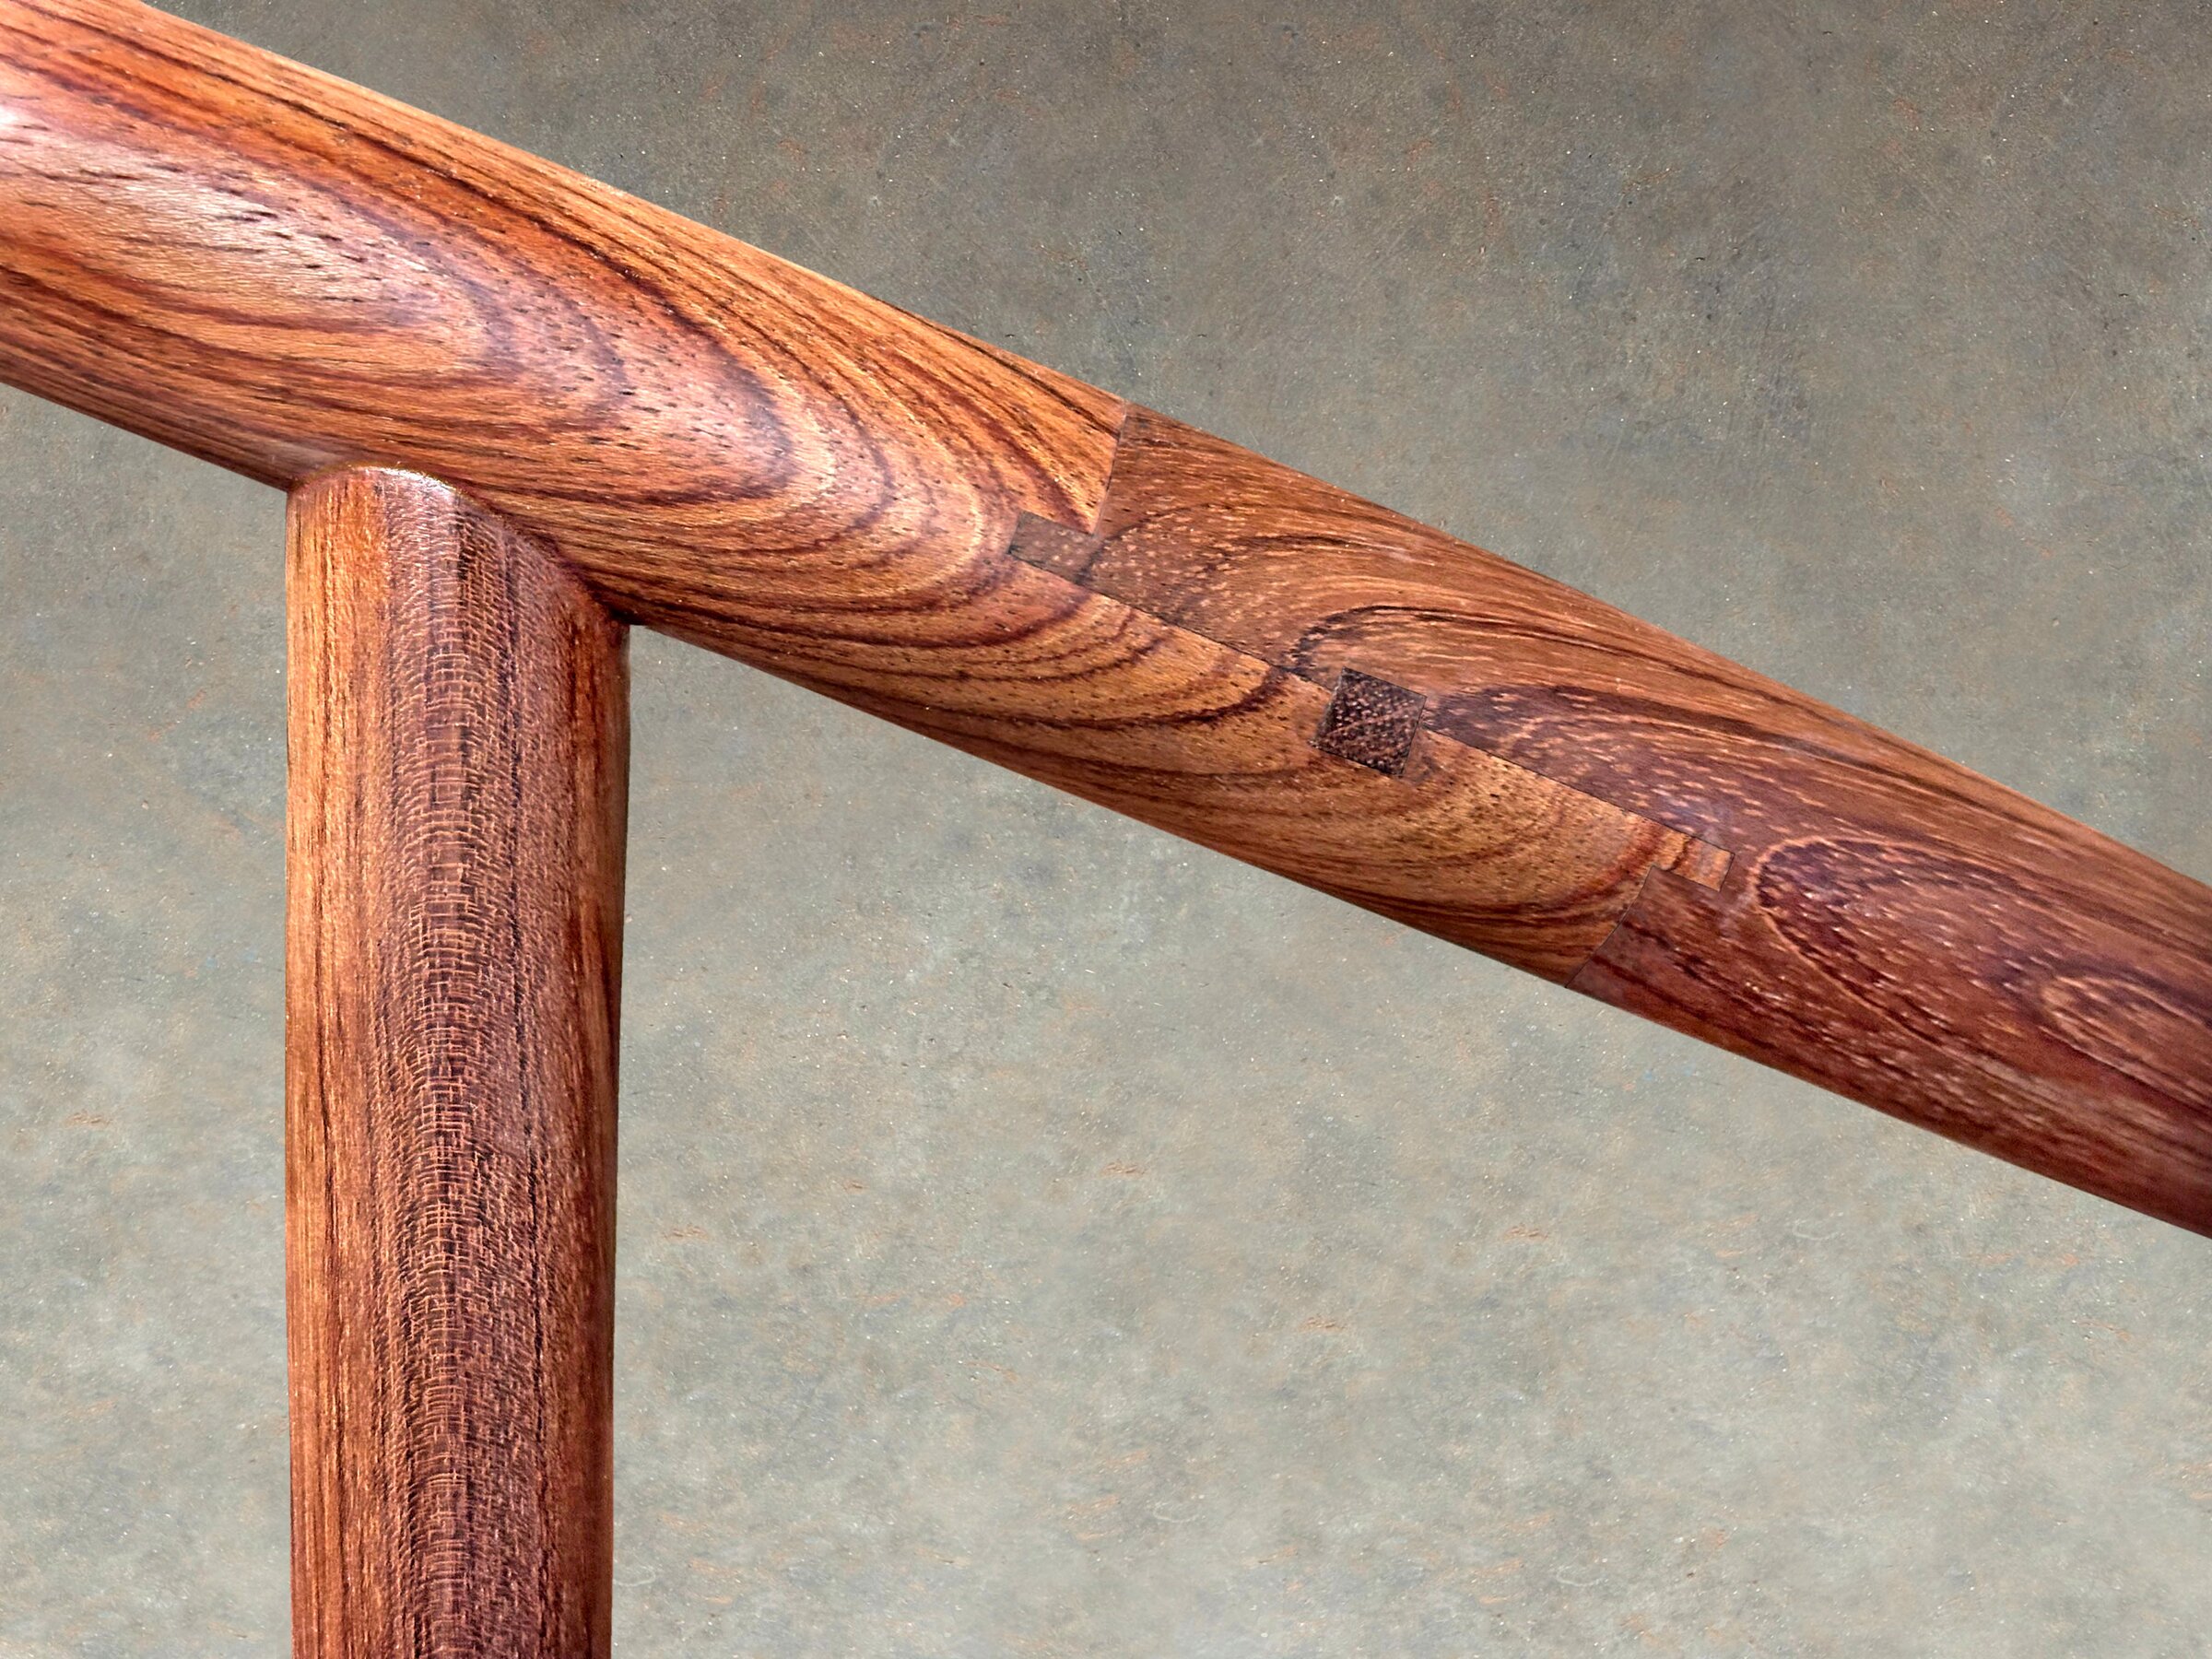
The arm forms one continuous curve from five flat boards, joined end to end by four pinned scarf joints. It lies in a single plane, tilted forward so that its ends are about ten inches lower than its back.

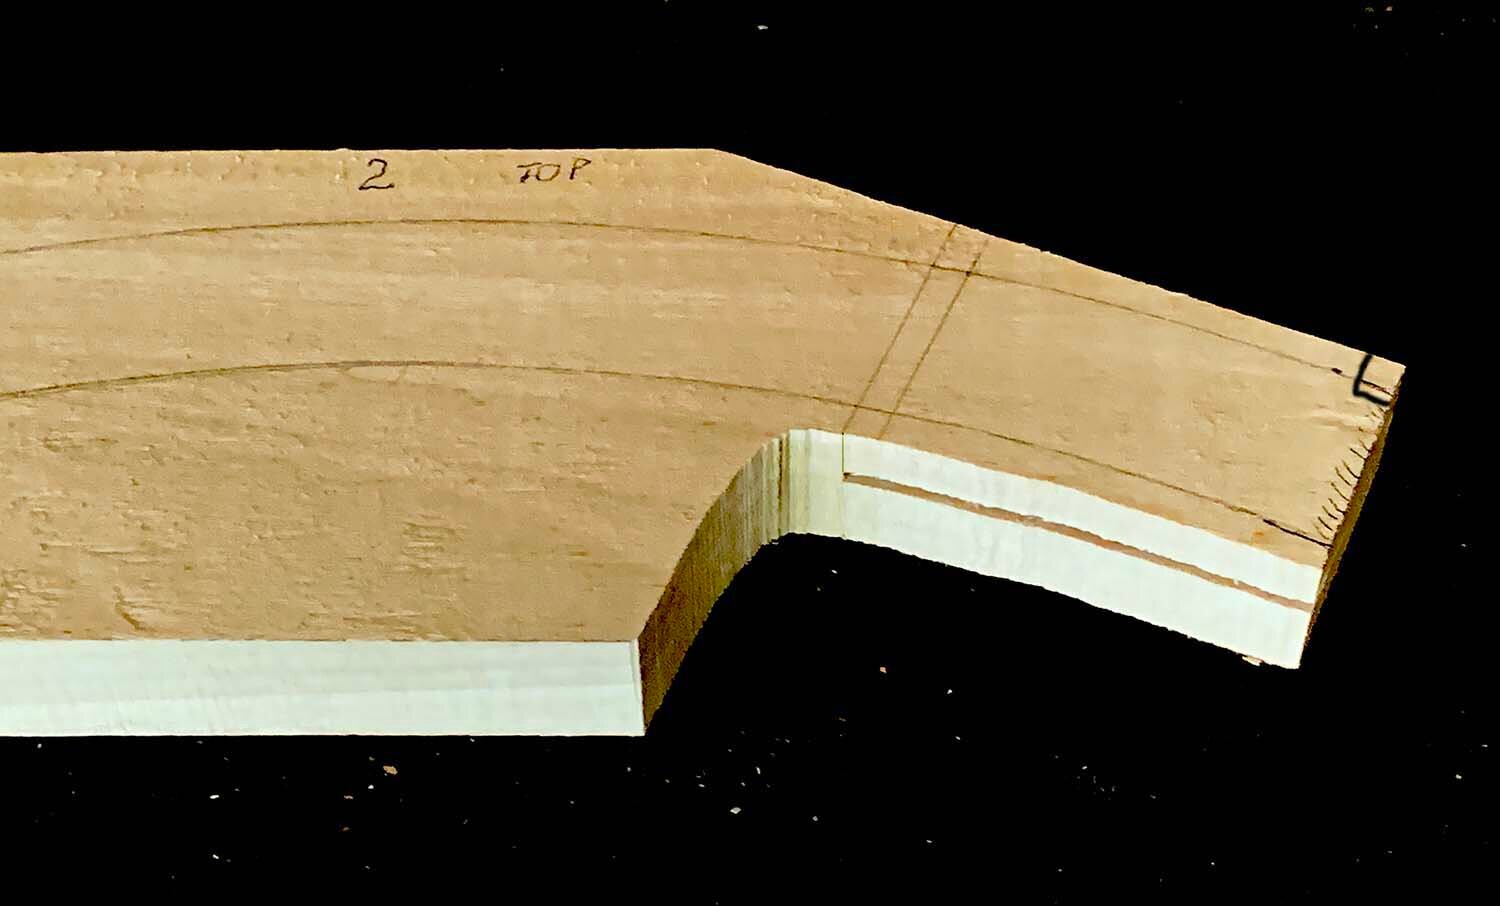
In each scarf joint, two long laps hook together. A tapered pin driven through the middle pulls them tight.
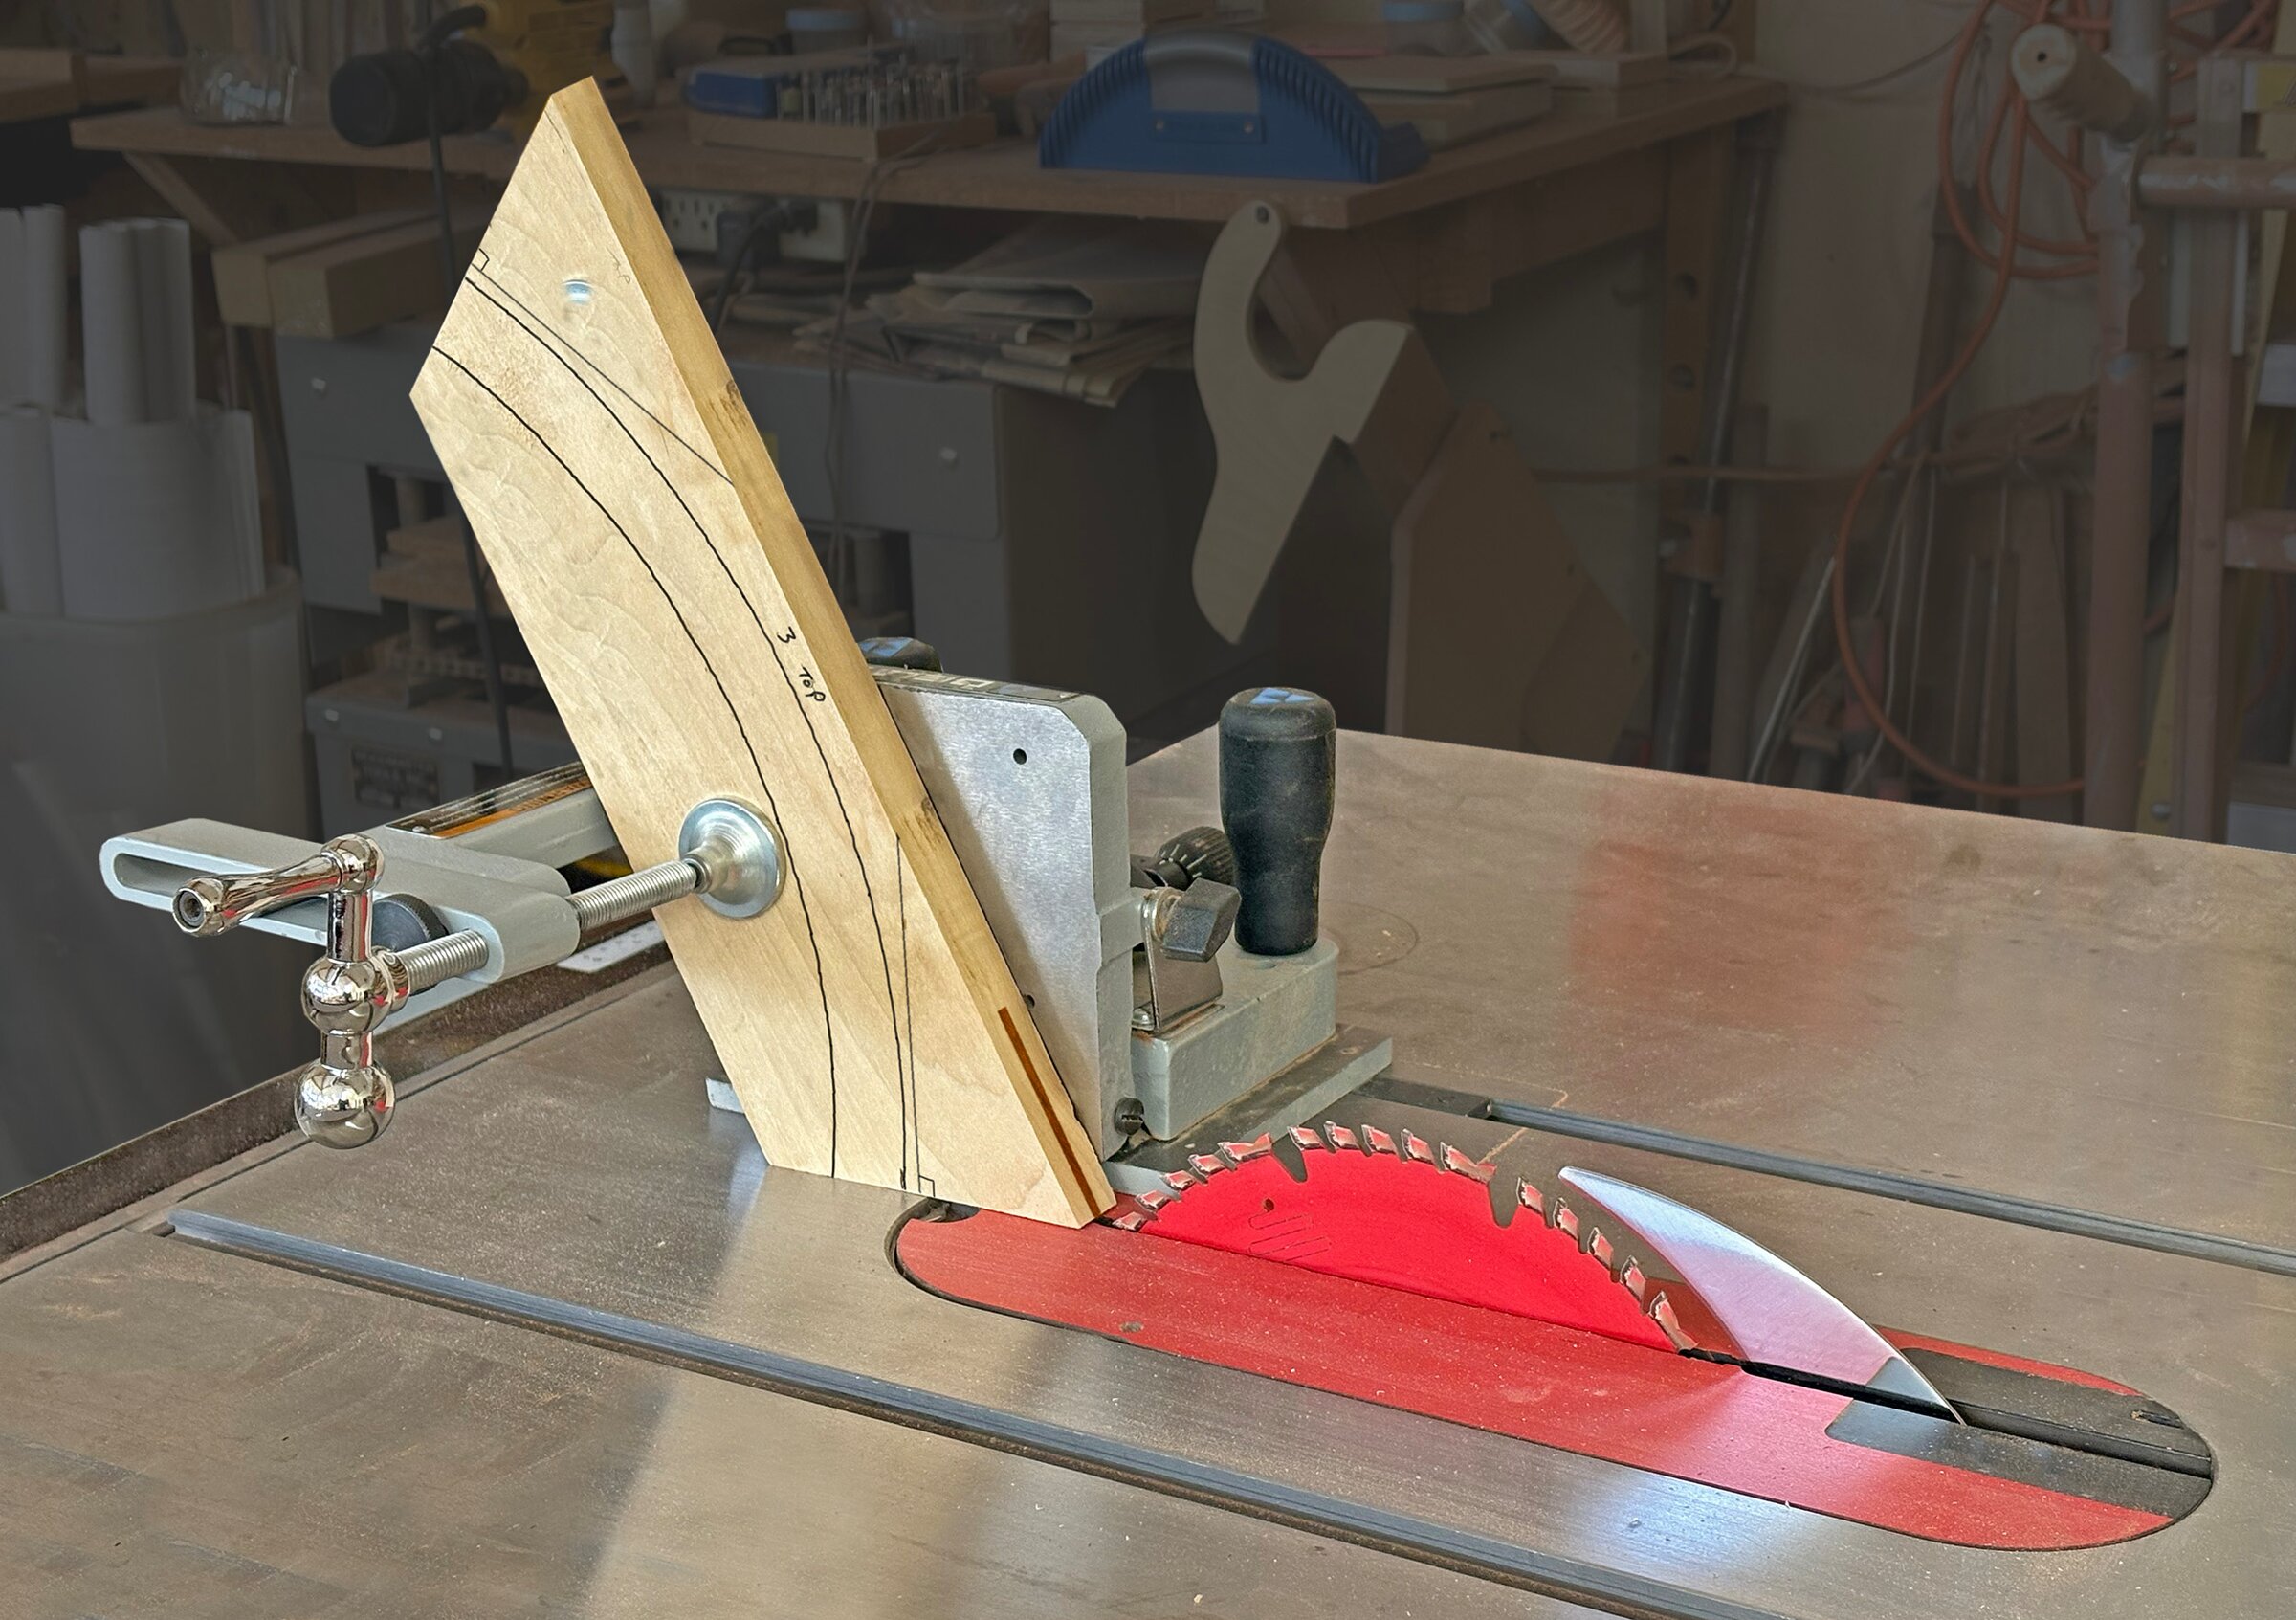
We cut the board ends so that each piece could stand square to the blade in a tenoning jig on the table saw. We tried the joints in poplar first.


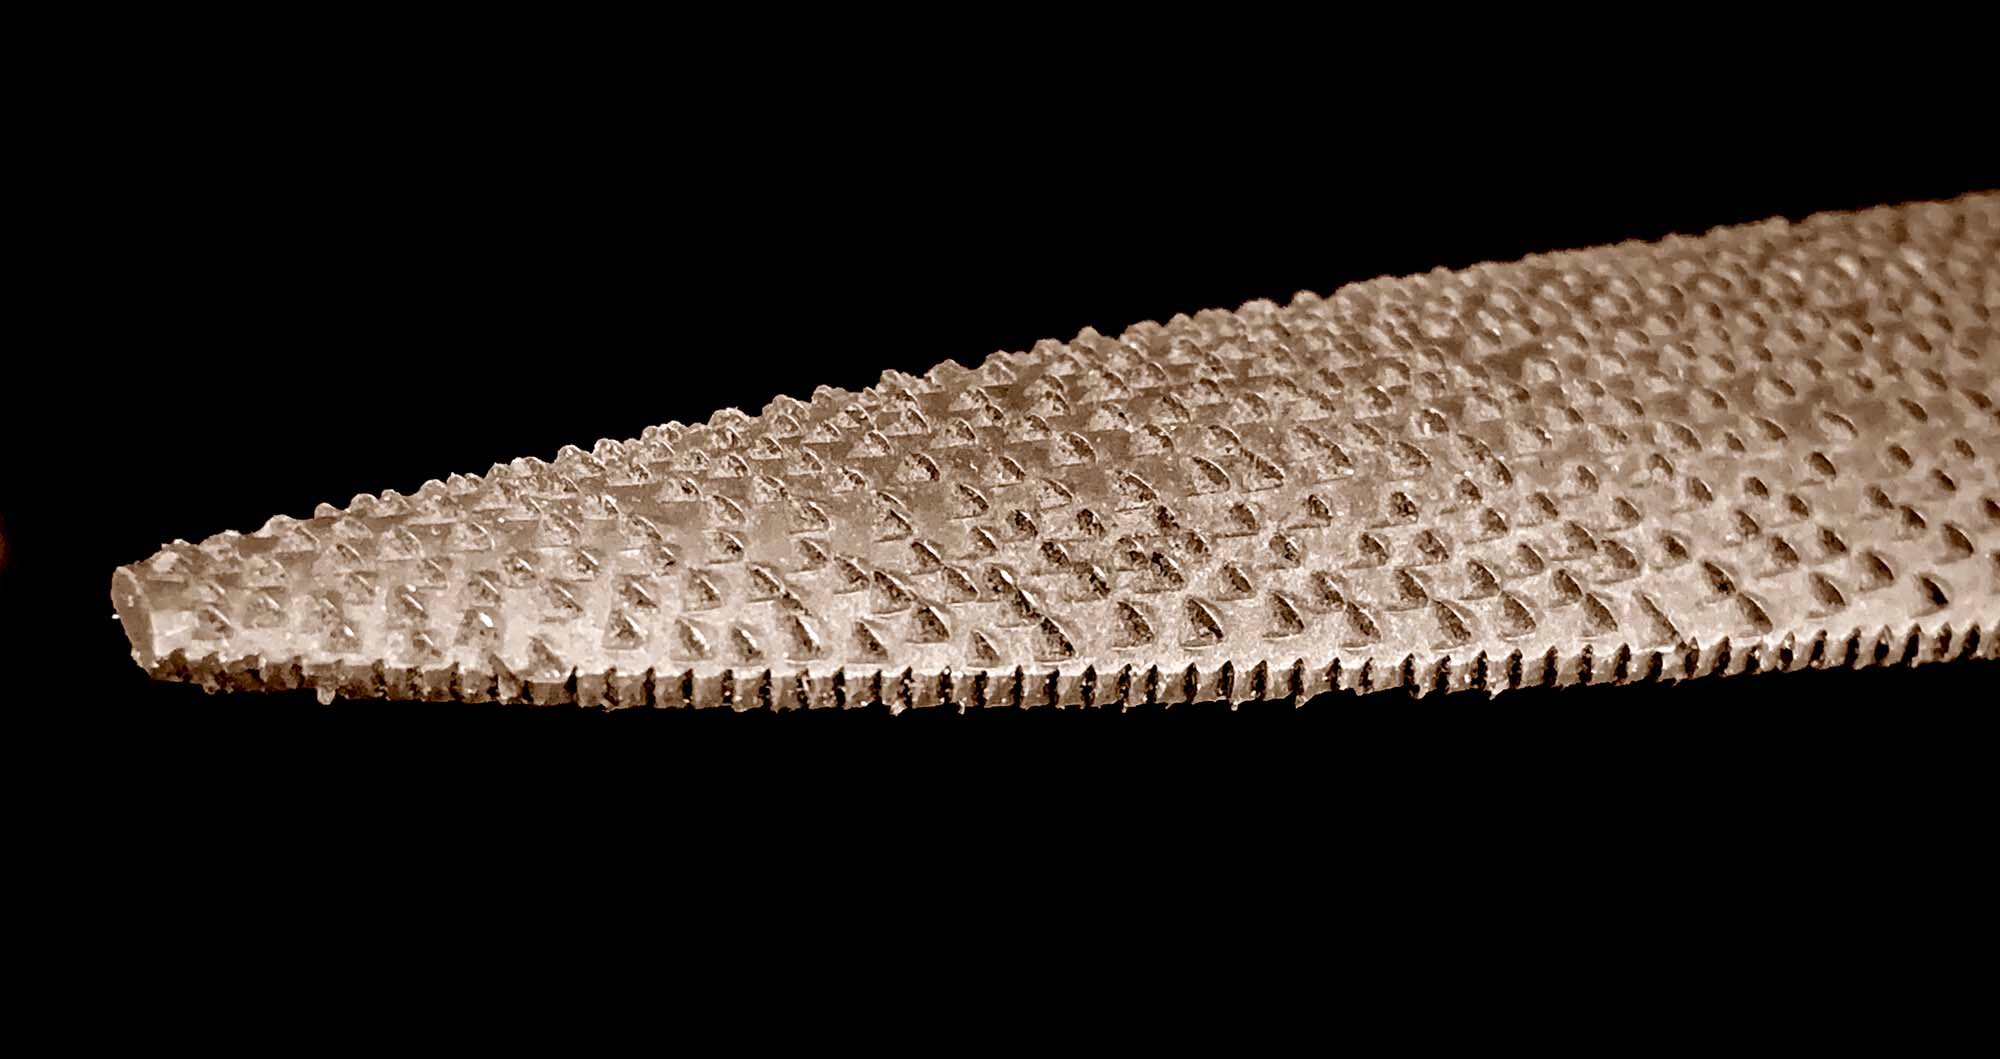
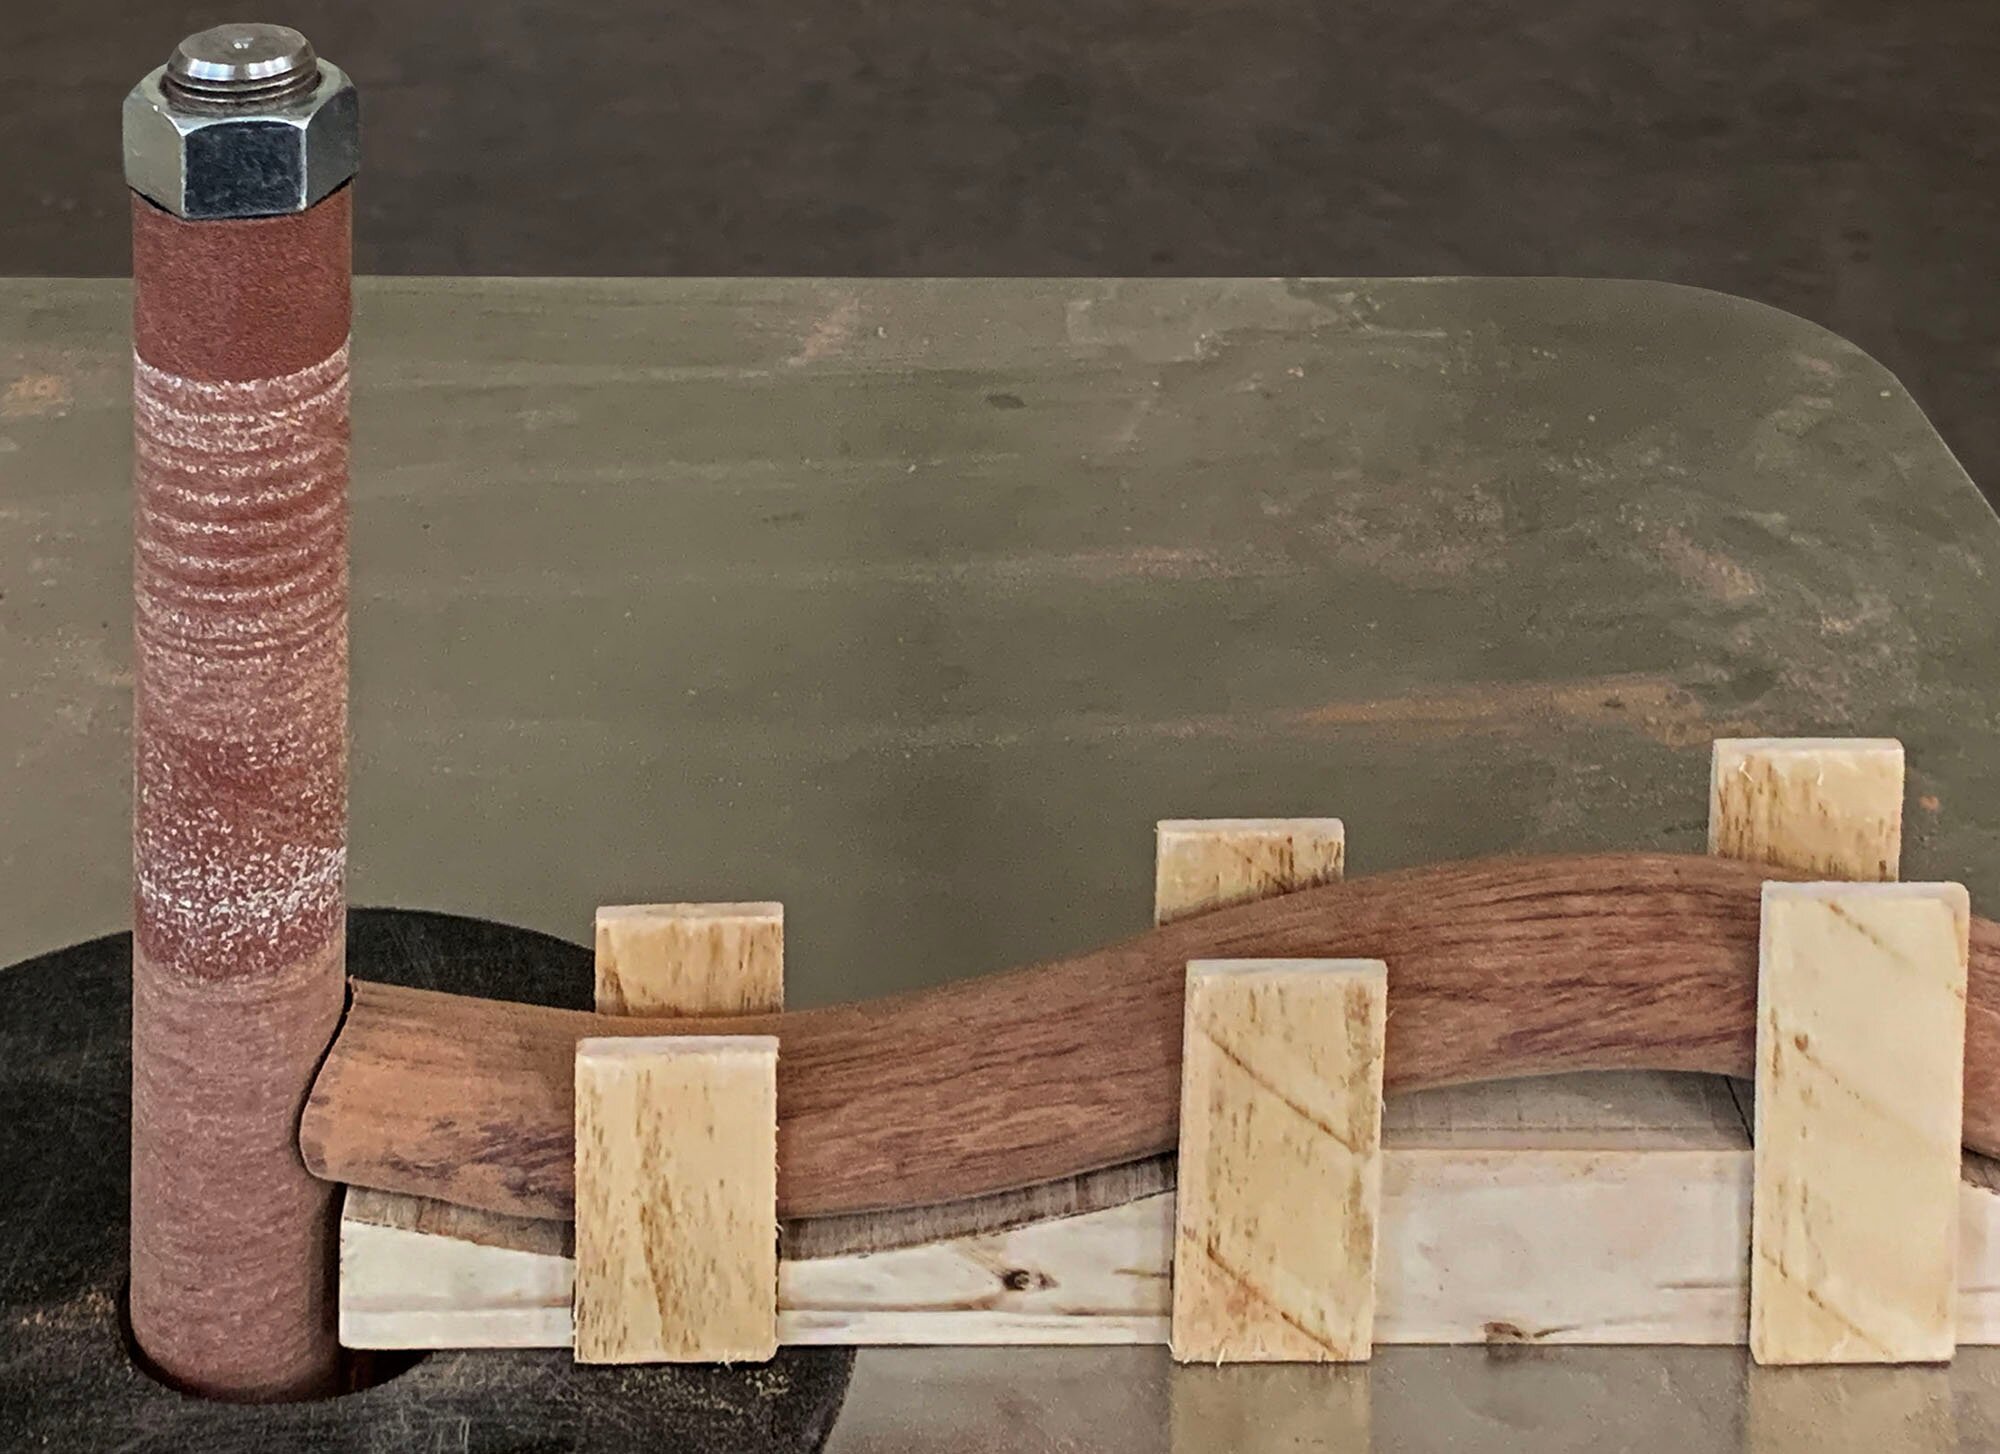
At this stage, the arm was square in section. It still had to be tapered toward its ends and rounded. We tapered it on sleds in the drum sander, then marked out an octagon and took off the corners to the lines. The rest came off with rasps, a spindle sander, and hours and hours of sanding.



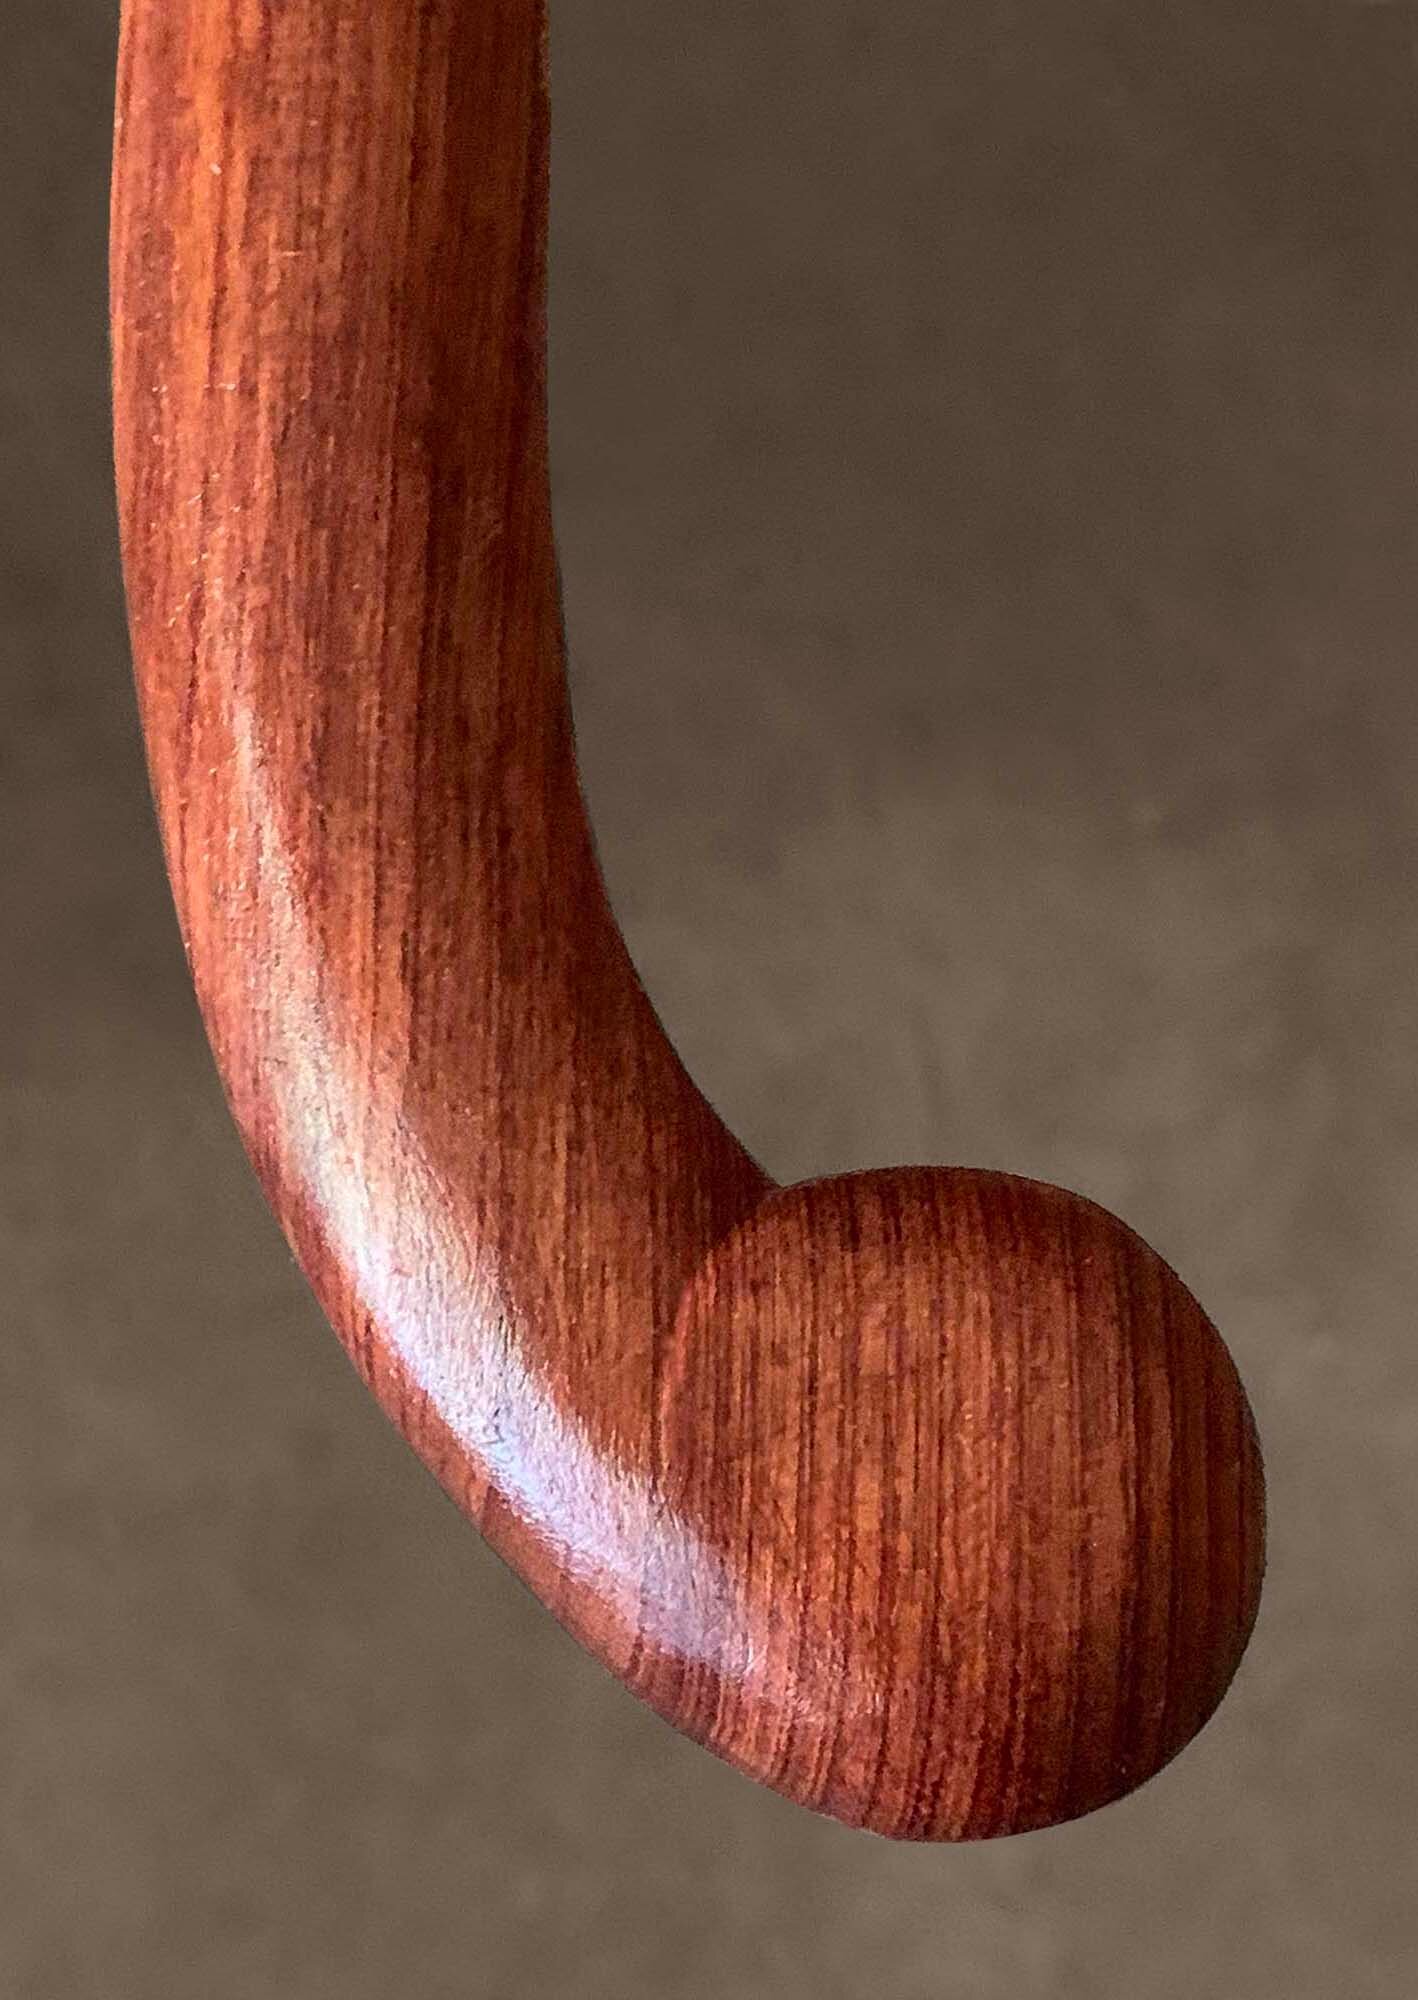
The ends of the arm curl out into flattened knobs.

The splat
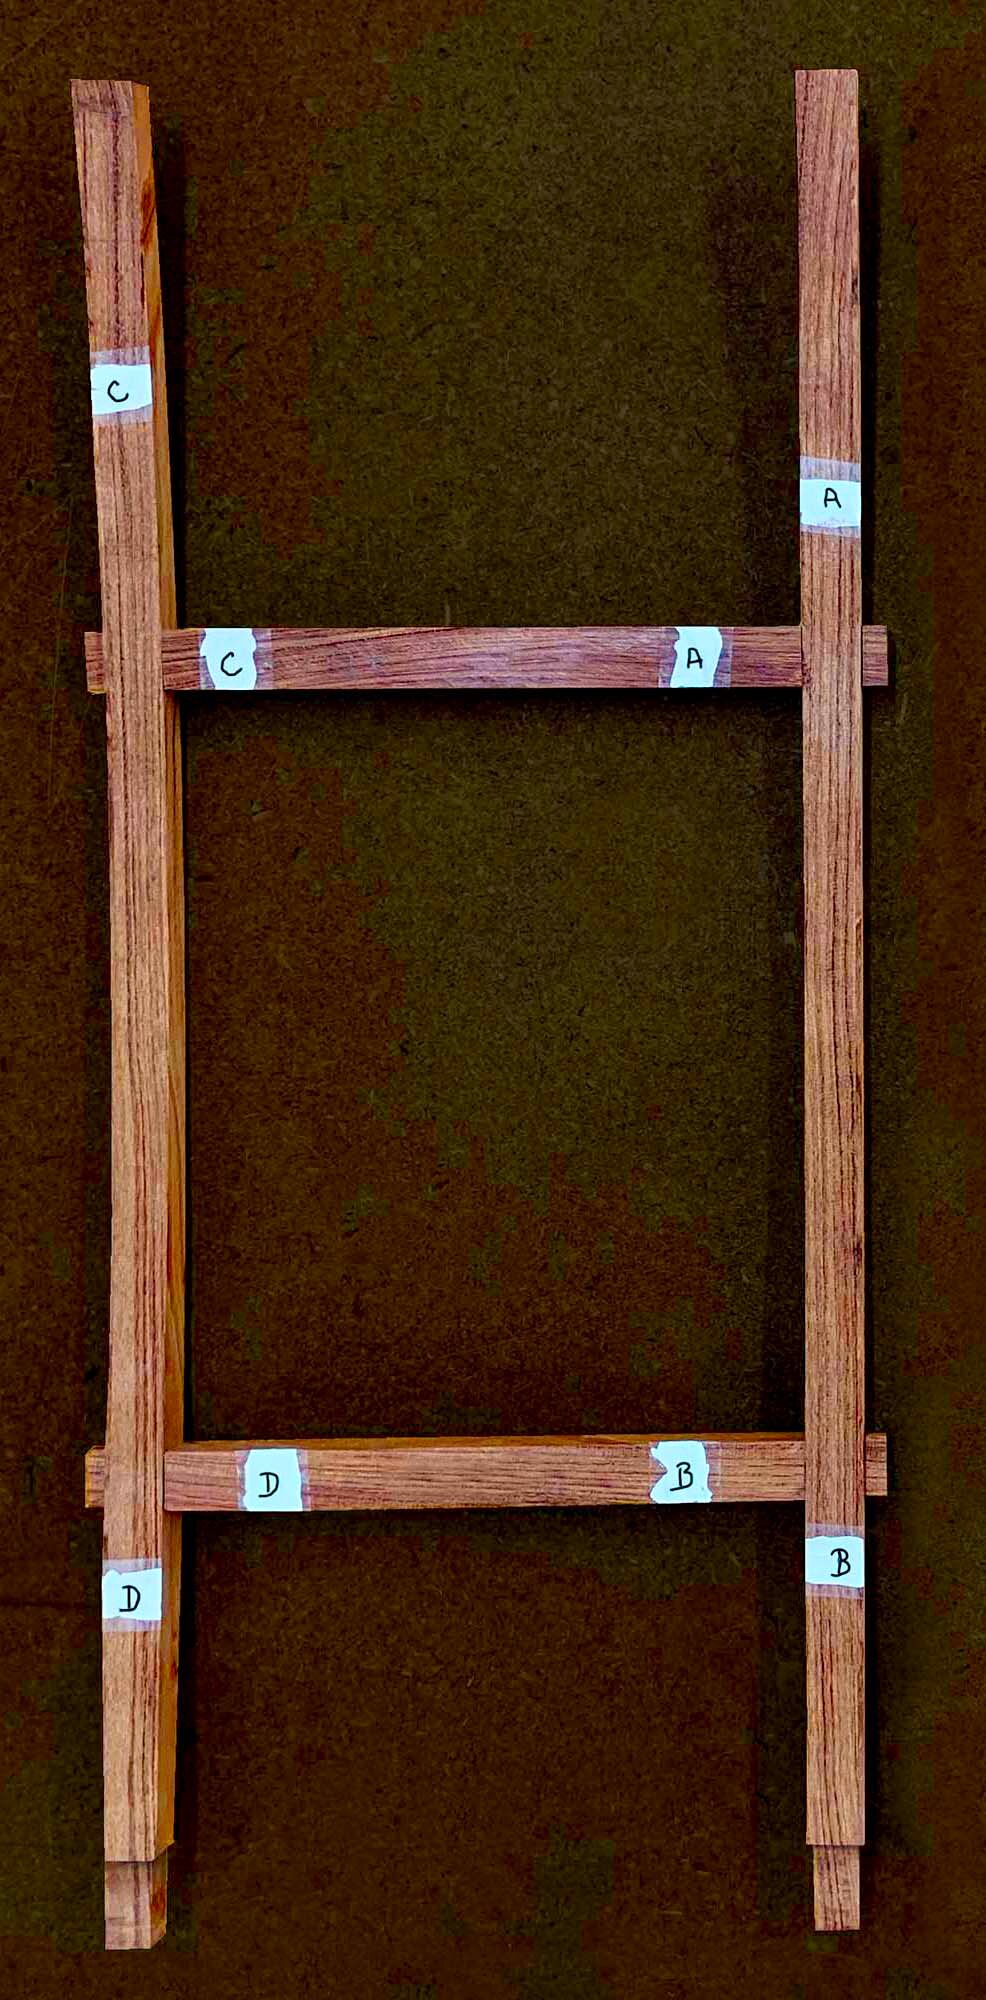
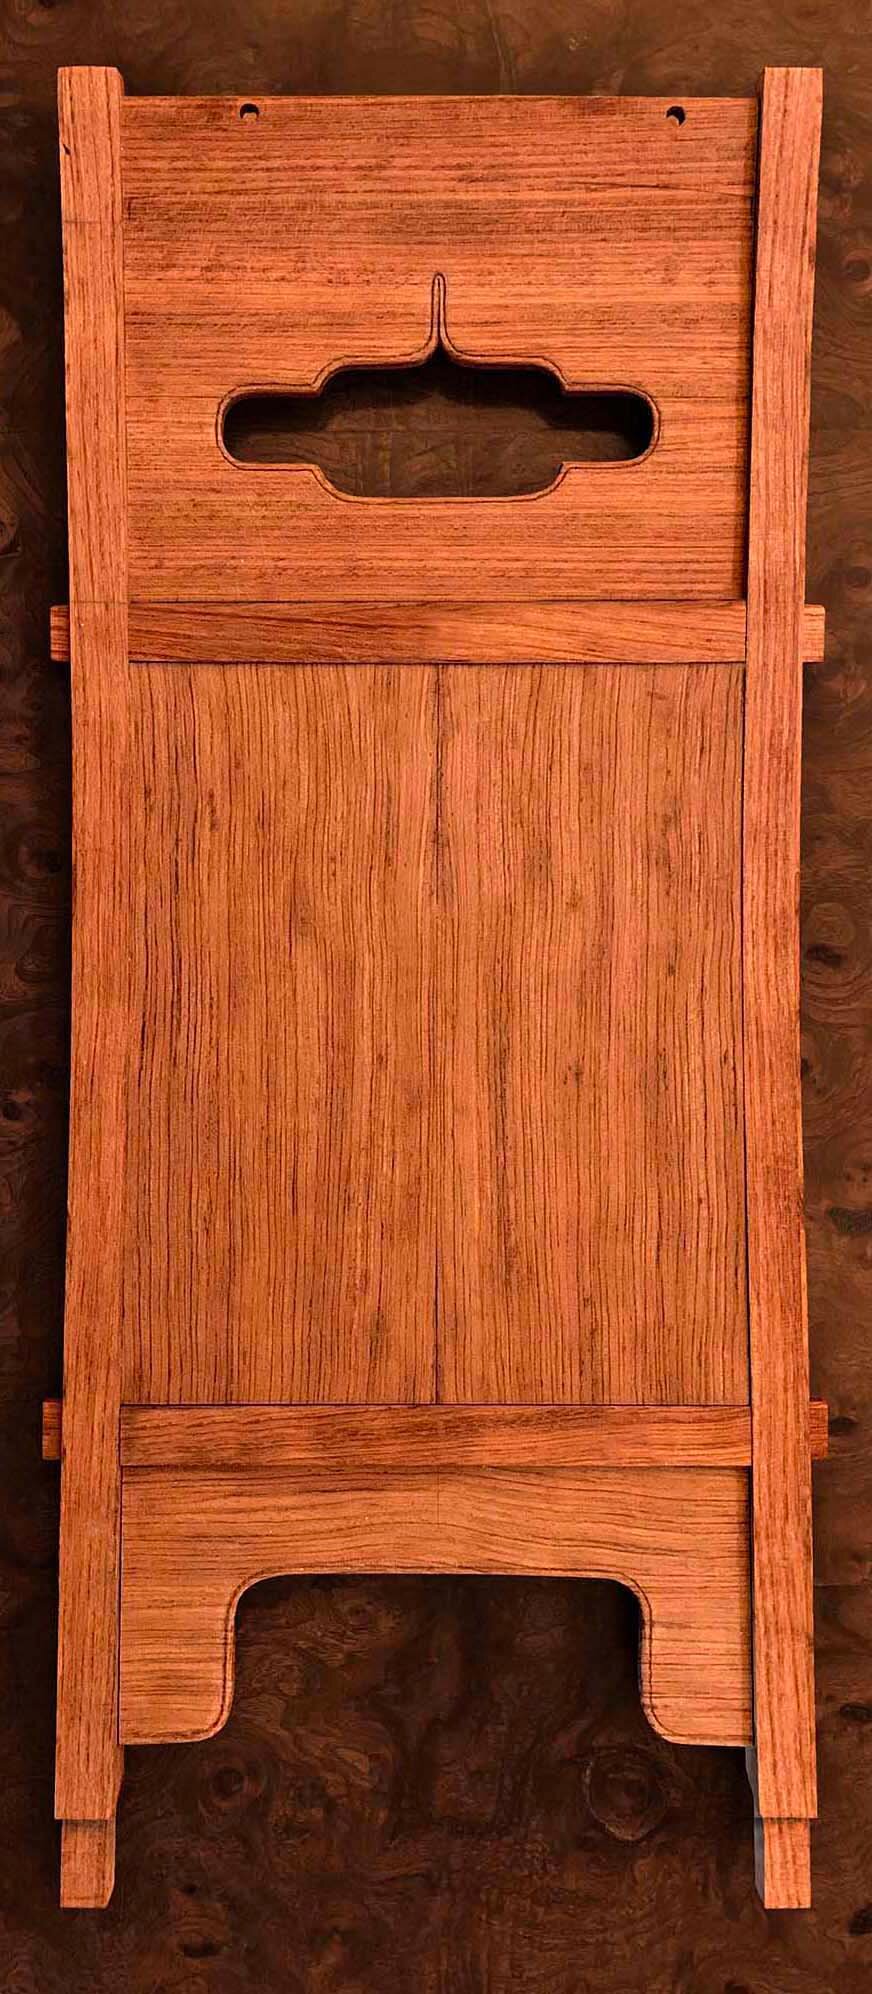
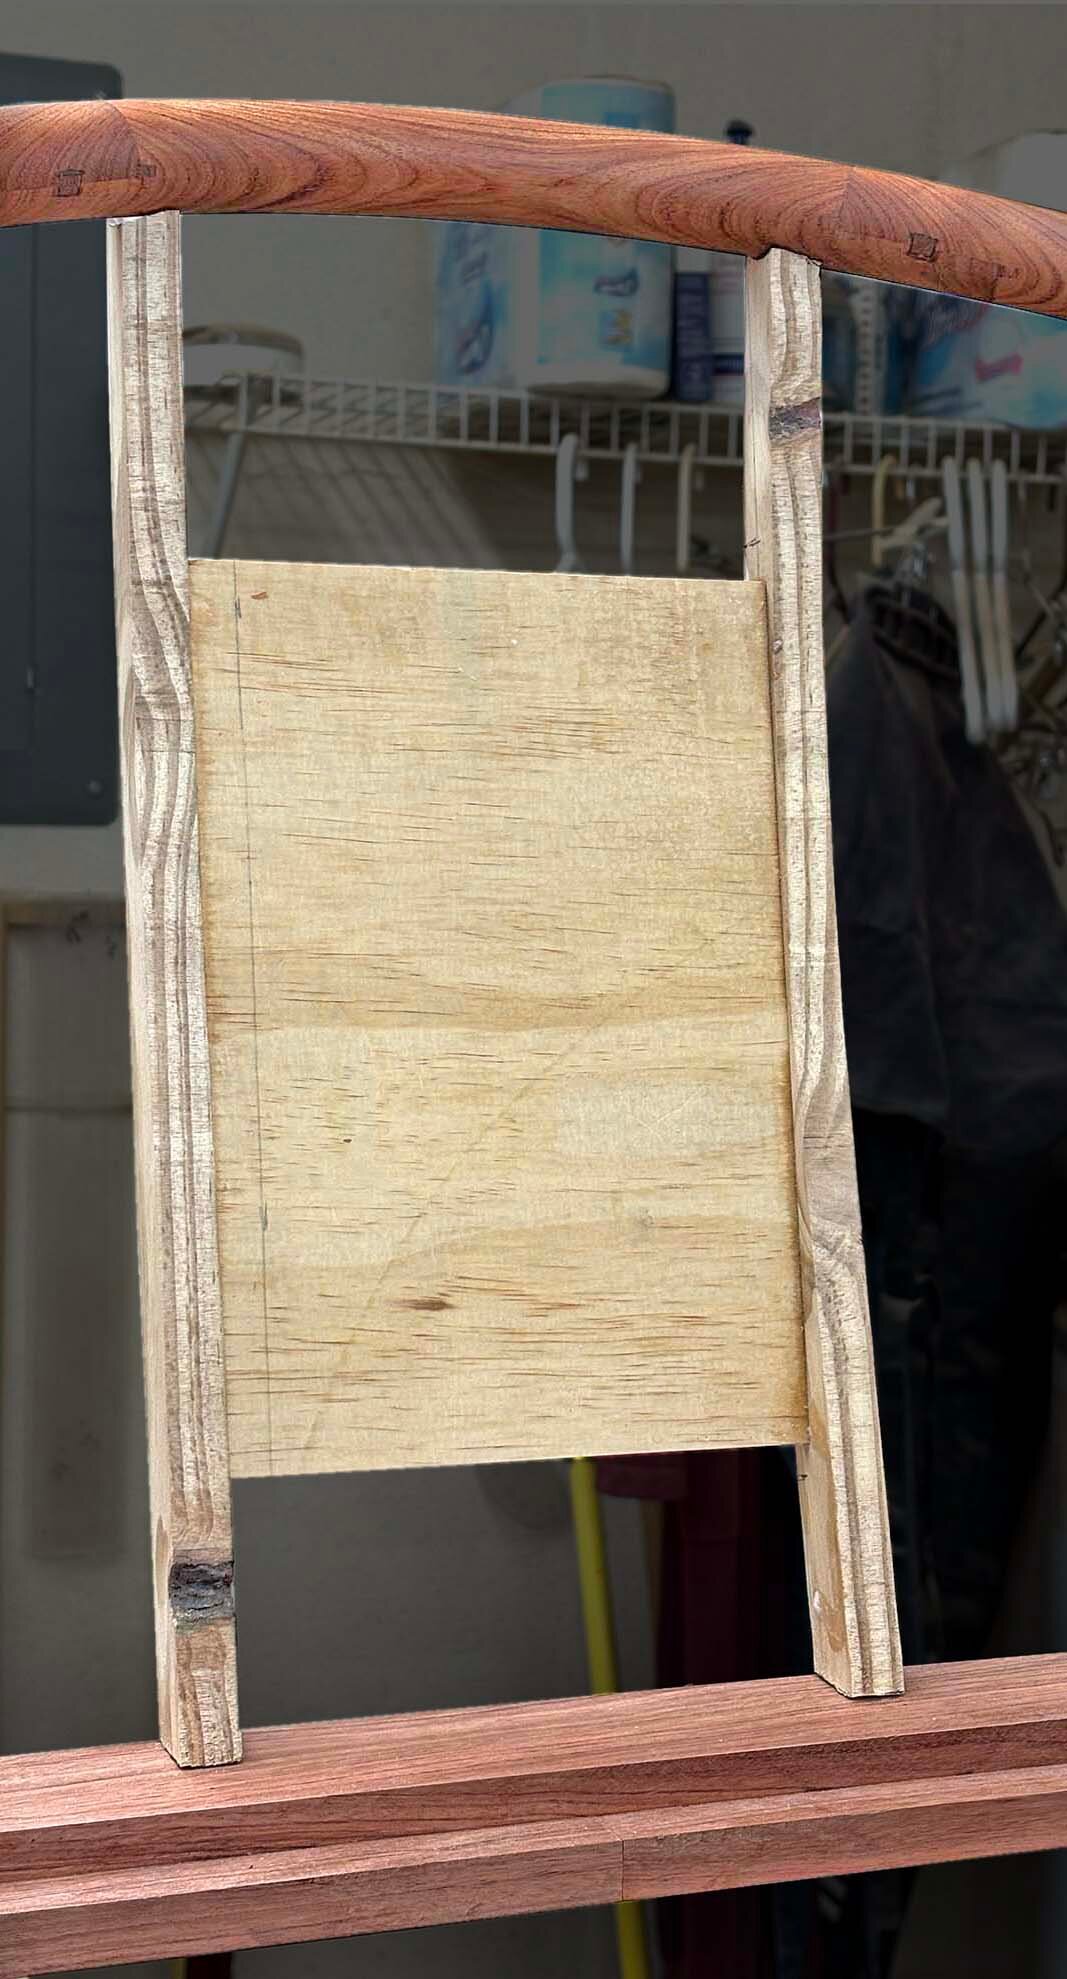
The splat forms the chair’s back. Its frame has two uprights and two rails, curved to fit your back, and holds two panels above an arched apron. The rails’ tenons pass through the uprights, their ends visible on the sides, as on the original.


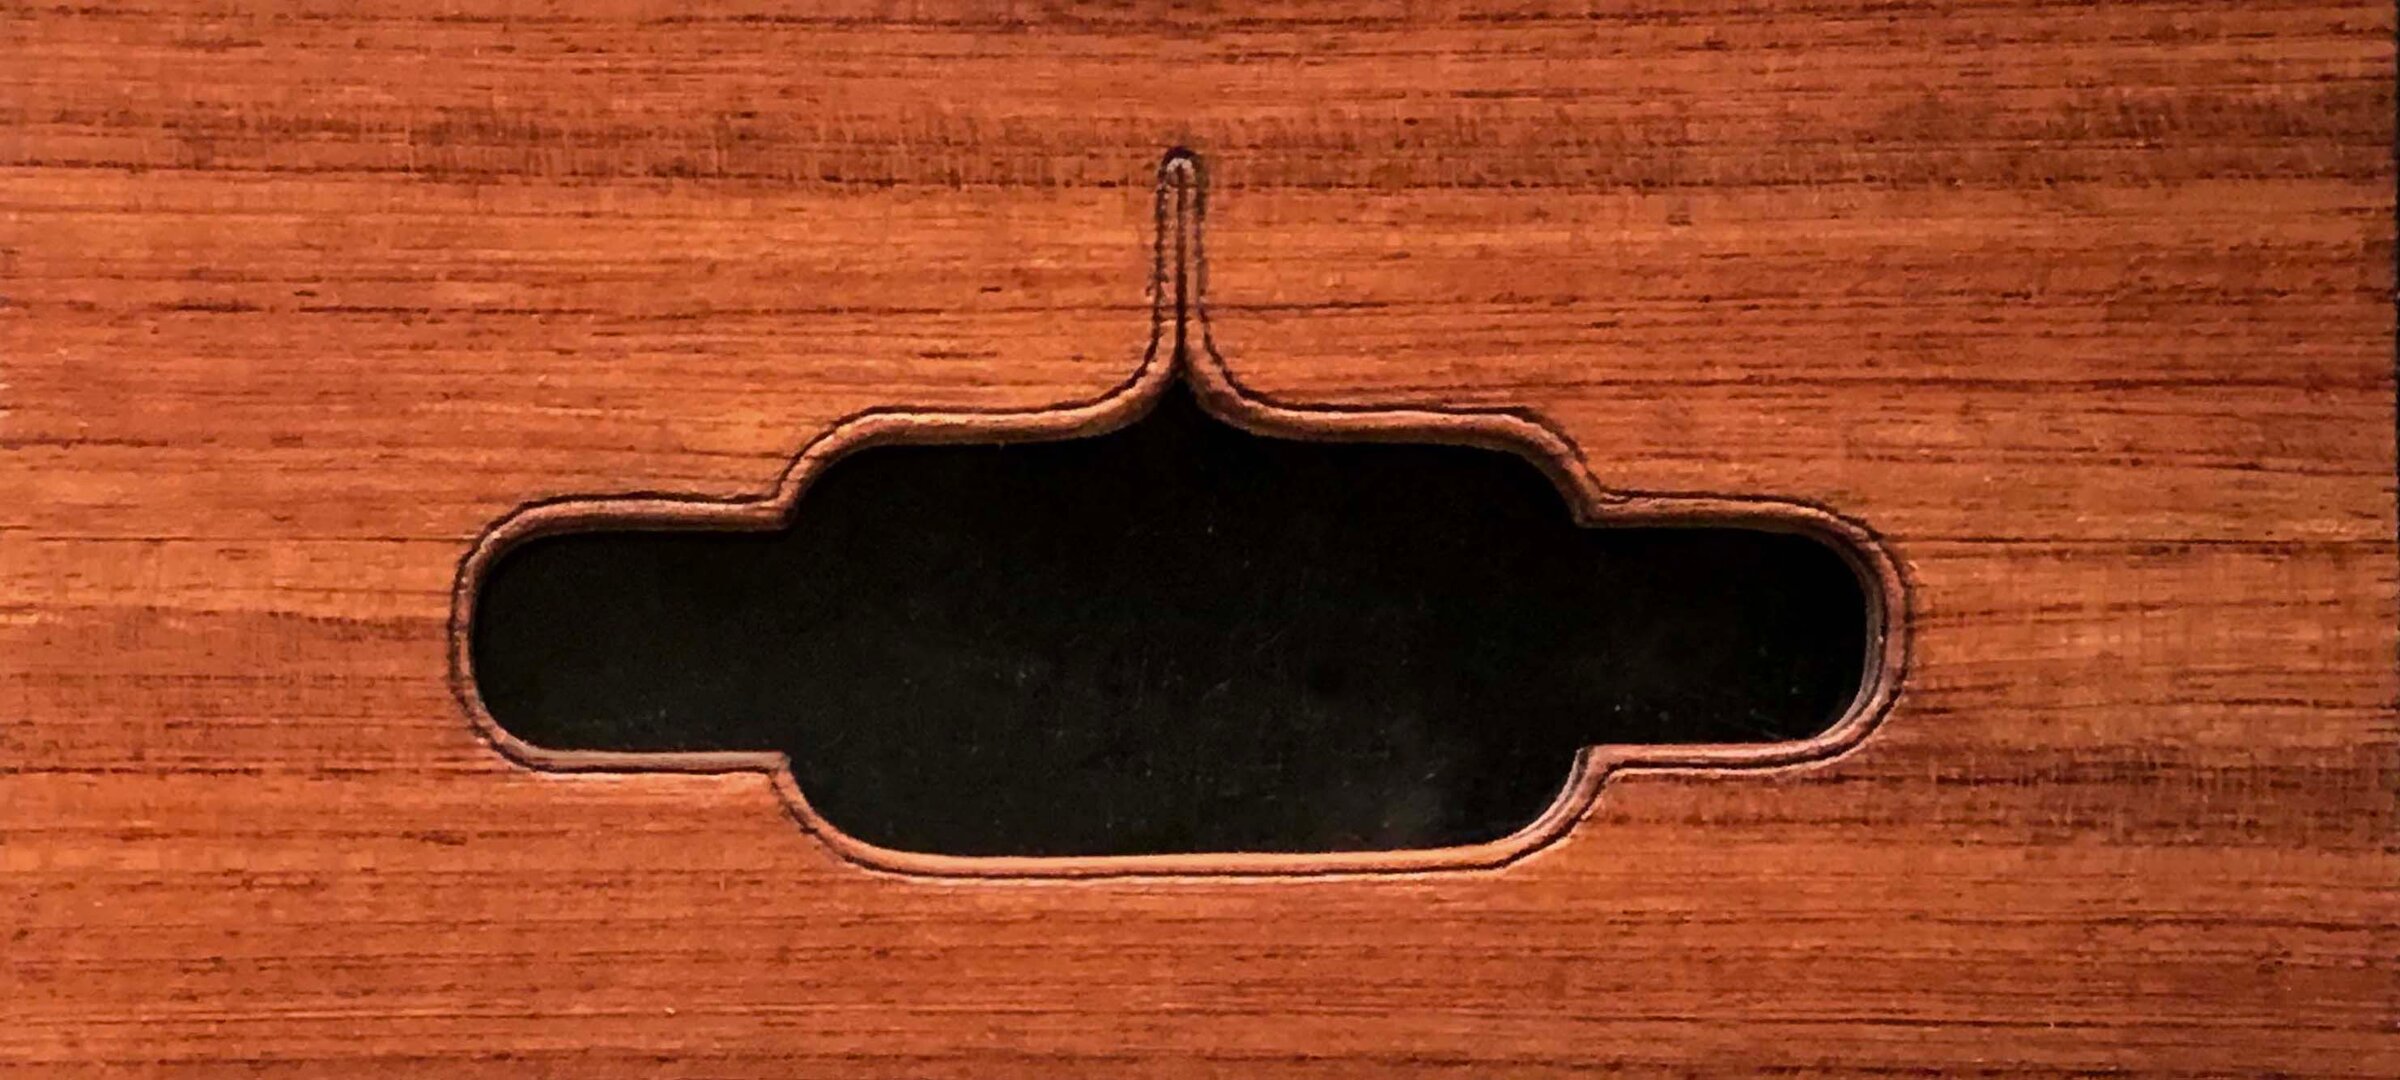
A raised bead follows the edge of the cloud-shaped opening in the top panel. The usual tool for a bead like this is a scratch stock: a piece of steel ground to the bead’s profile and held in a block. But because of the angles, we used an awl and files to do ours.

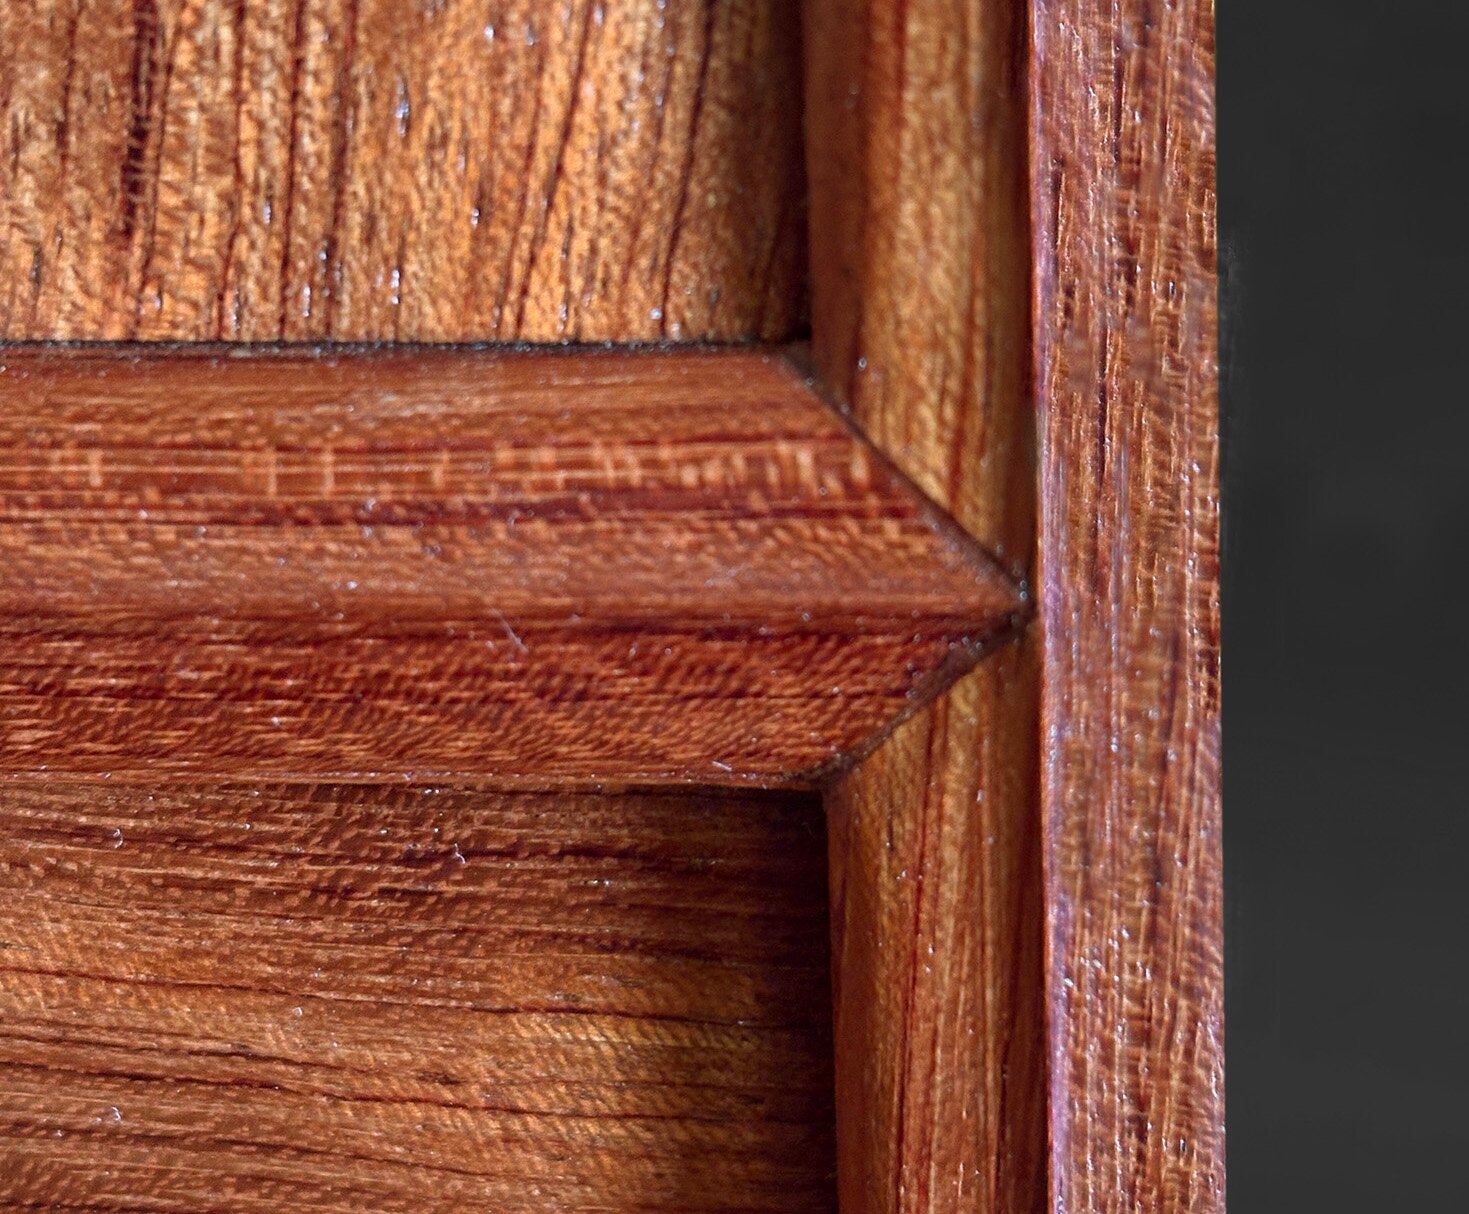
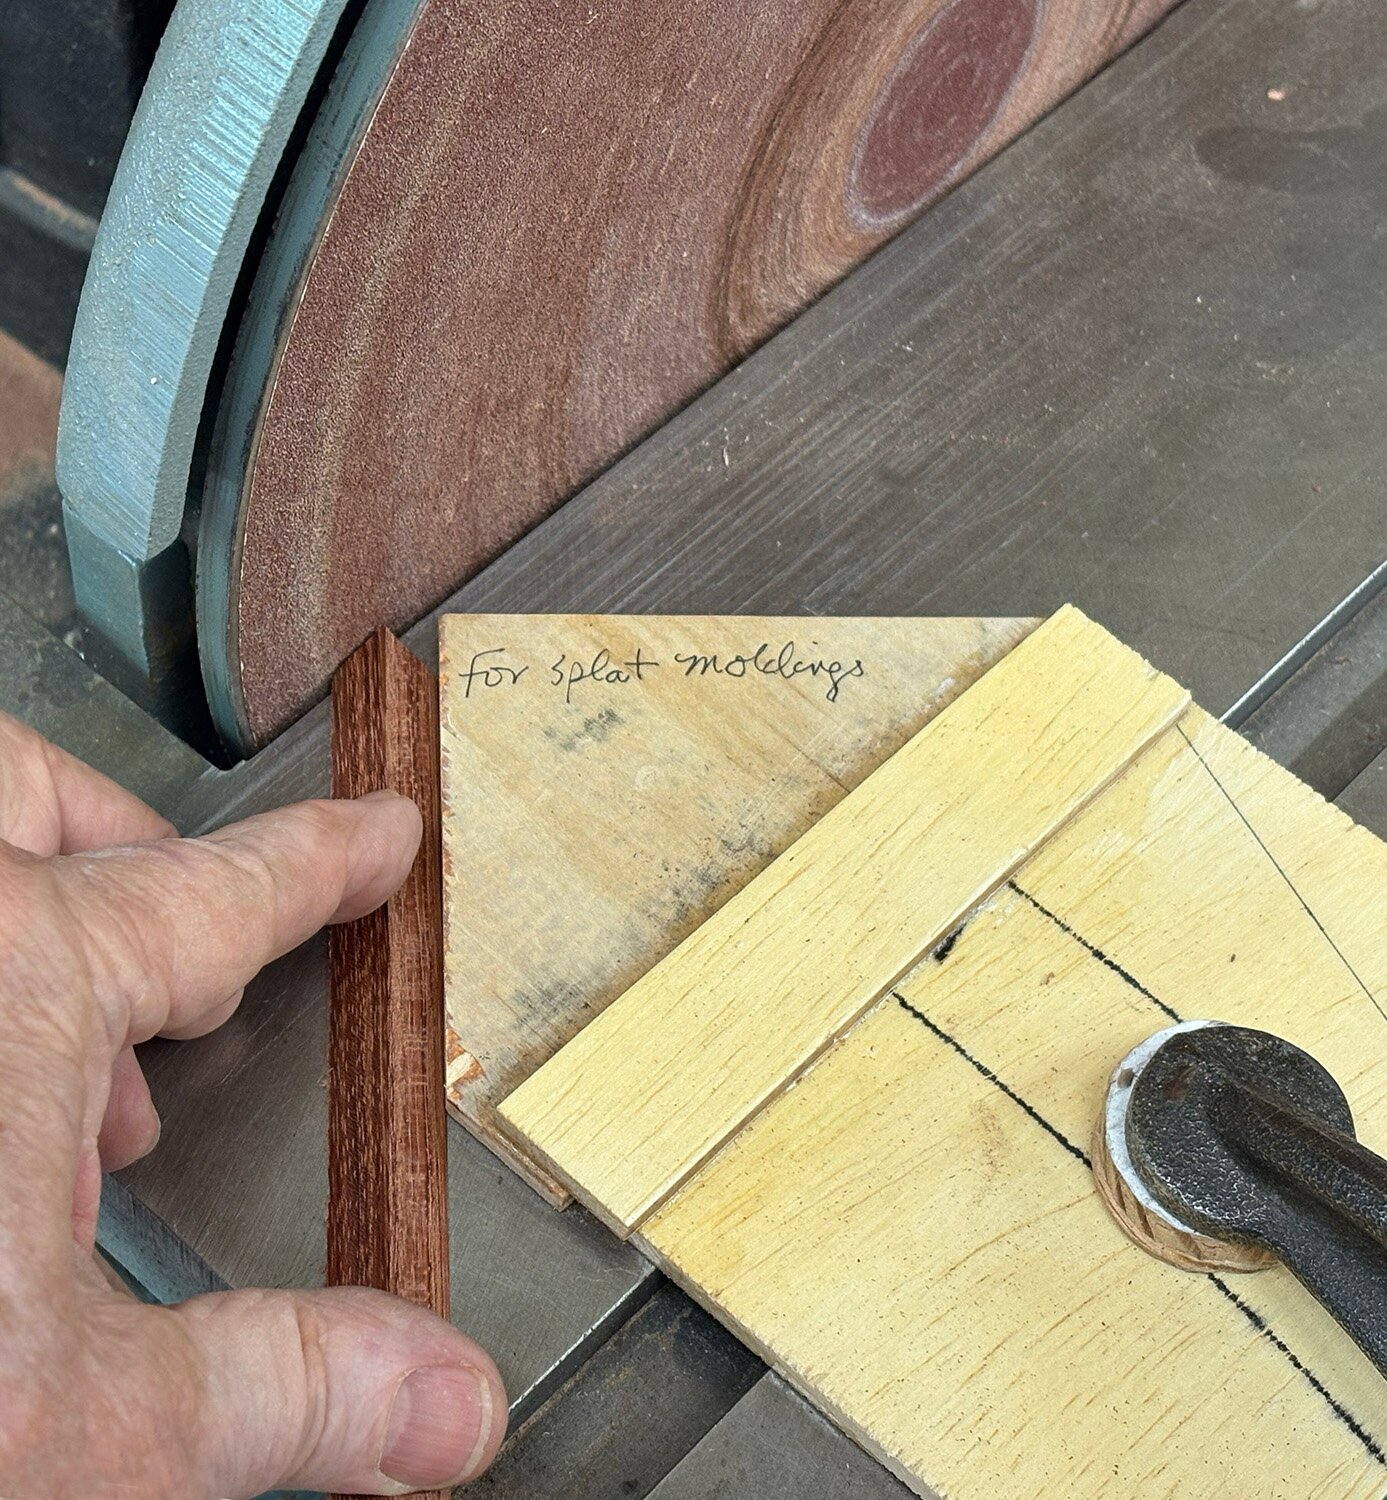
We mitered the moldings around the panels using a jig on the disc sander.


The base
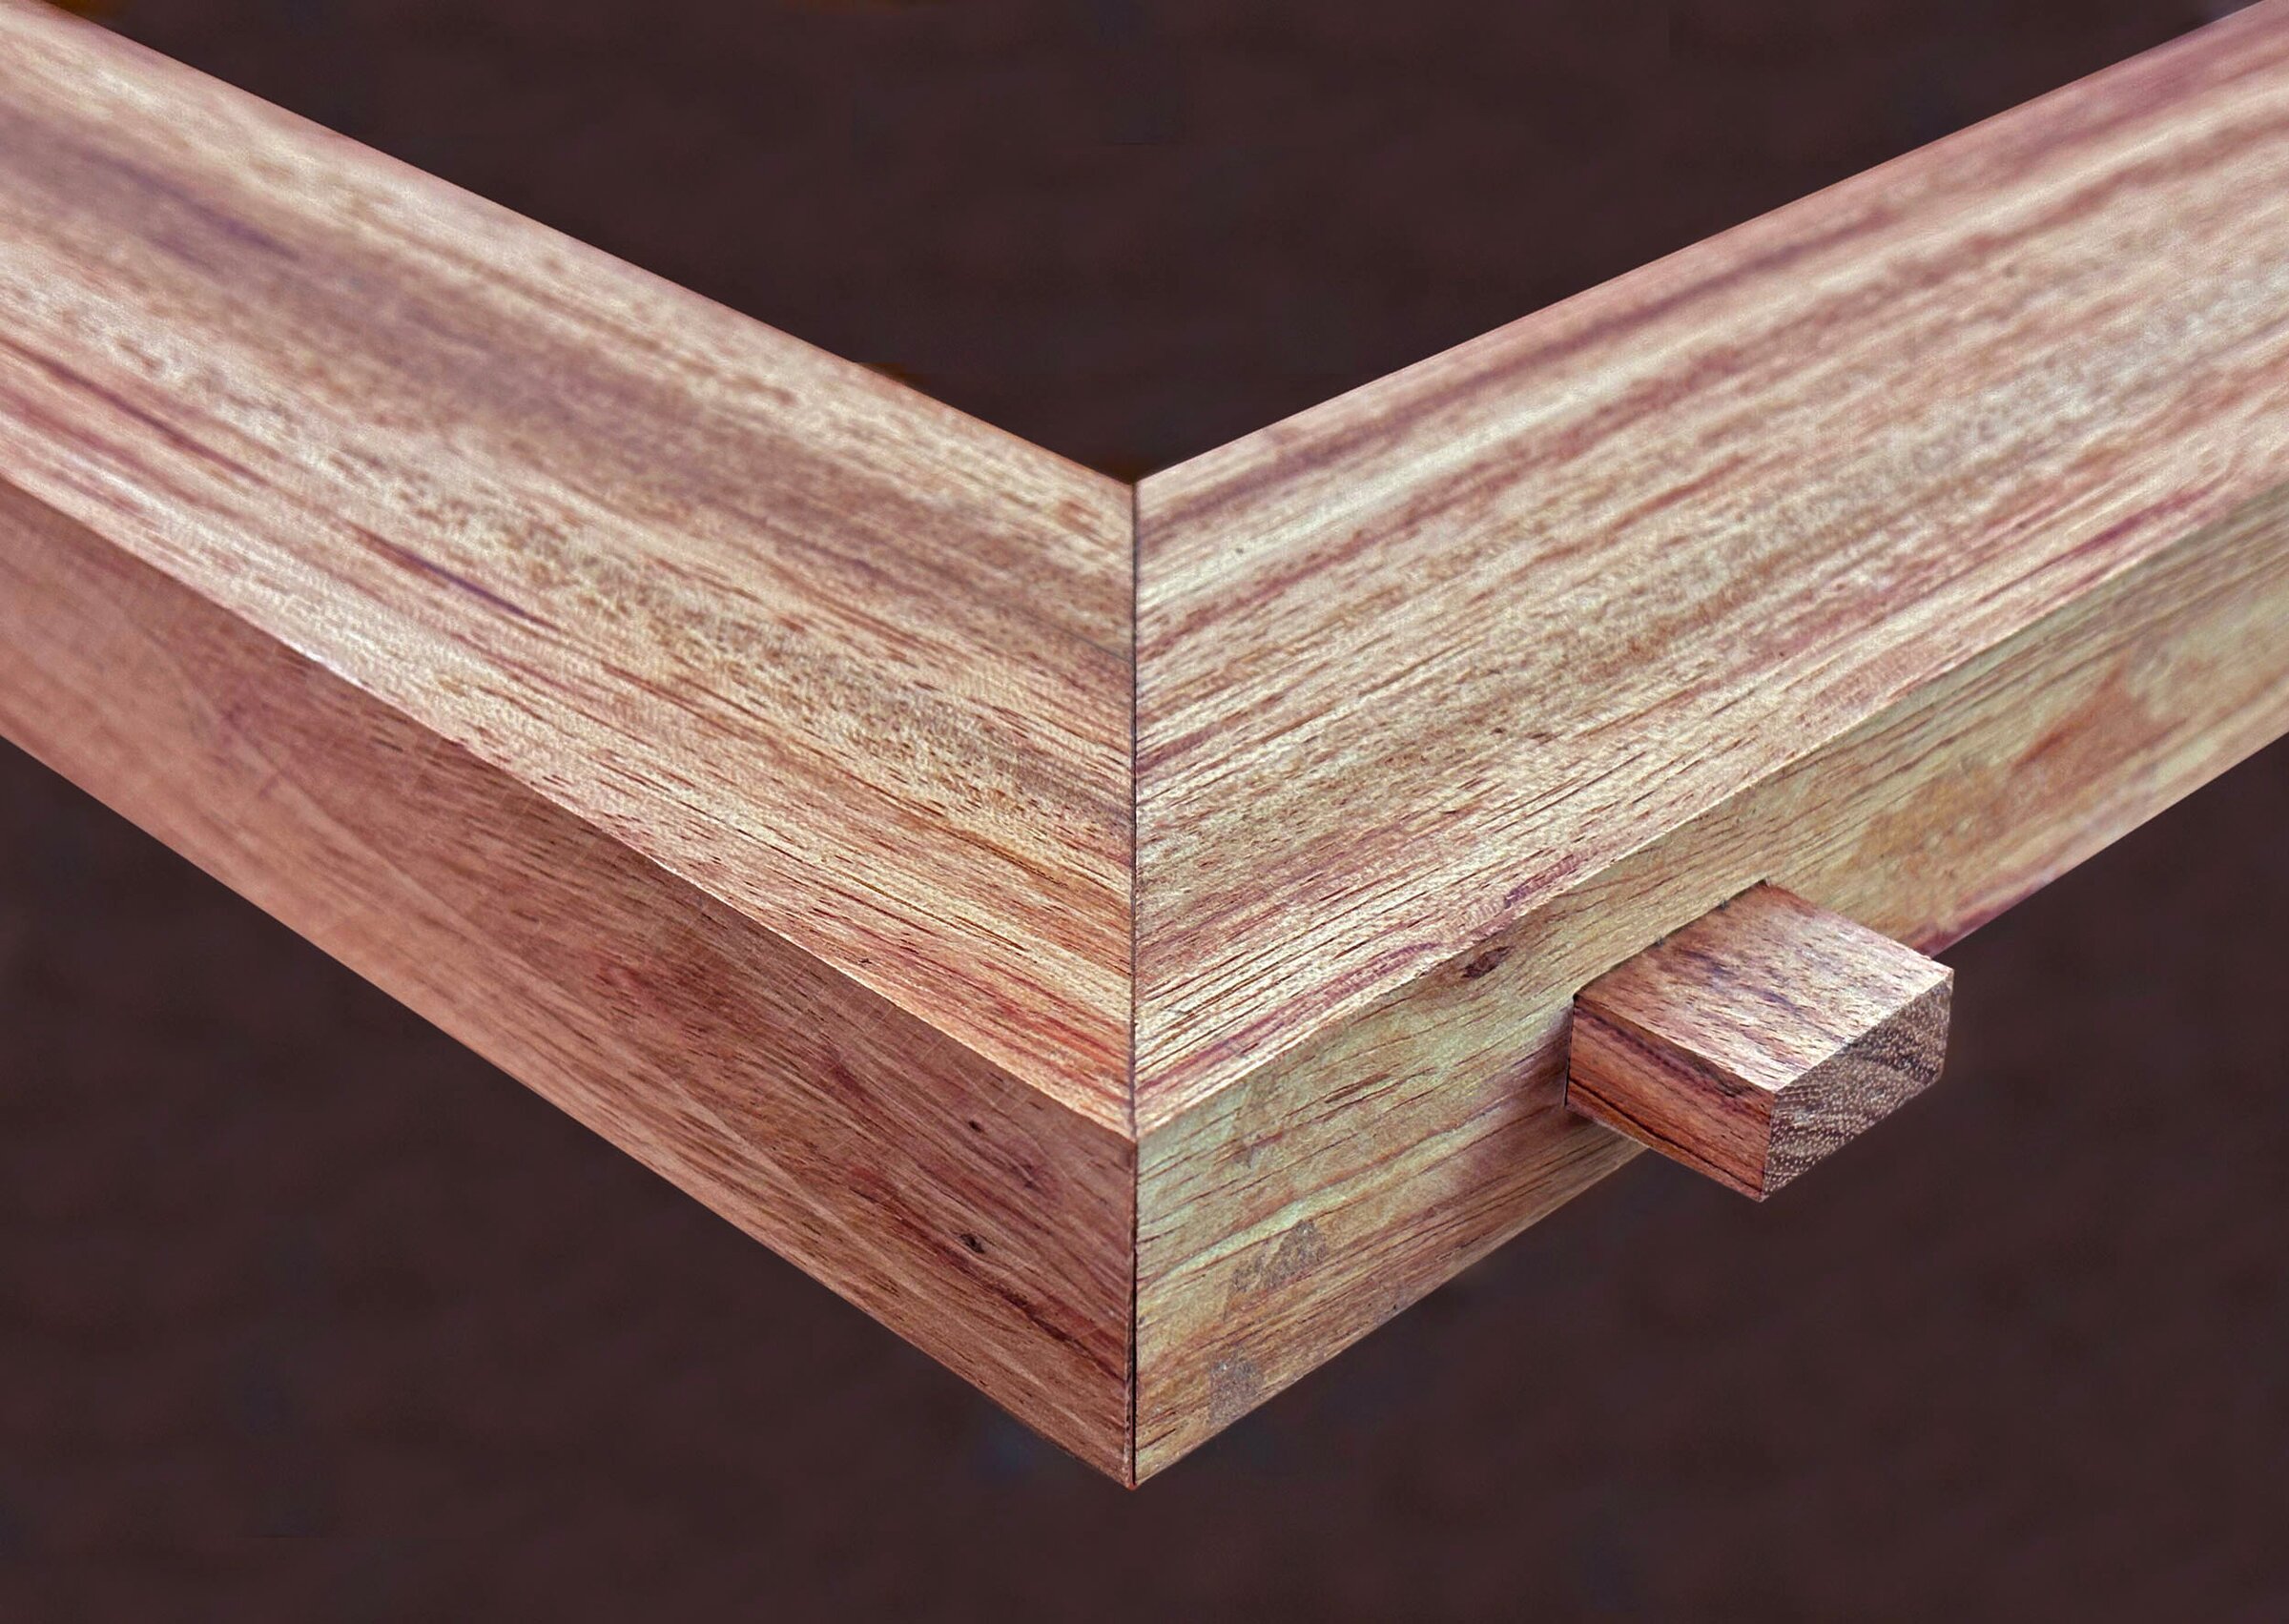
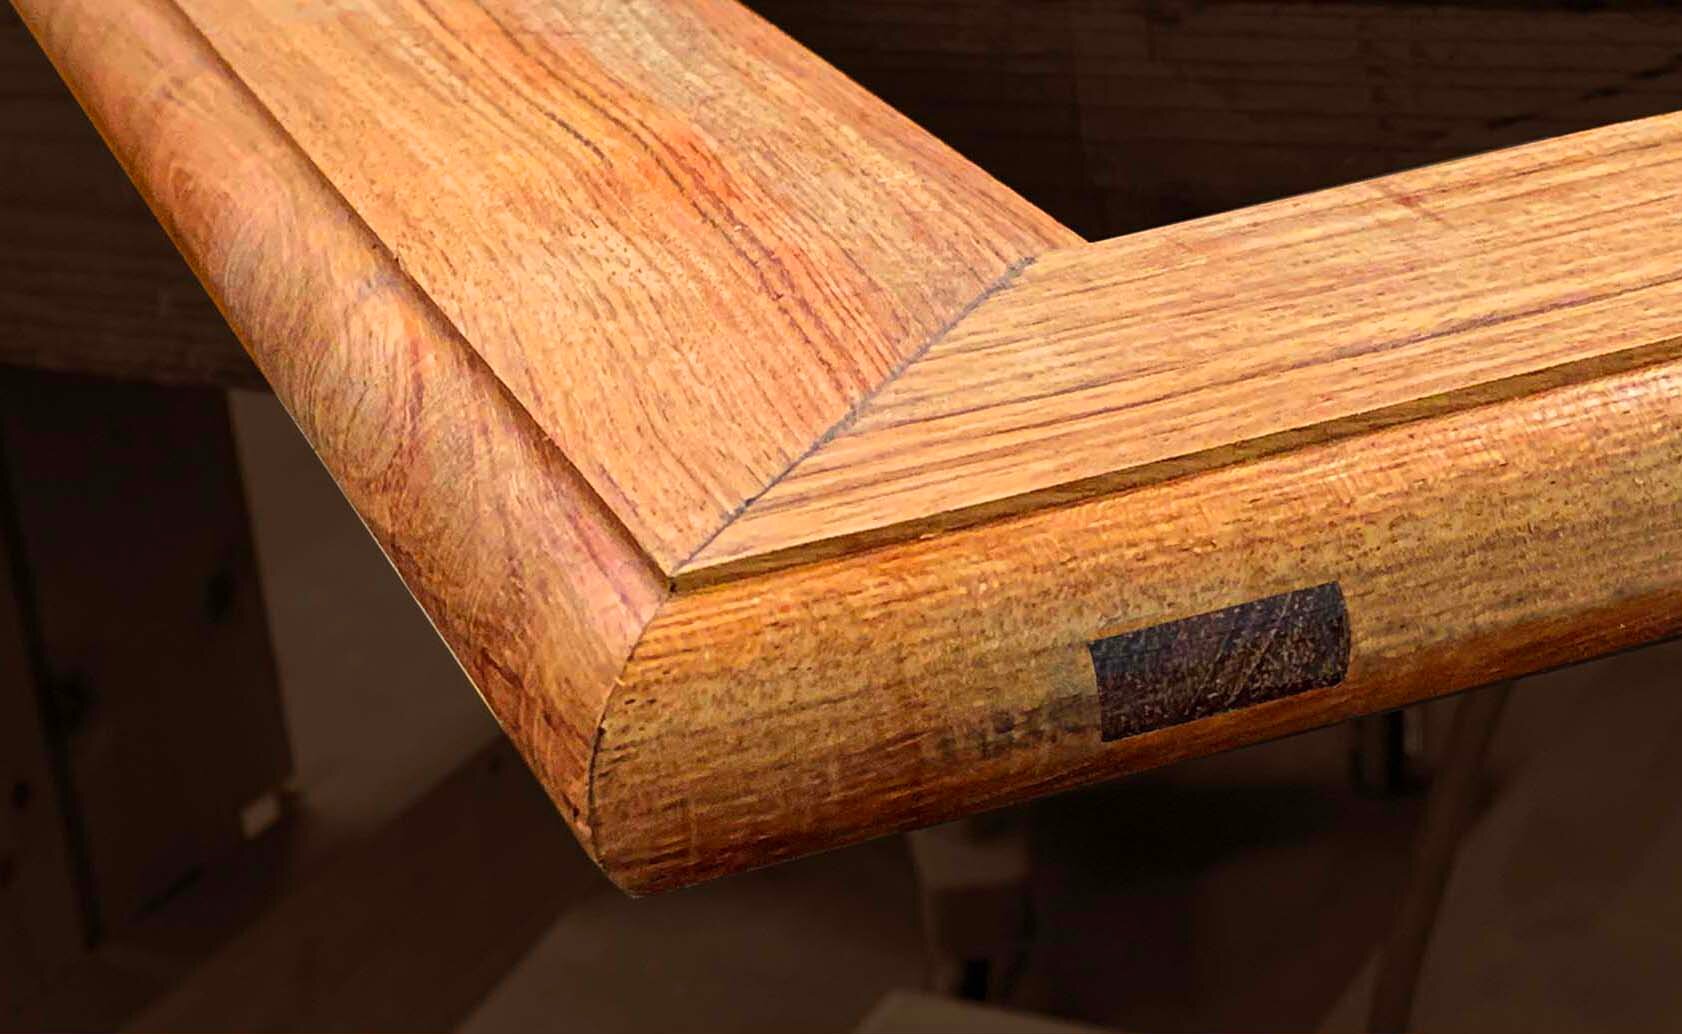
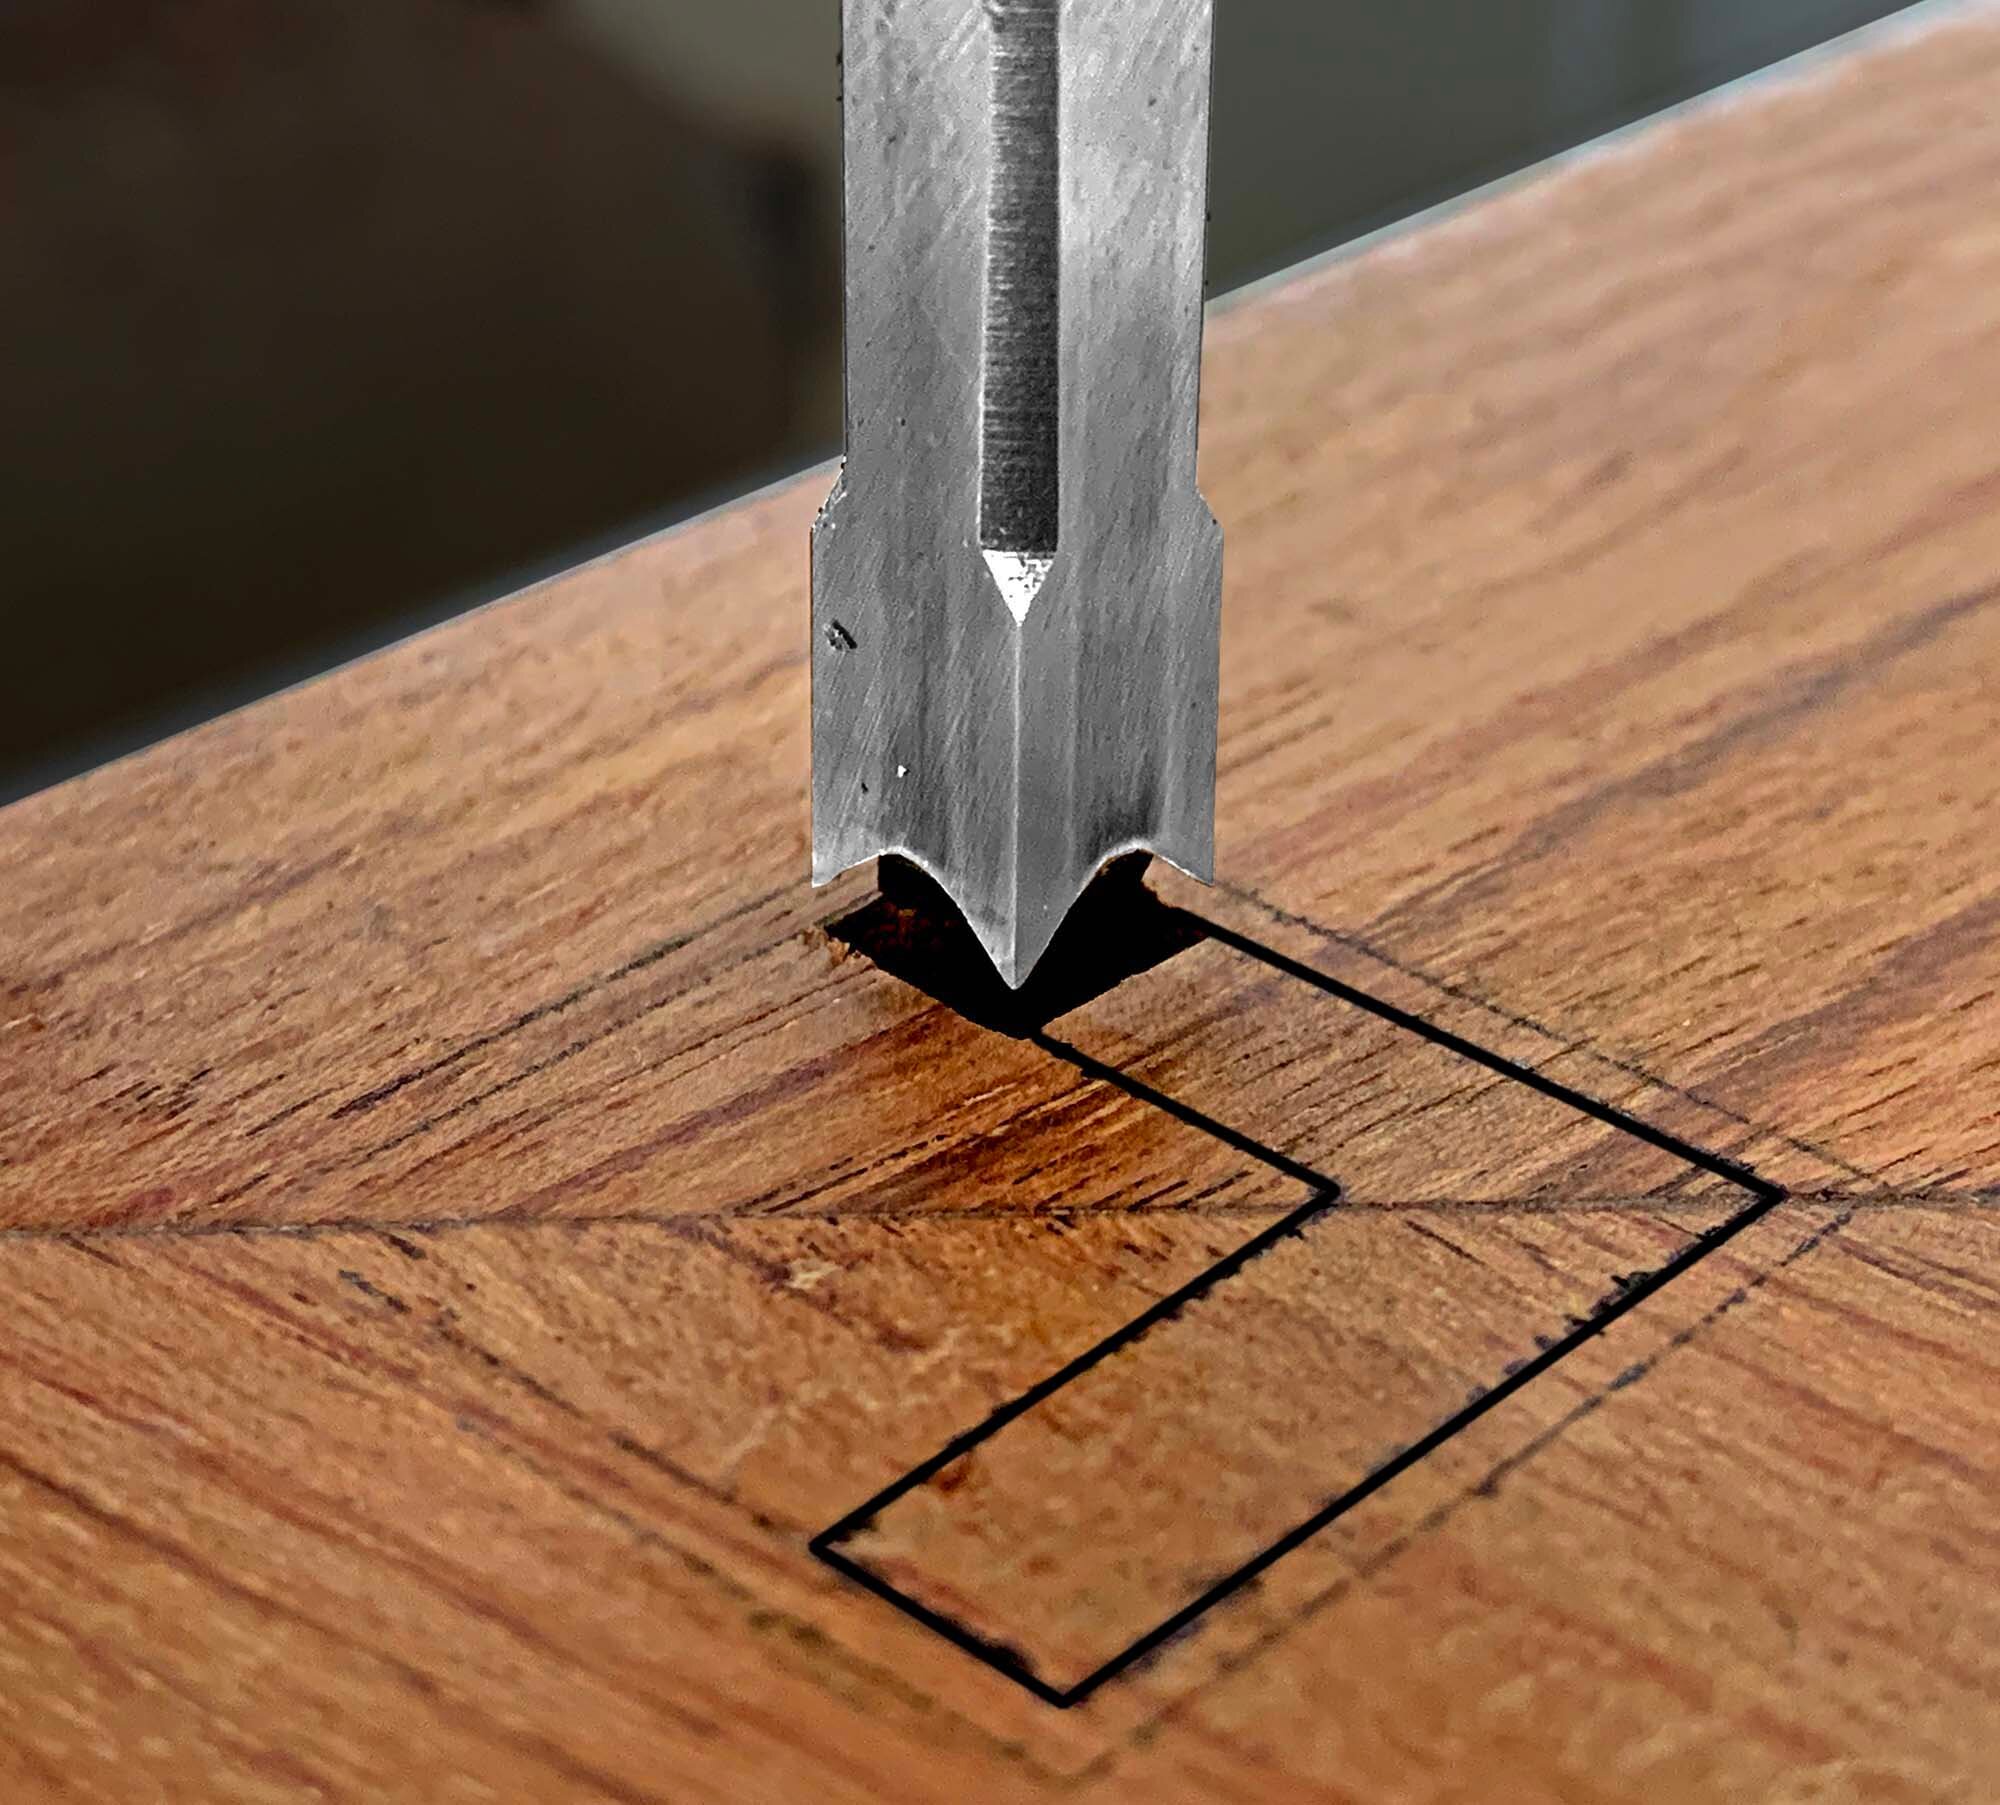
The seat frame has four rails, mitered at the corners and joined with through mortise-and-tenon joints. The tenon ends show on the outside of the frame. We rounded the outer edge to a ½-inch radius with a bullnose router bit.


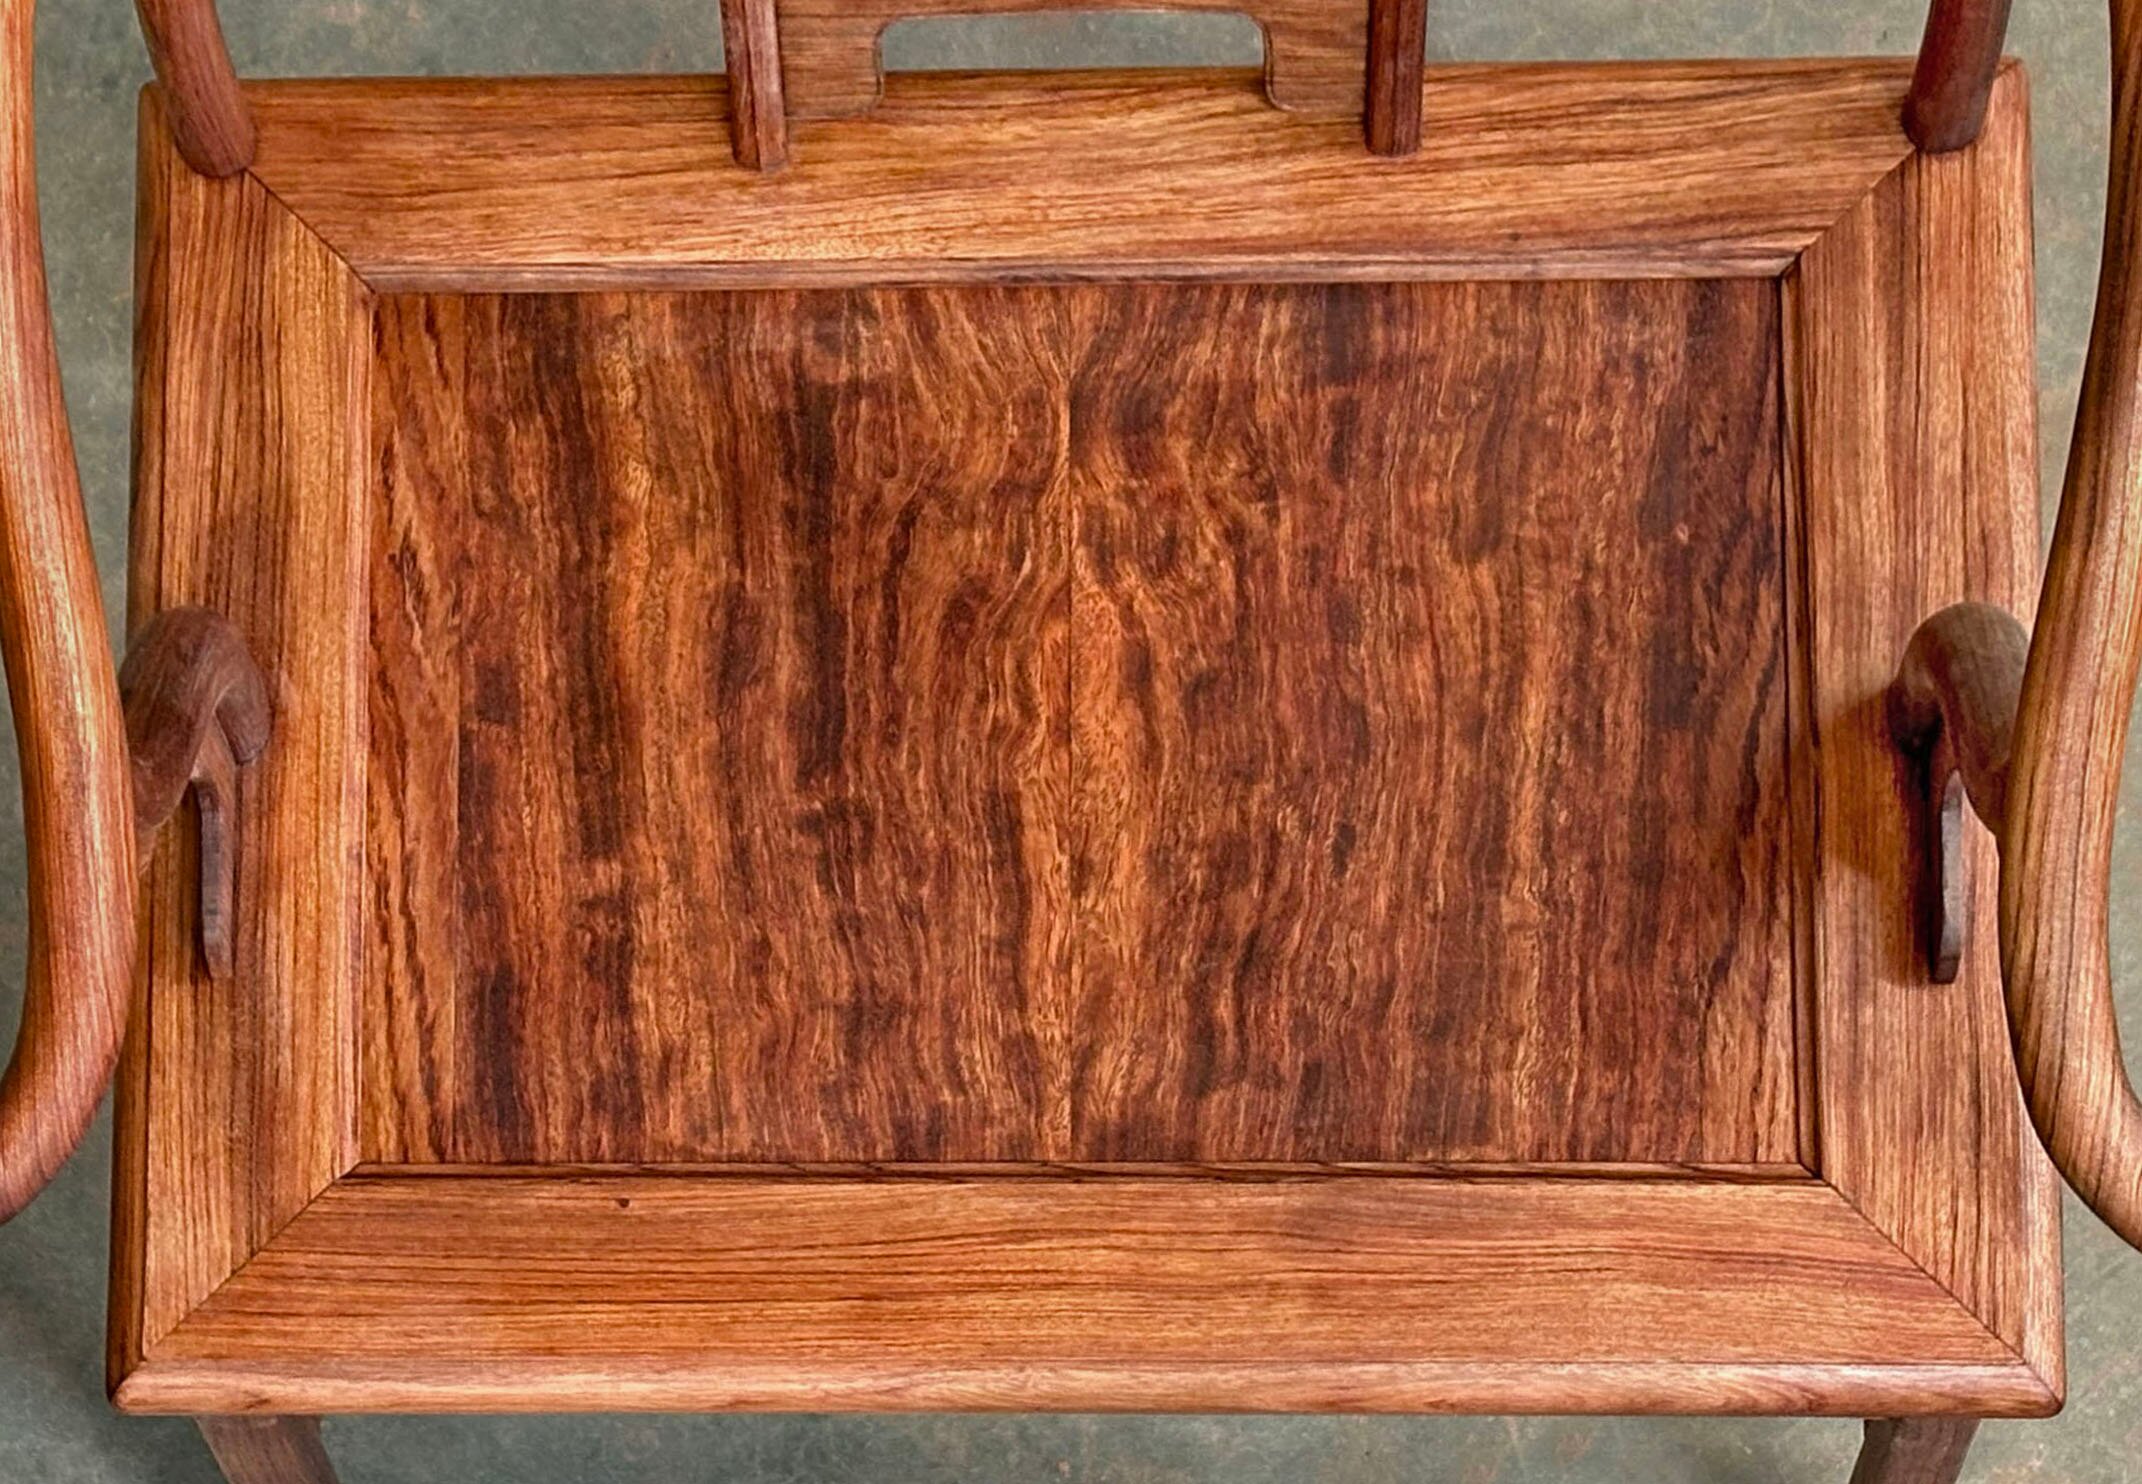
The original seats were soft mats of rattan woven over palm cord. We used figured bubinga panels on battens instead: I have cats, and didn’t want the seats used as scratching posts.


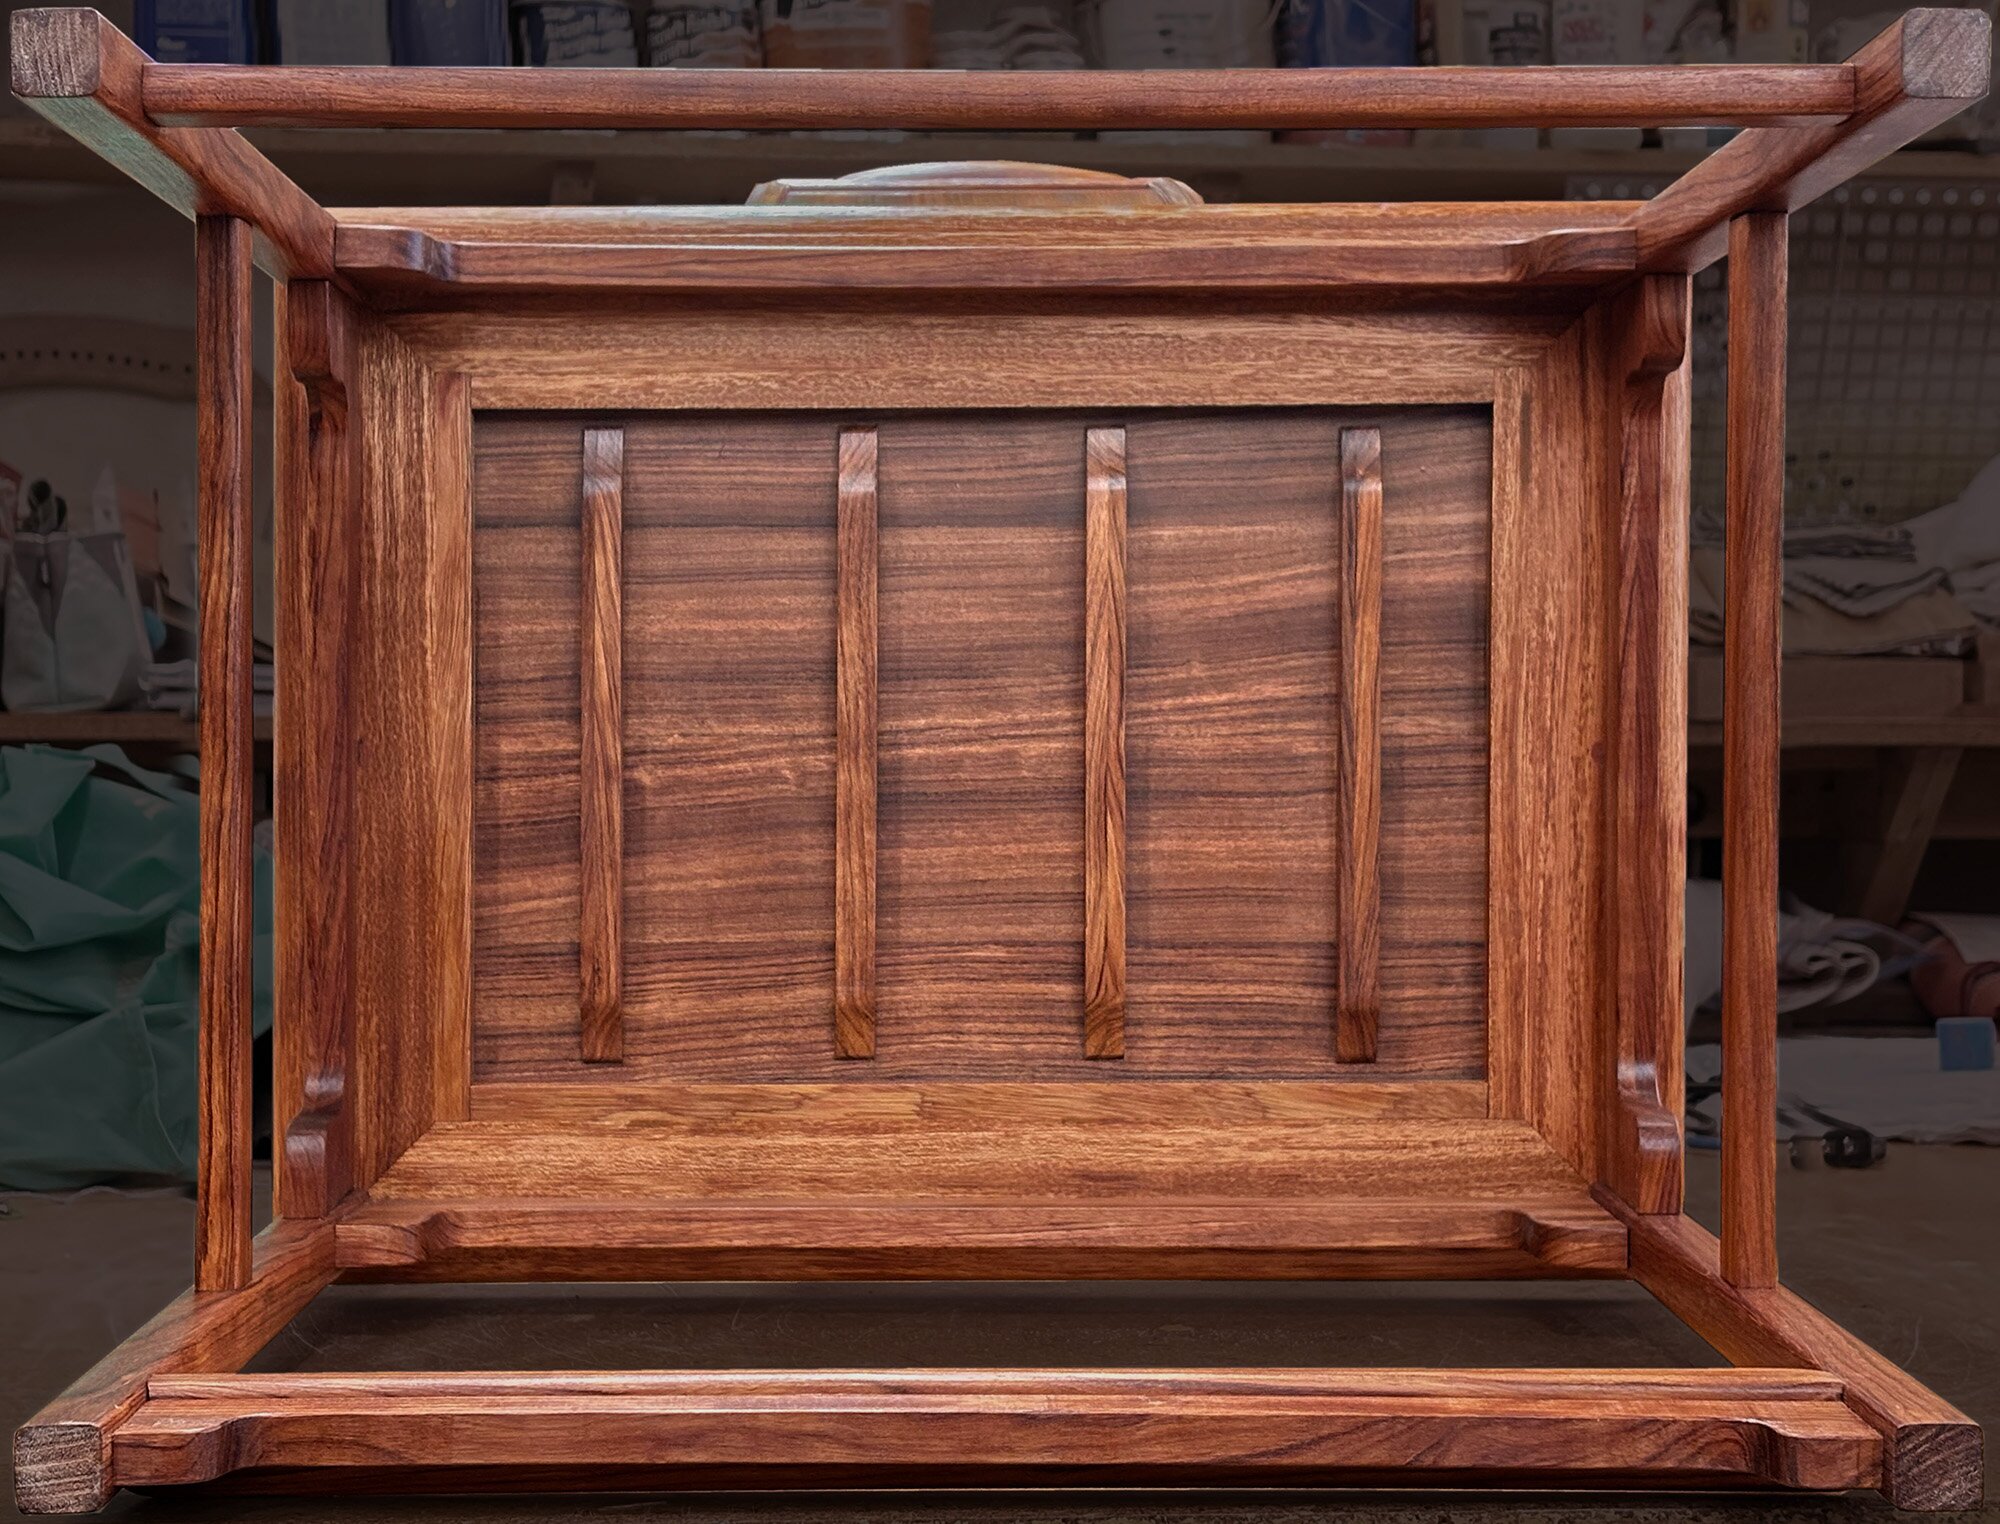
Each leg has two tenons at the top, one for each rail at the corner of the seat frame. They fit into an L-shaped mortise cut across the miter.

The aprons under the seat are tongued into the legs. Four stretchers join the legs at two heights: the footrest across the front and one across the back, both low, and one on each side, higher up.

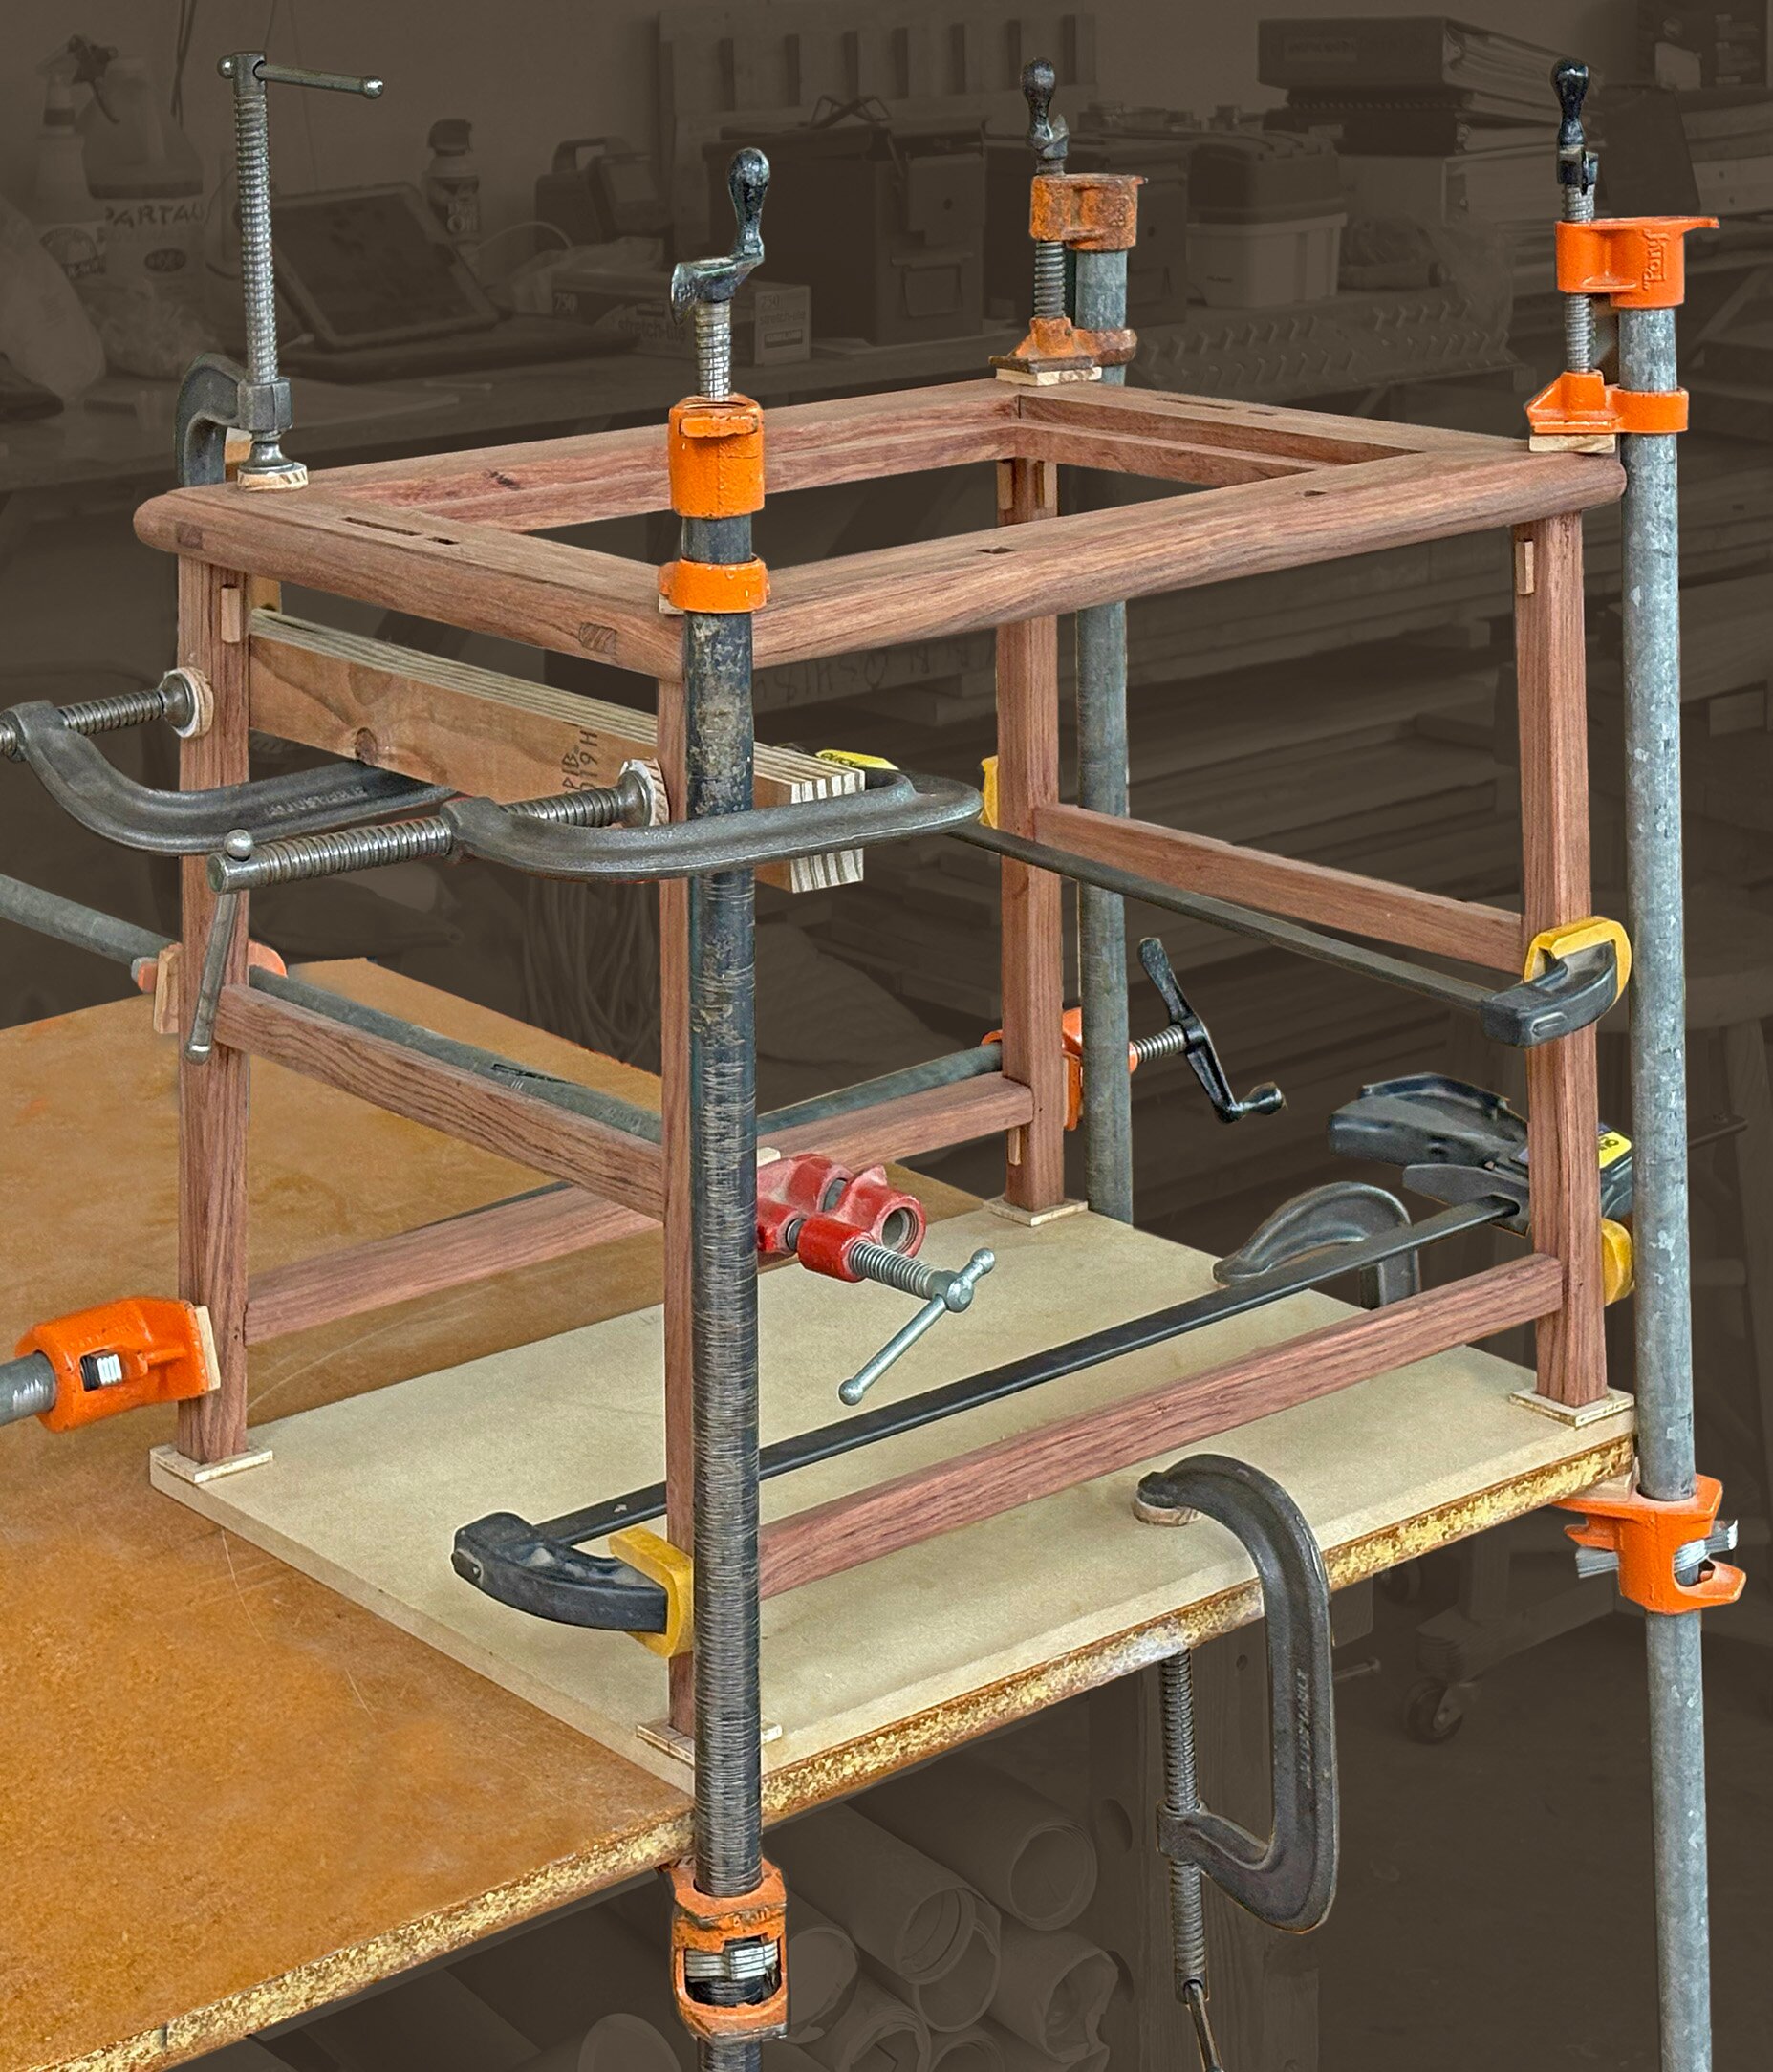

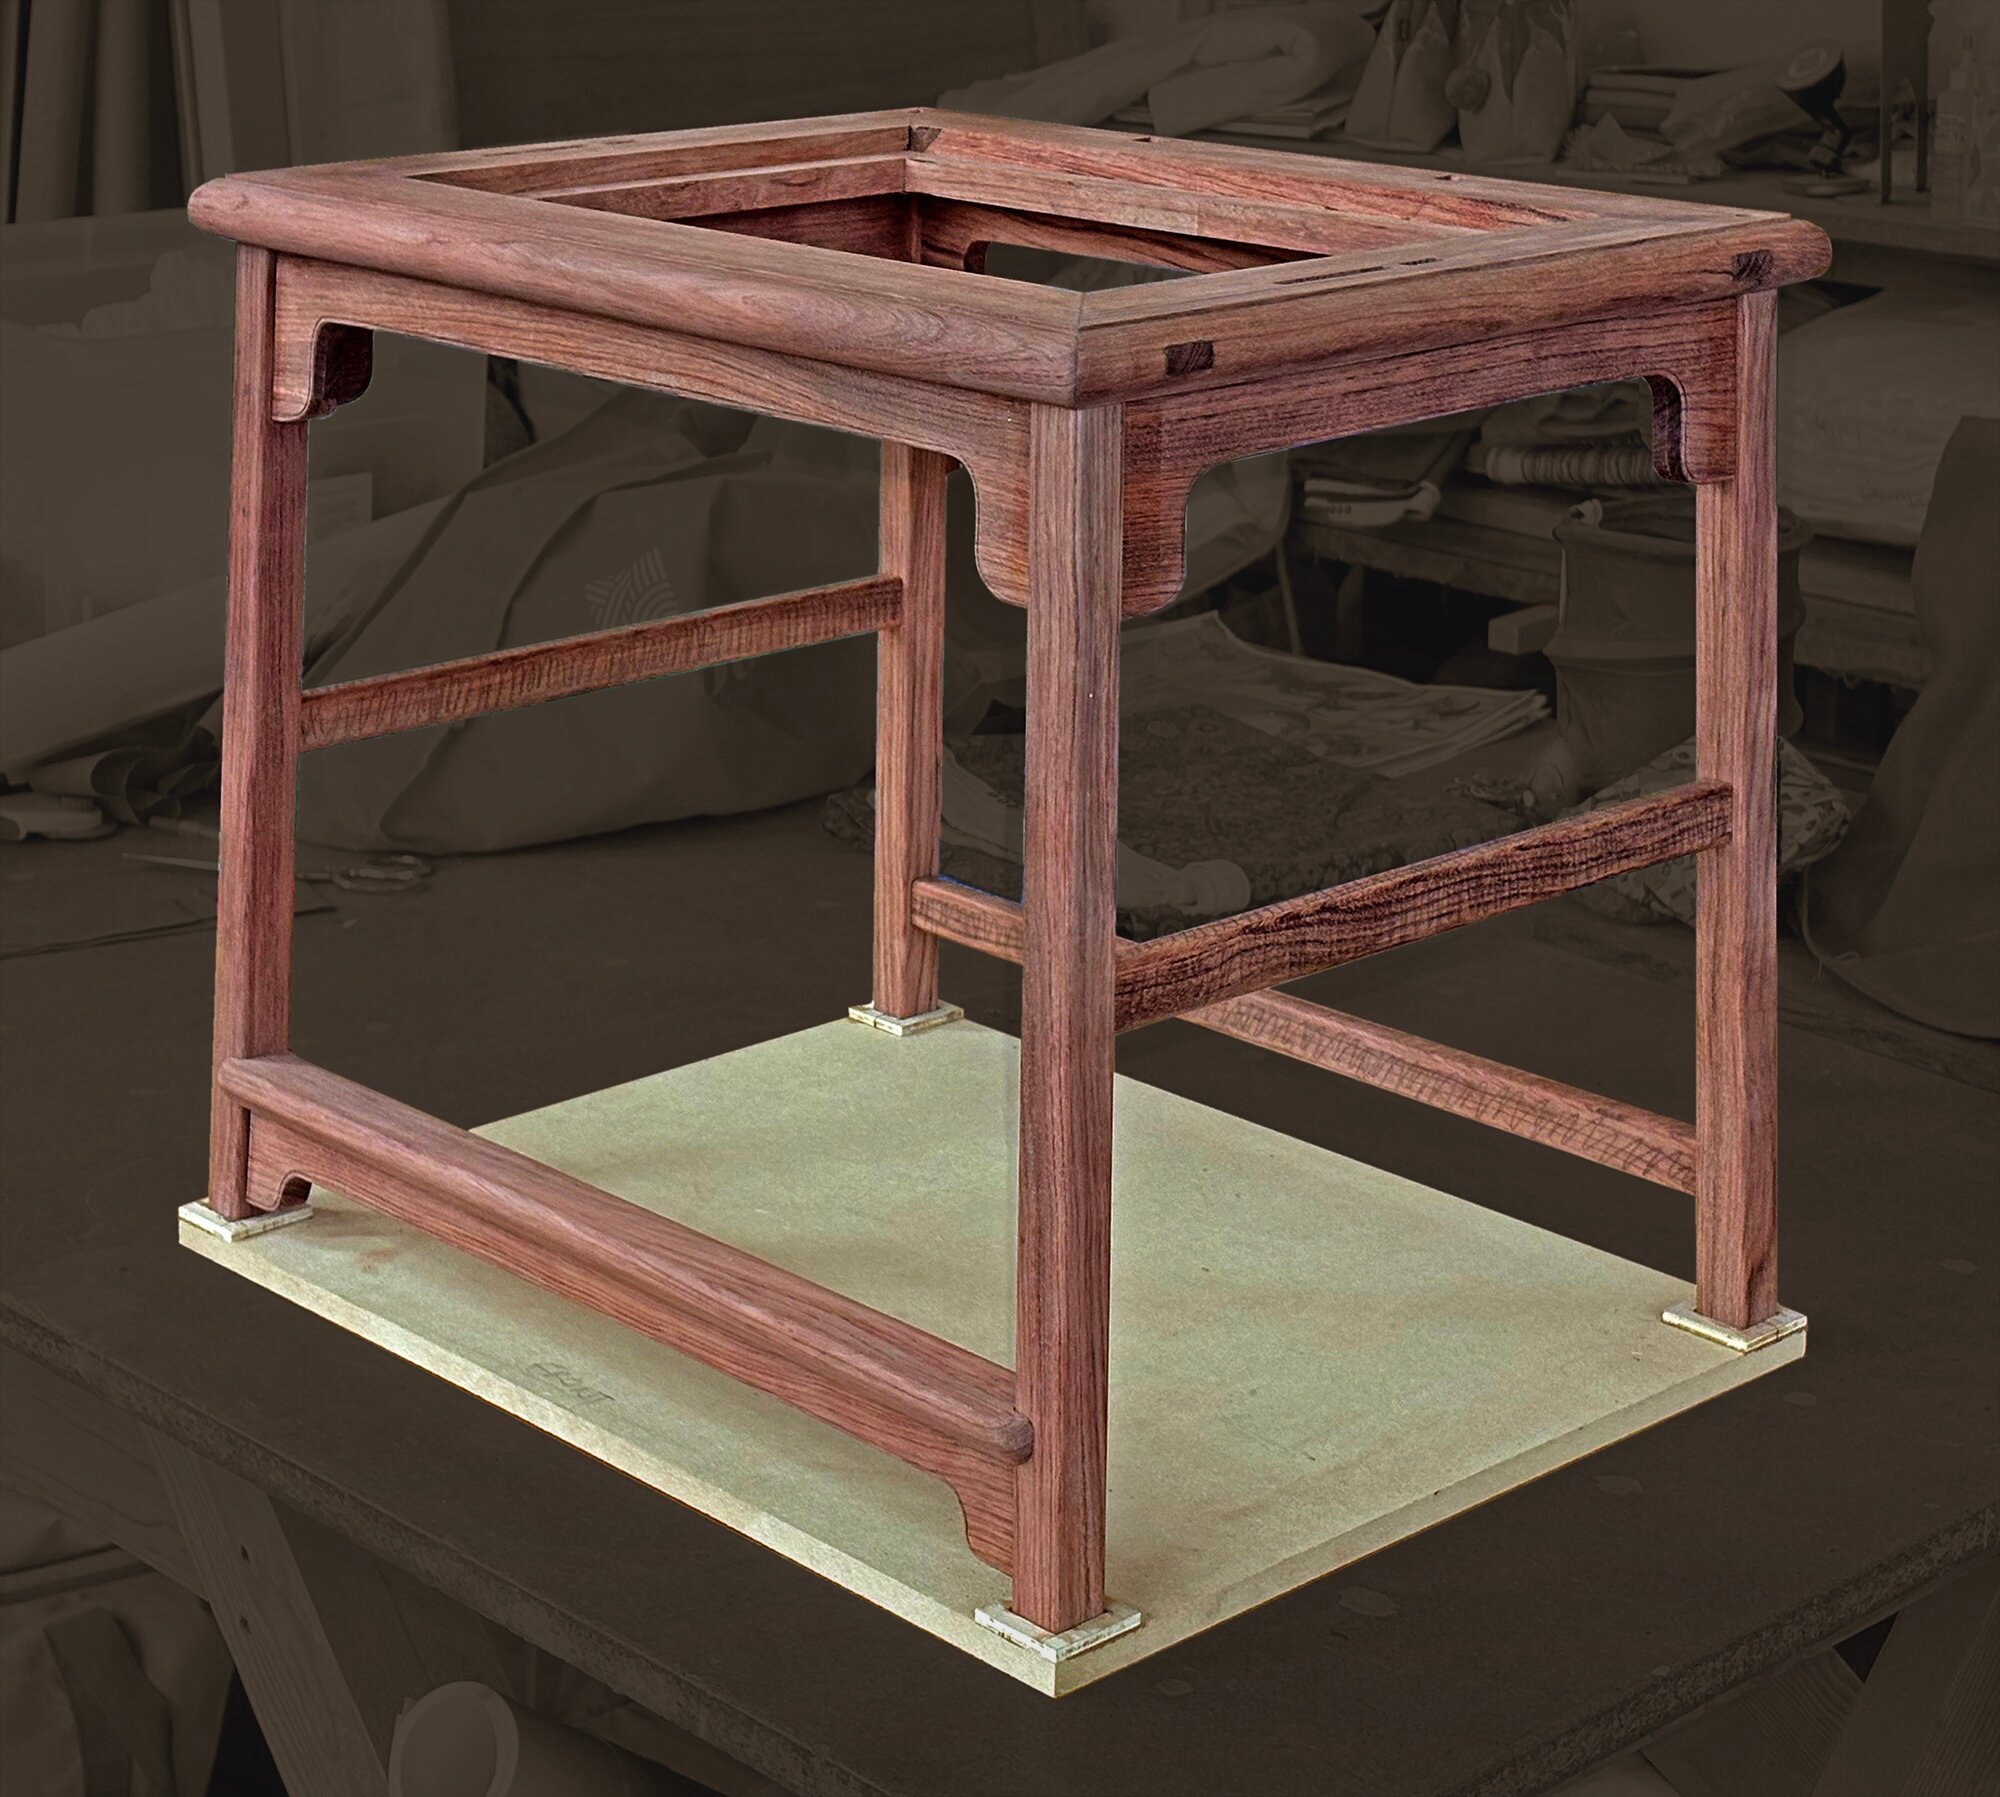
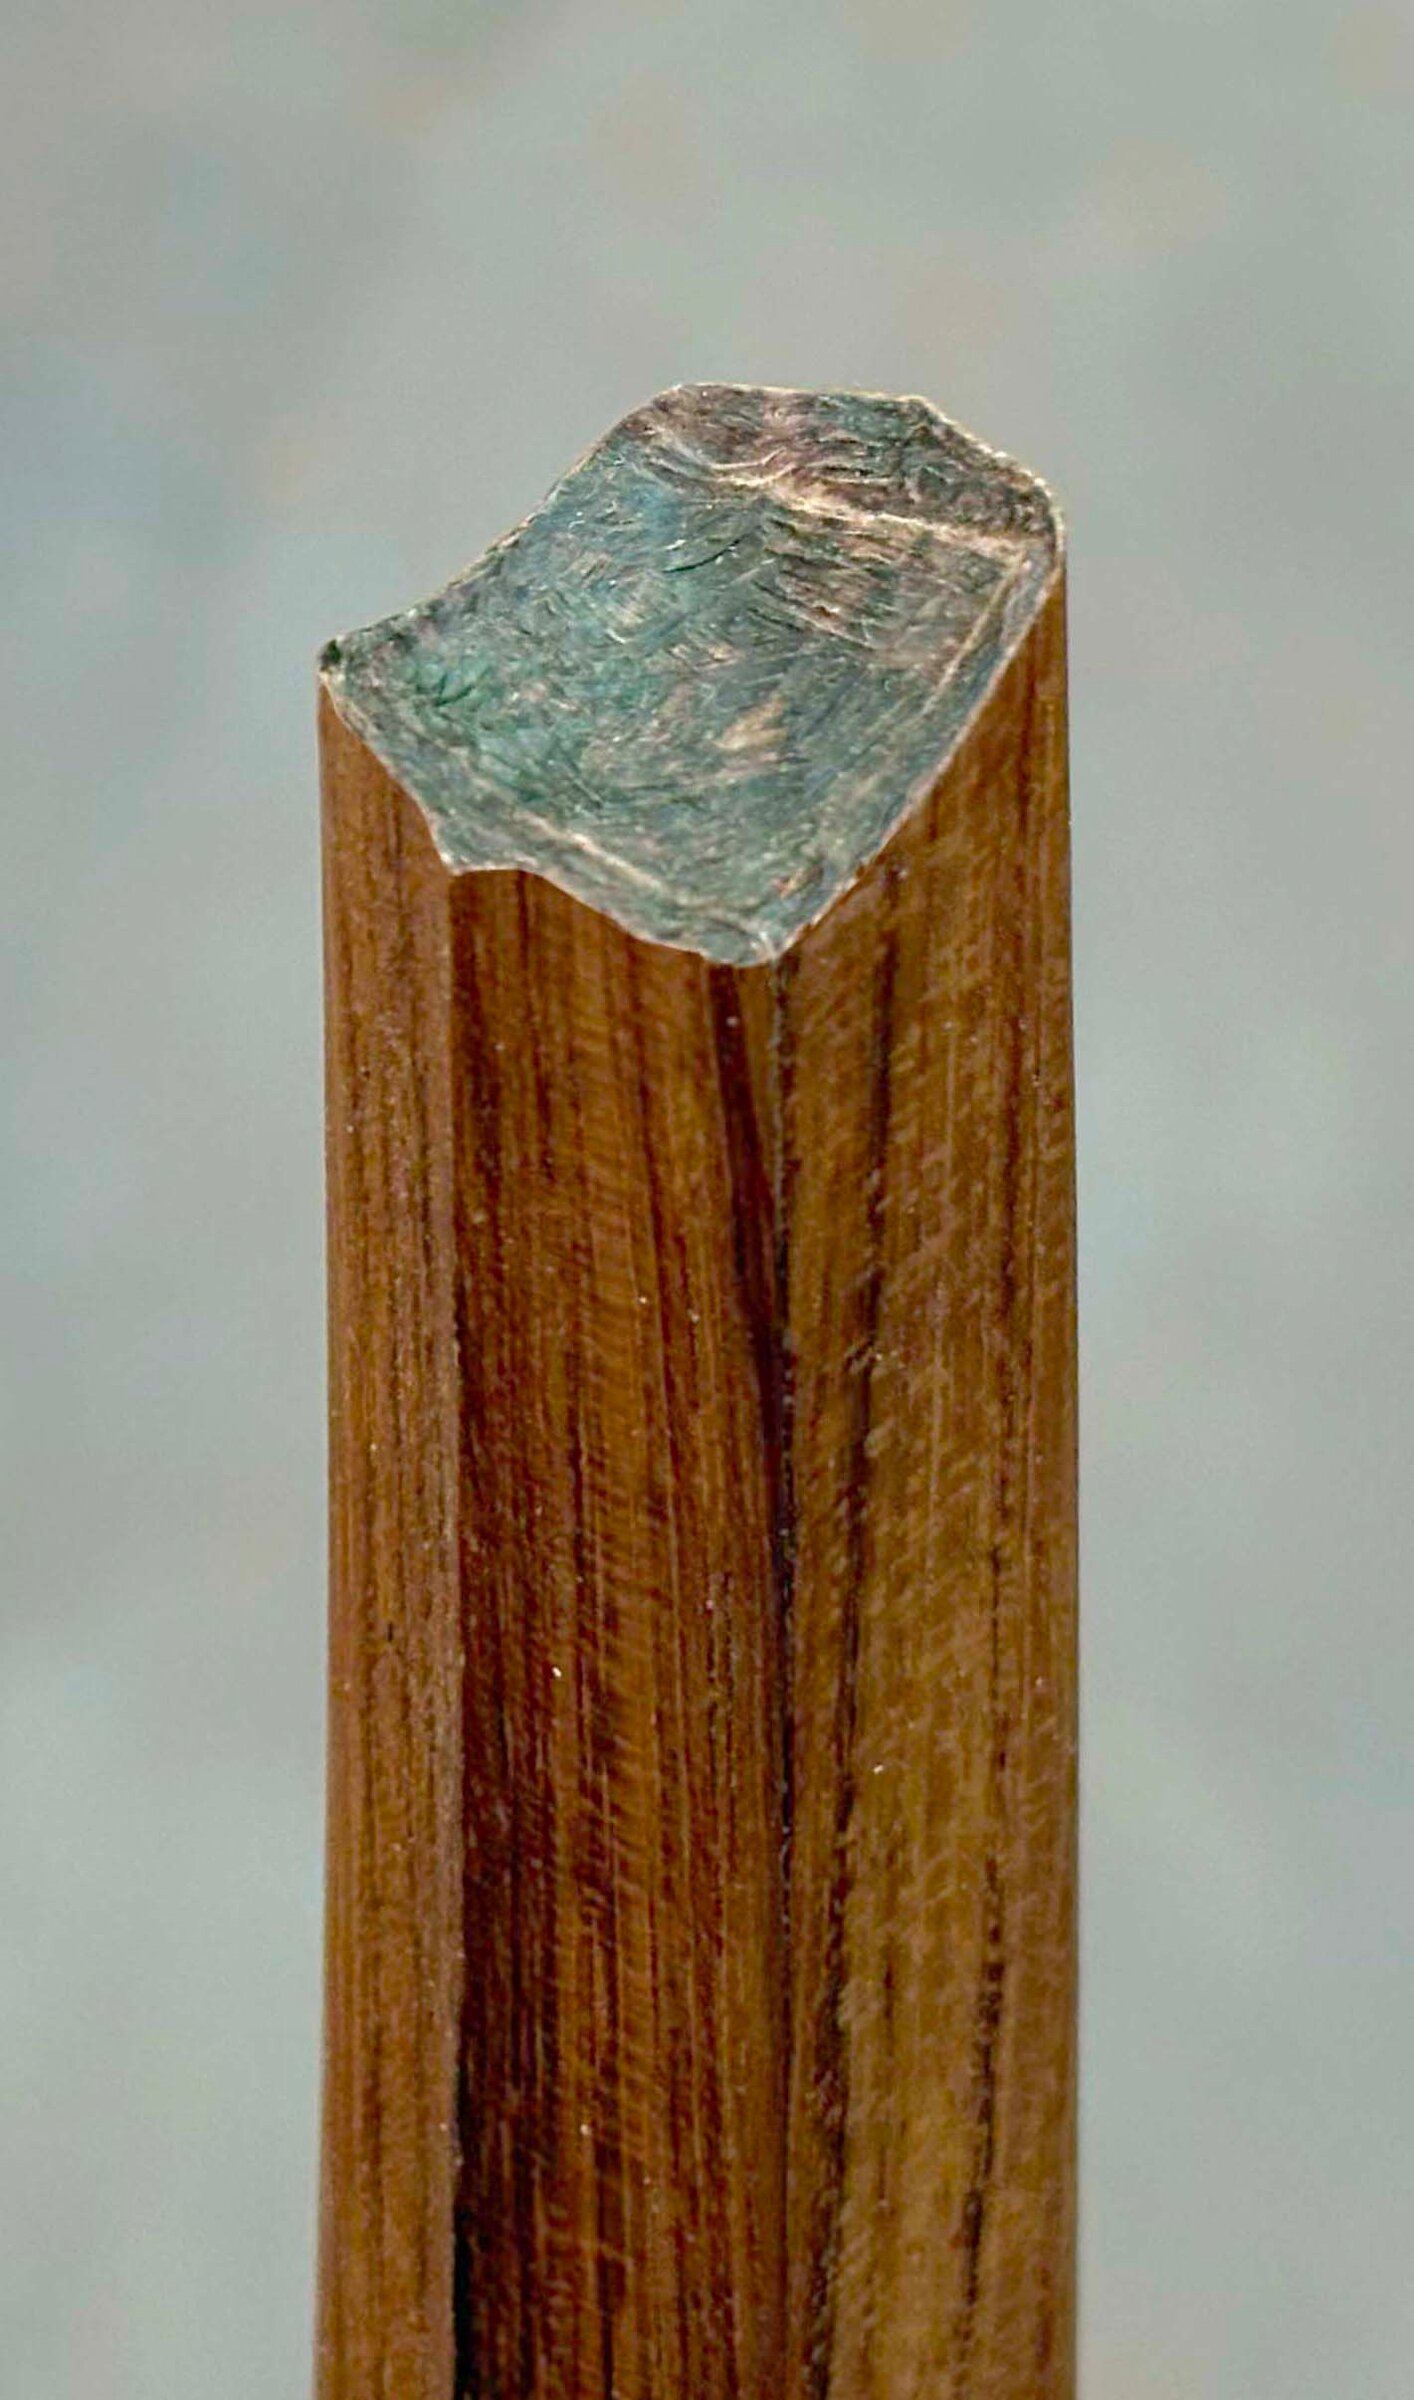
Ellsworth noted wooden pins in the mortise-and-tenon joints of all the stretchers, and one in the middle of each apron. We used pins too, cut from 2-56 threaded rod and set in epoxy. The rod was in the shop, and I never wanted these chairs coming loose.

The front posts
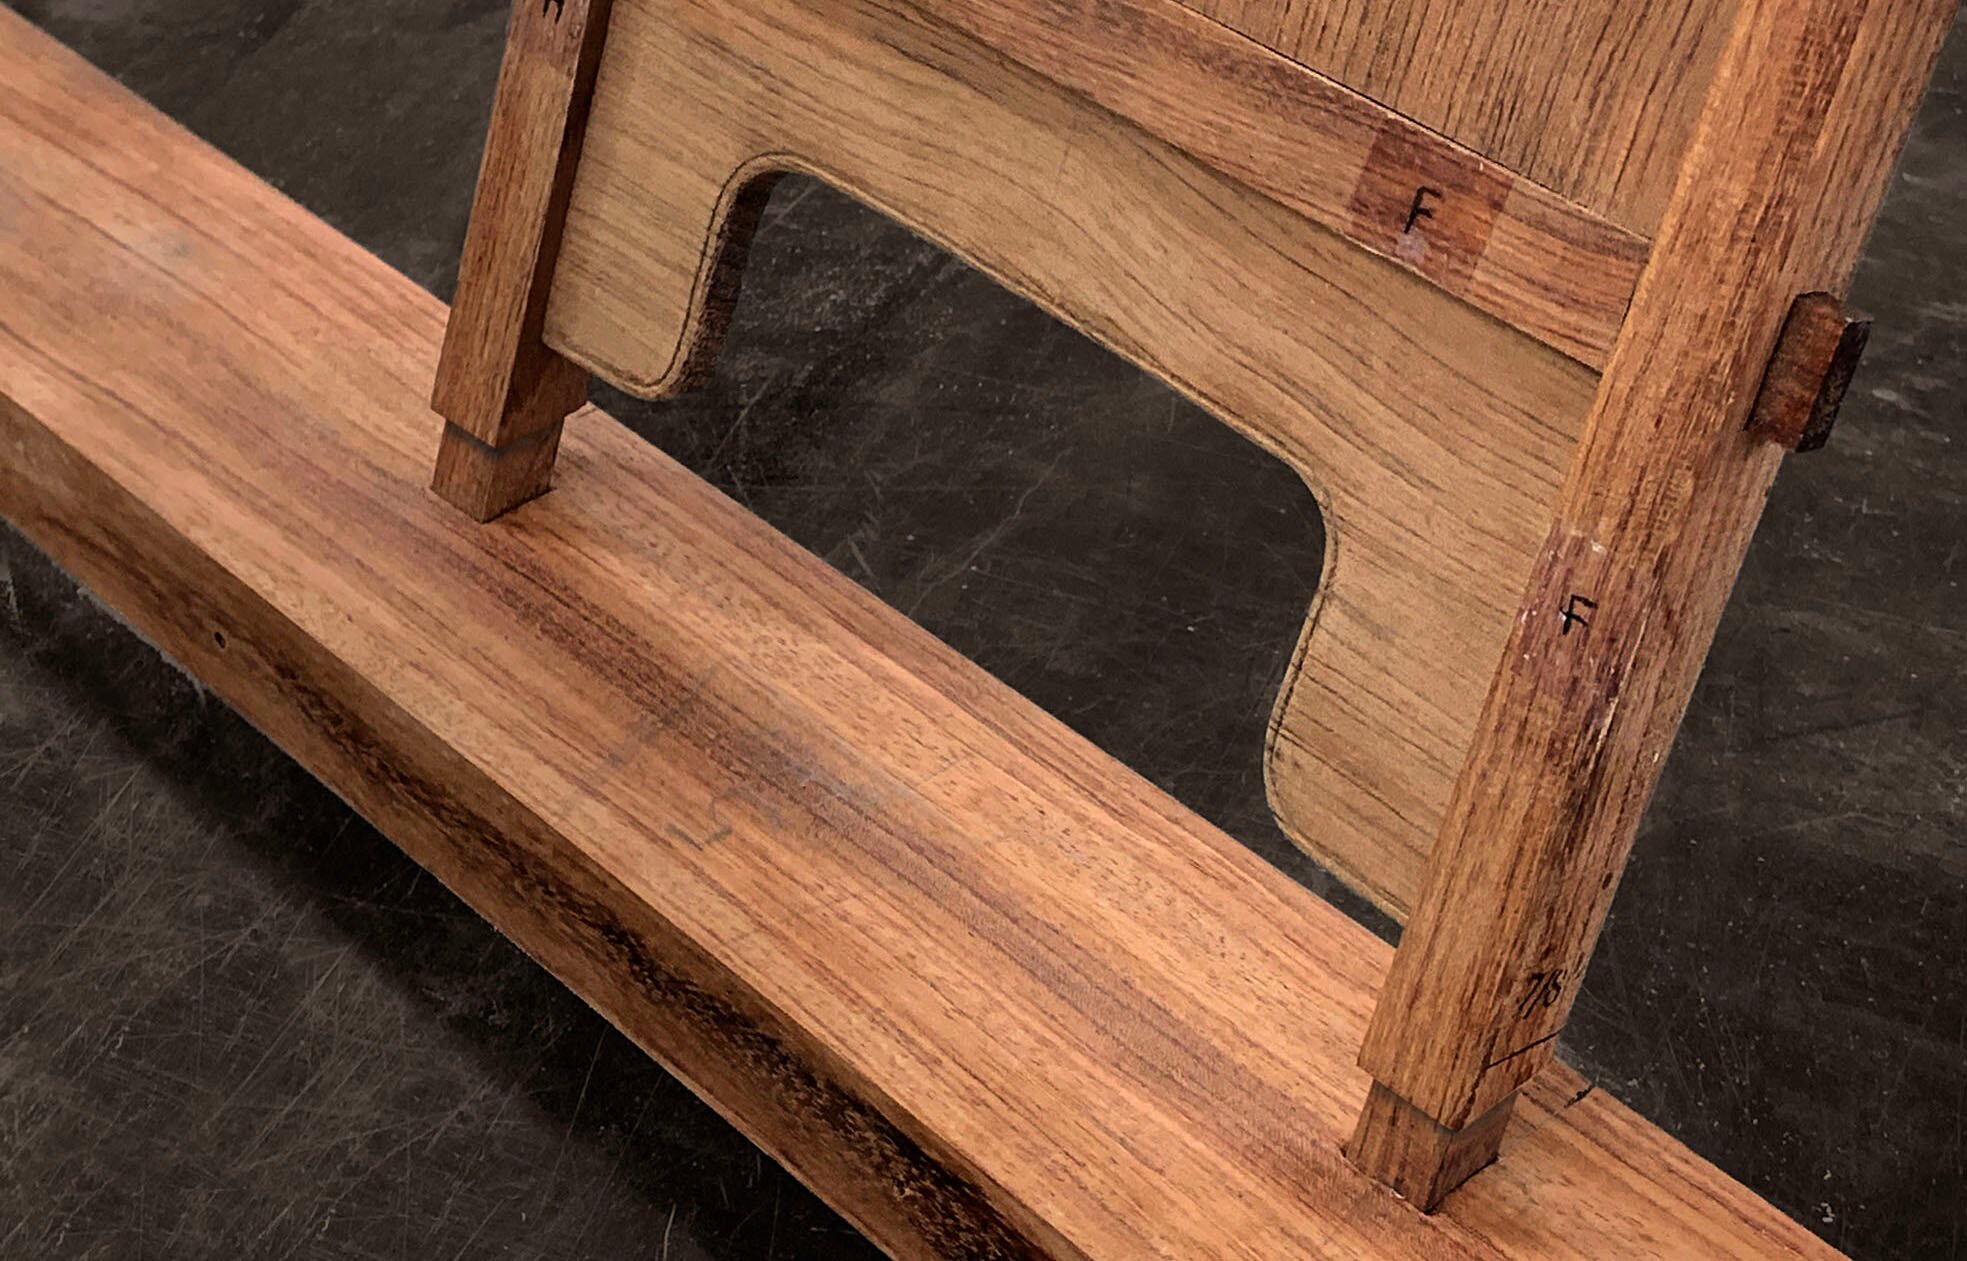
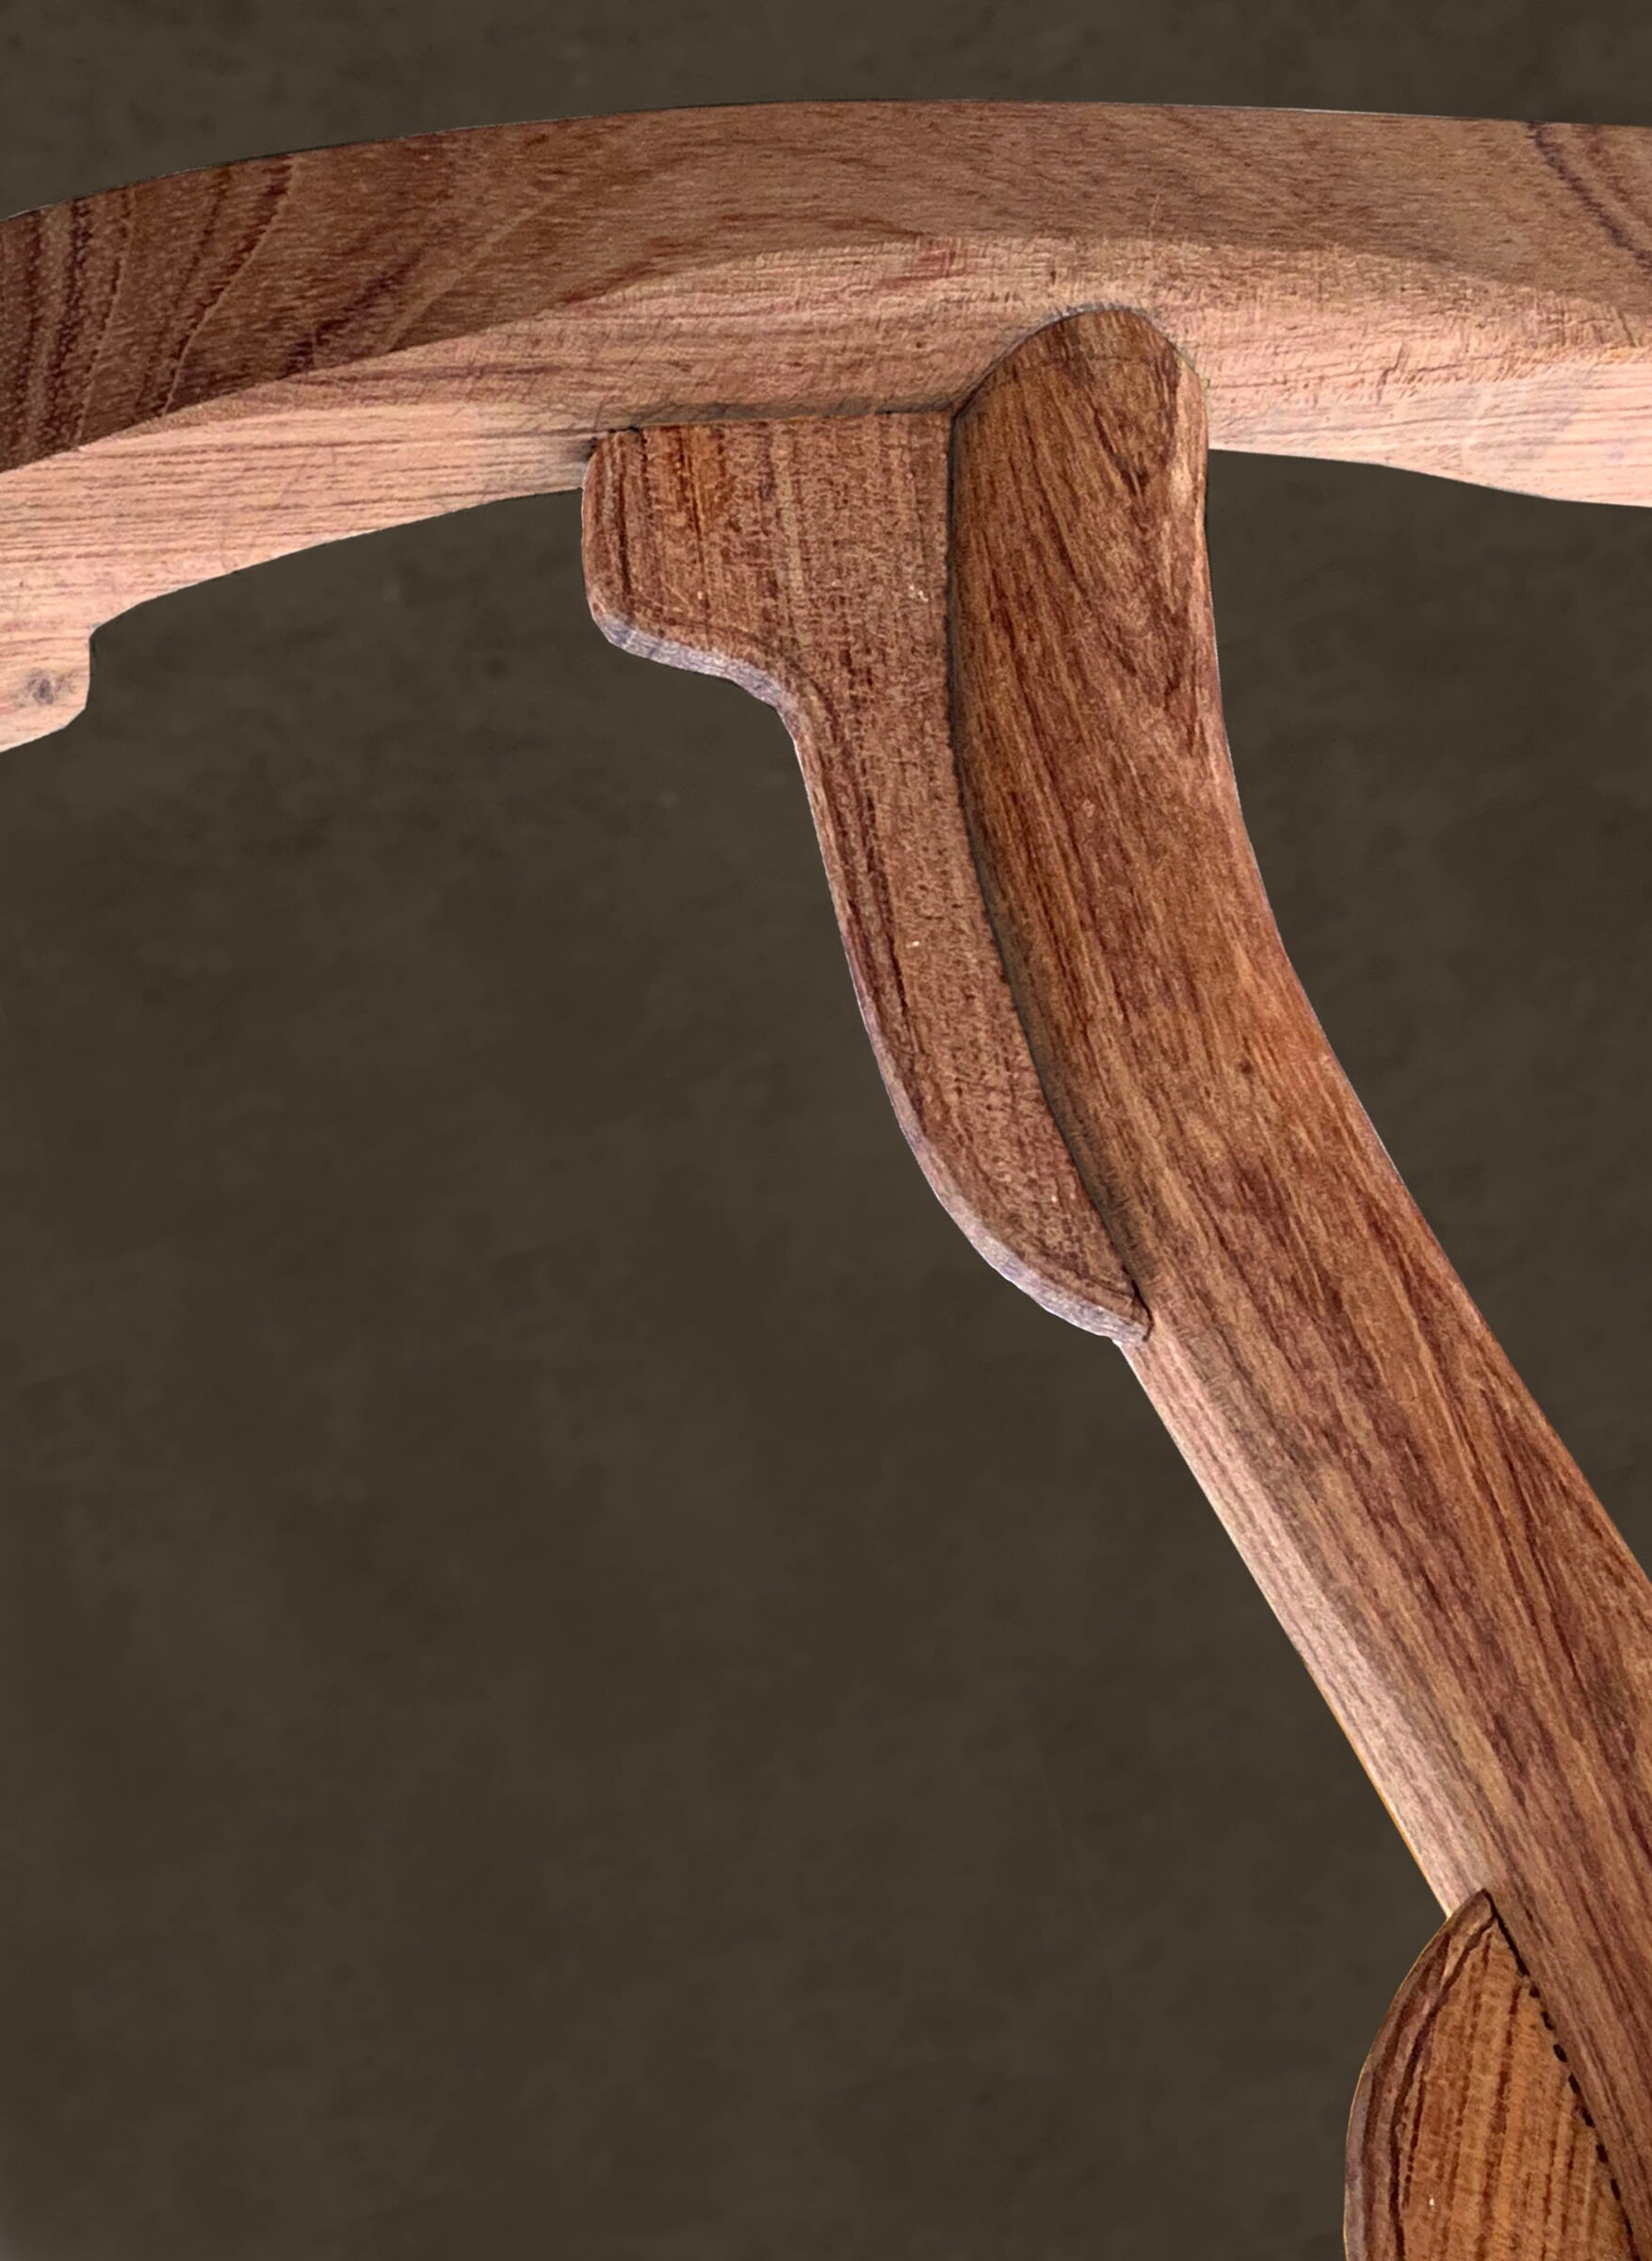
Each front post is an S-shape that rises from the side of the seat to the underside of the arm. A small bracket called a spandrel sits at each end.
Charlie worked out a way to build each post in three layers, leaving gaps in the center layer for the mortises. The center layer, the small floating tenons, and both spandrels all came from one piece of wood, ¼ inch thick. That gave the mortises and tenons matching thicknesses.

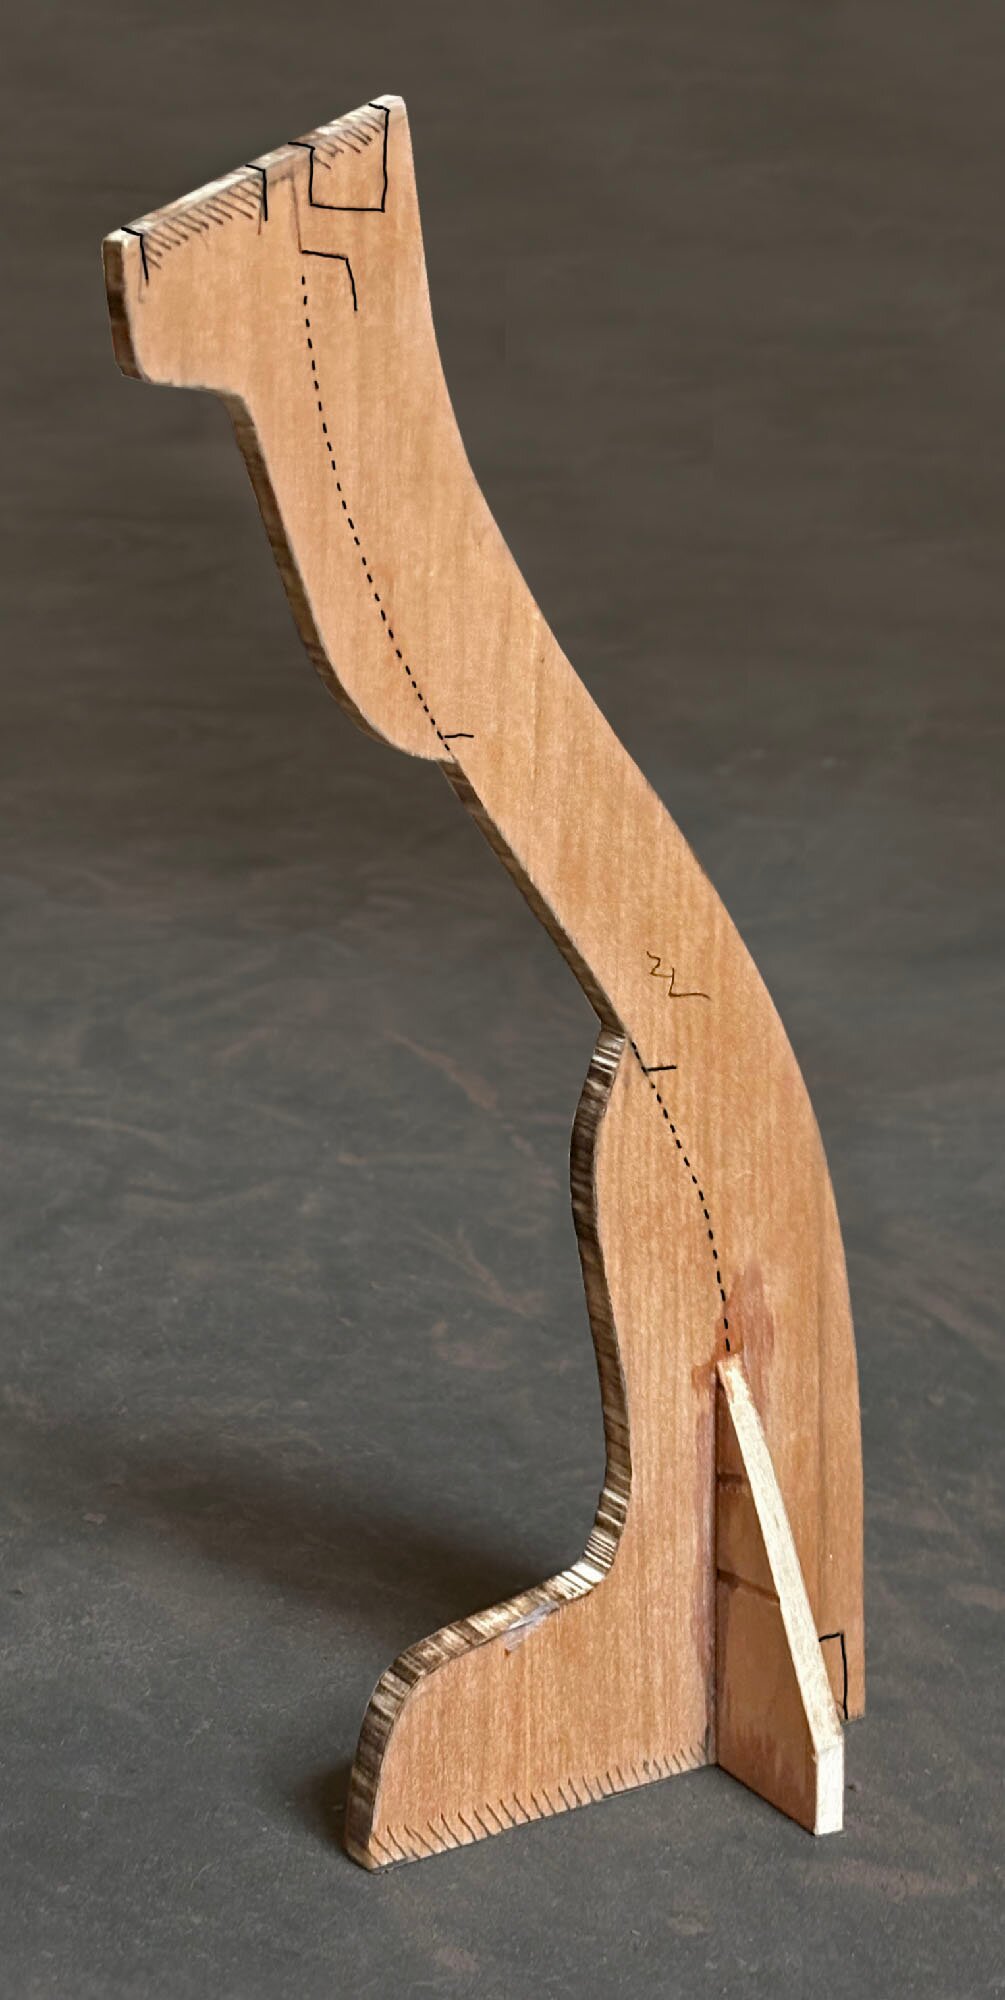


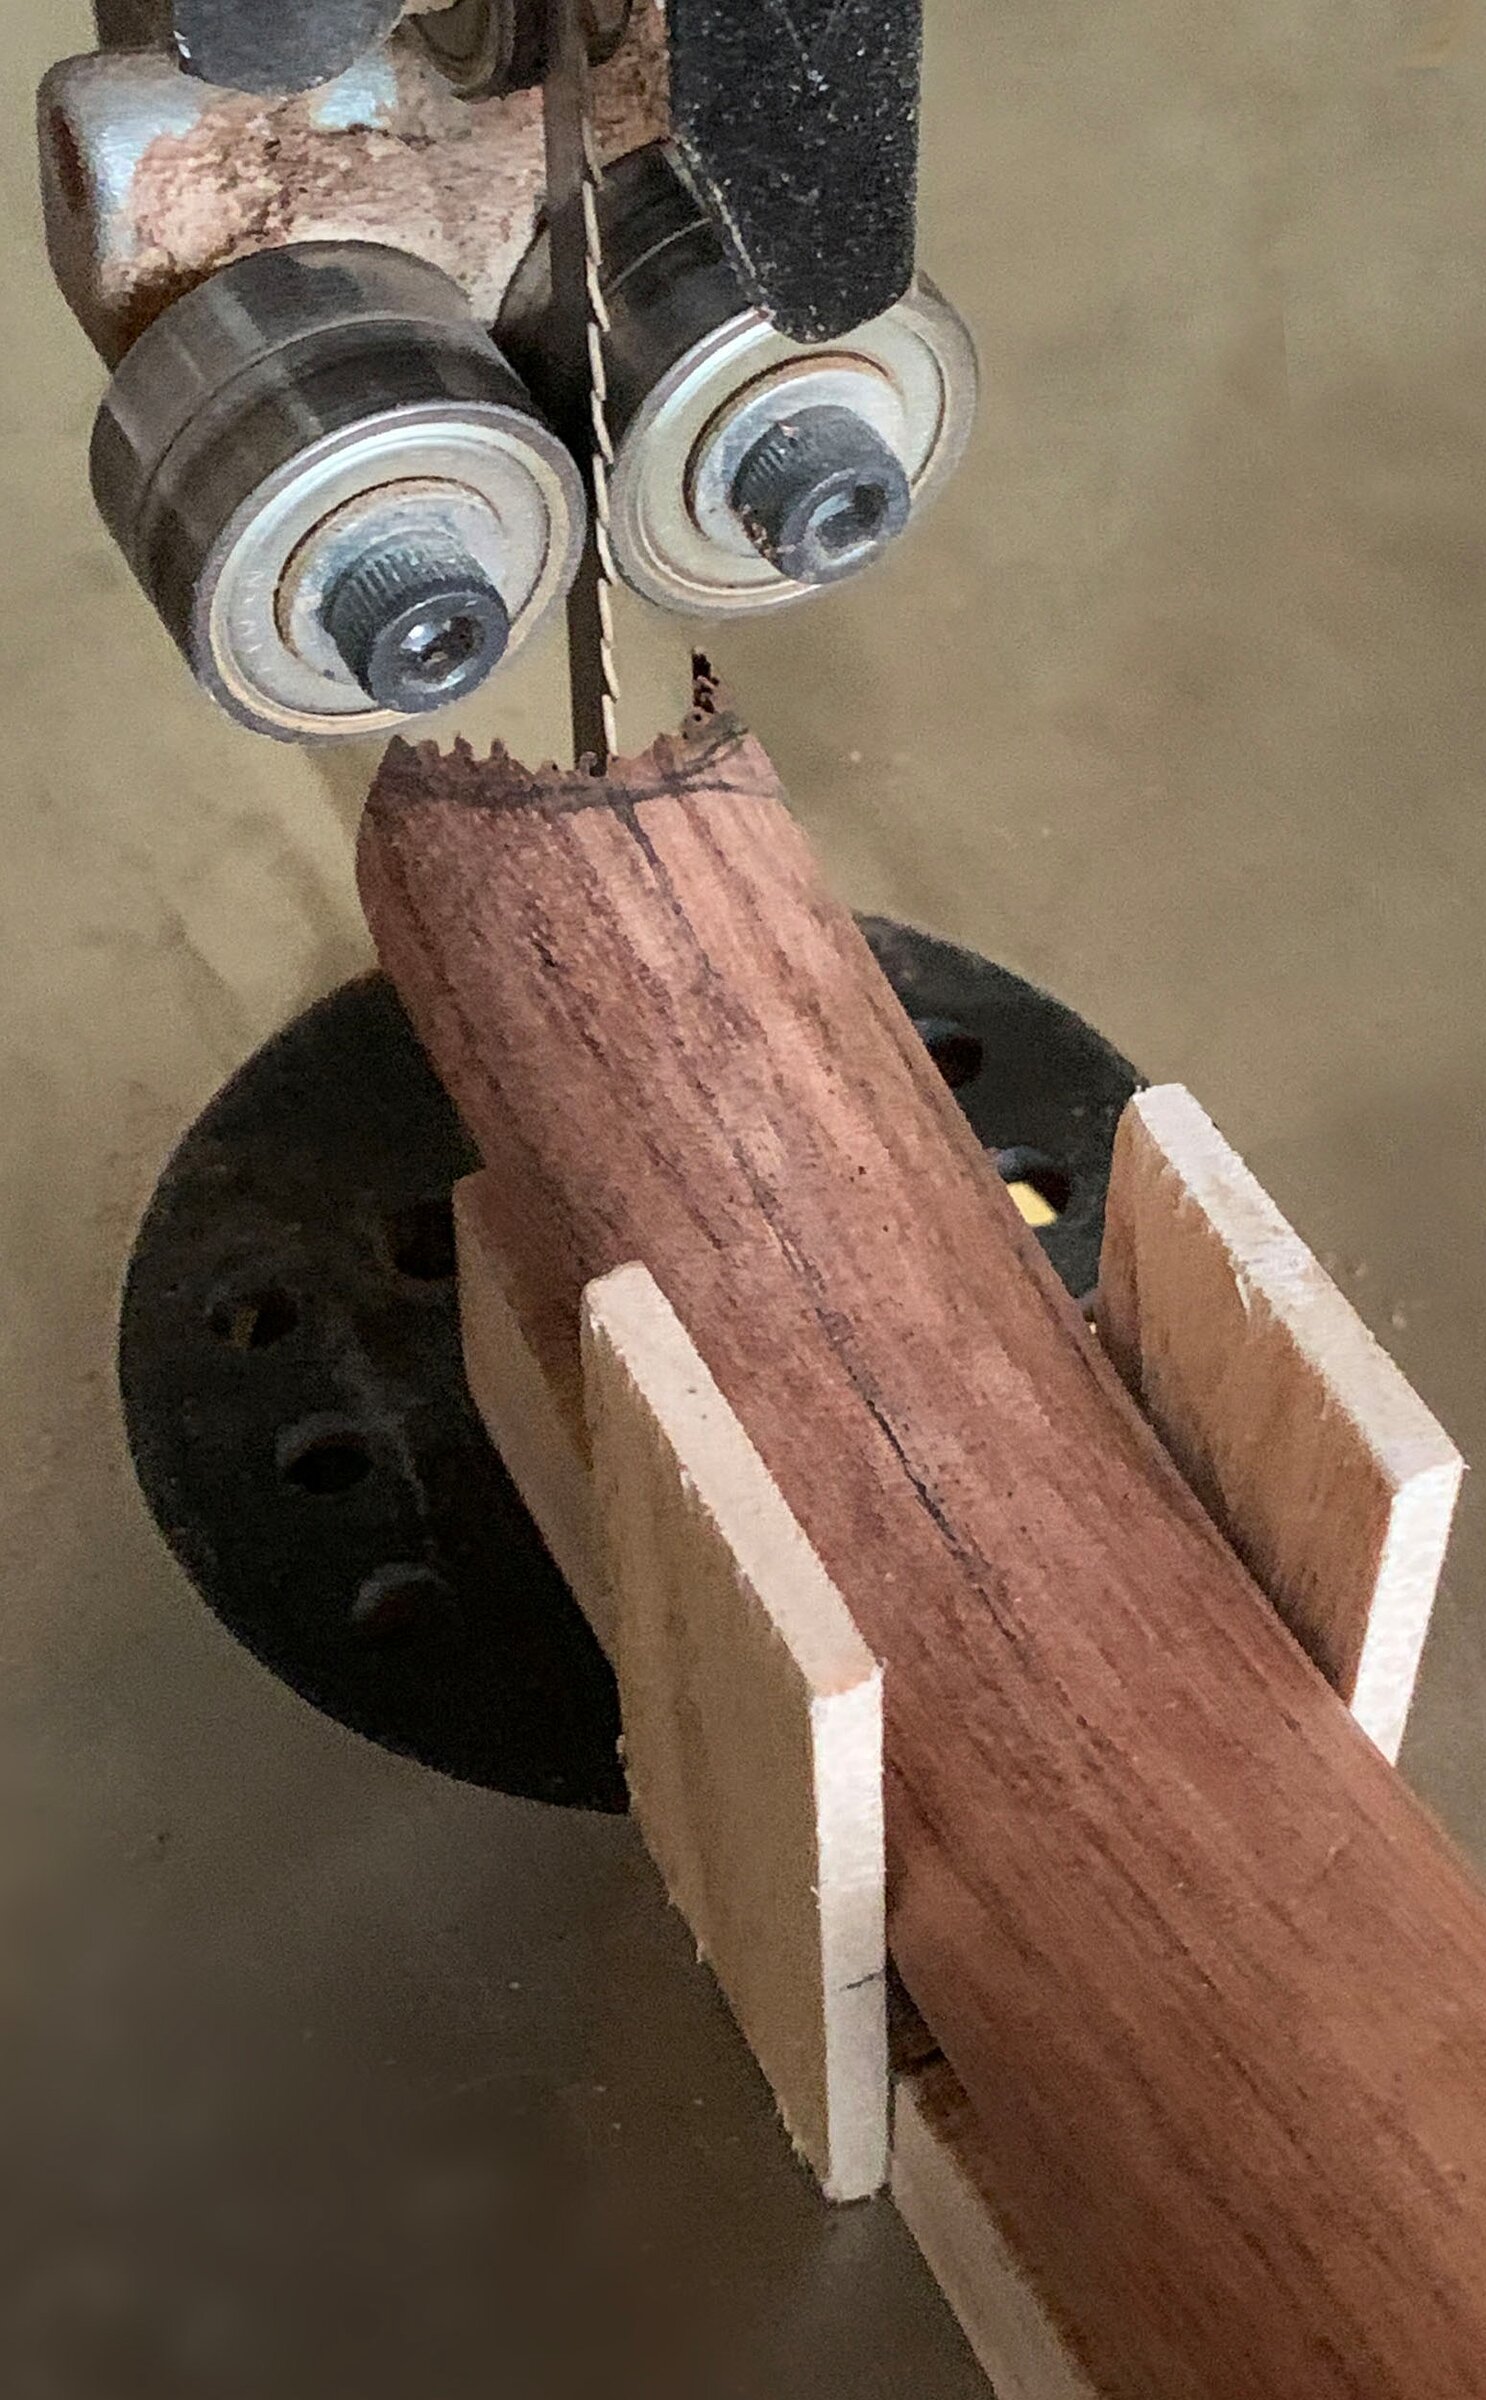
The posts curve in two directions. We sawed and sanded them in a jig, then rounded them on an oscillating spindle sander.



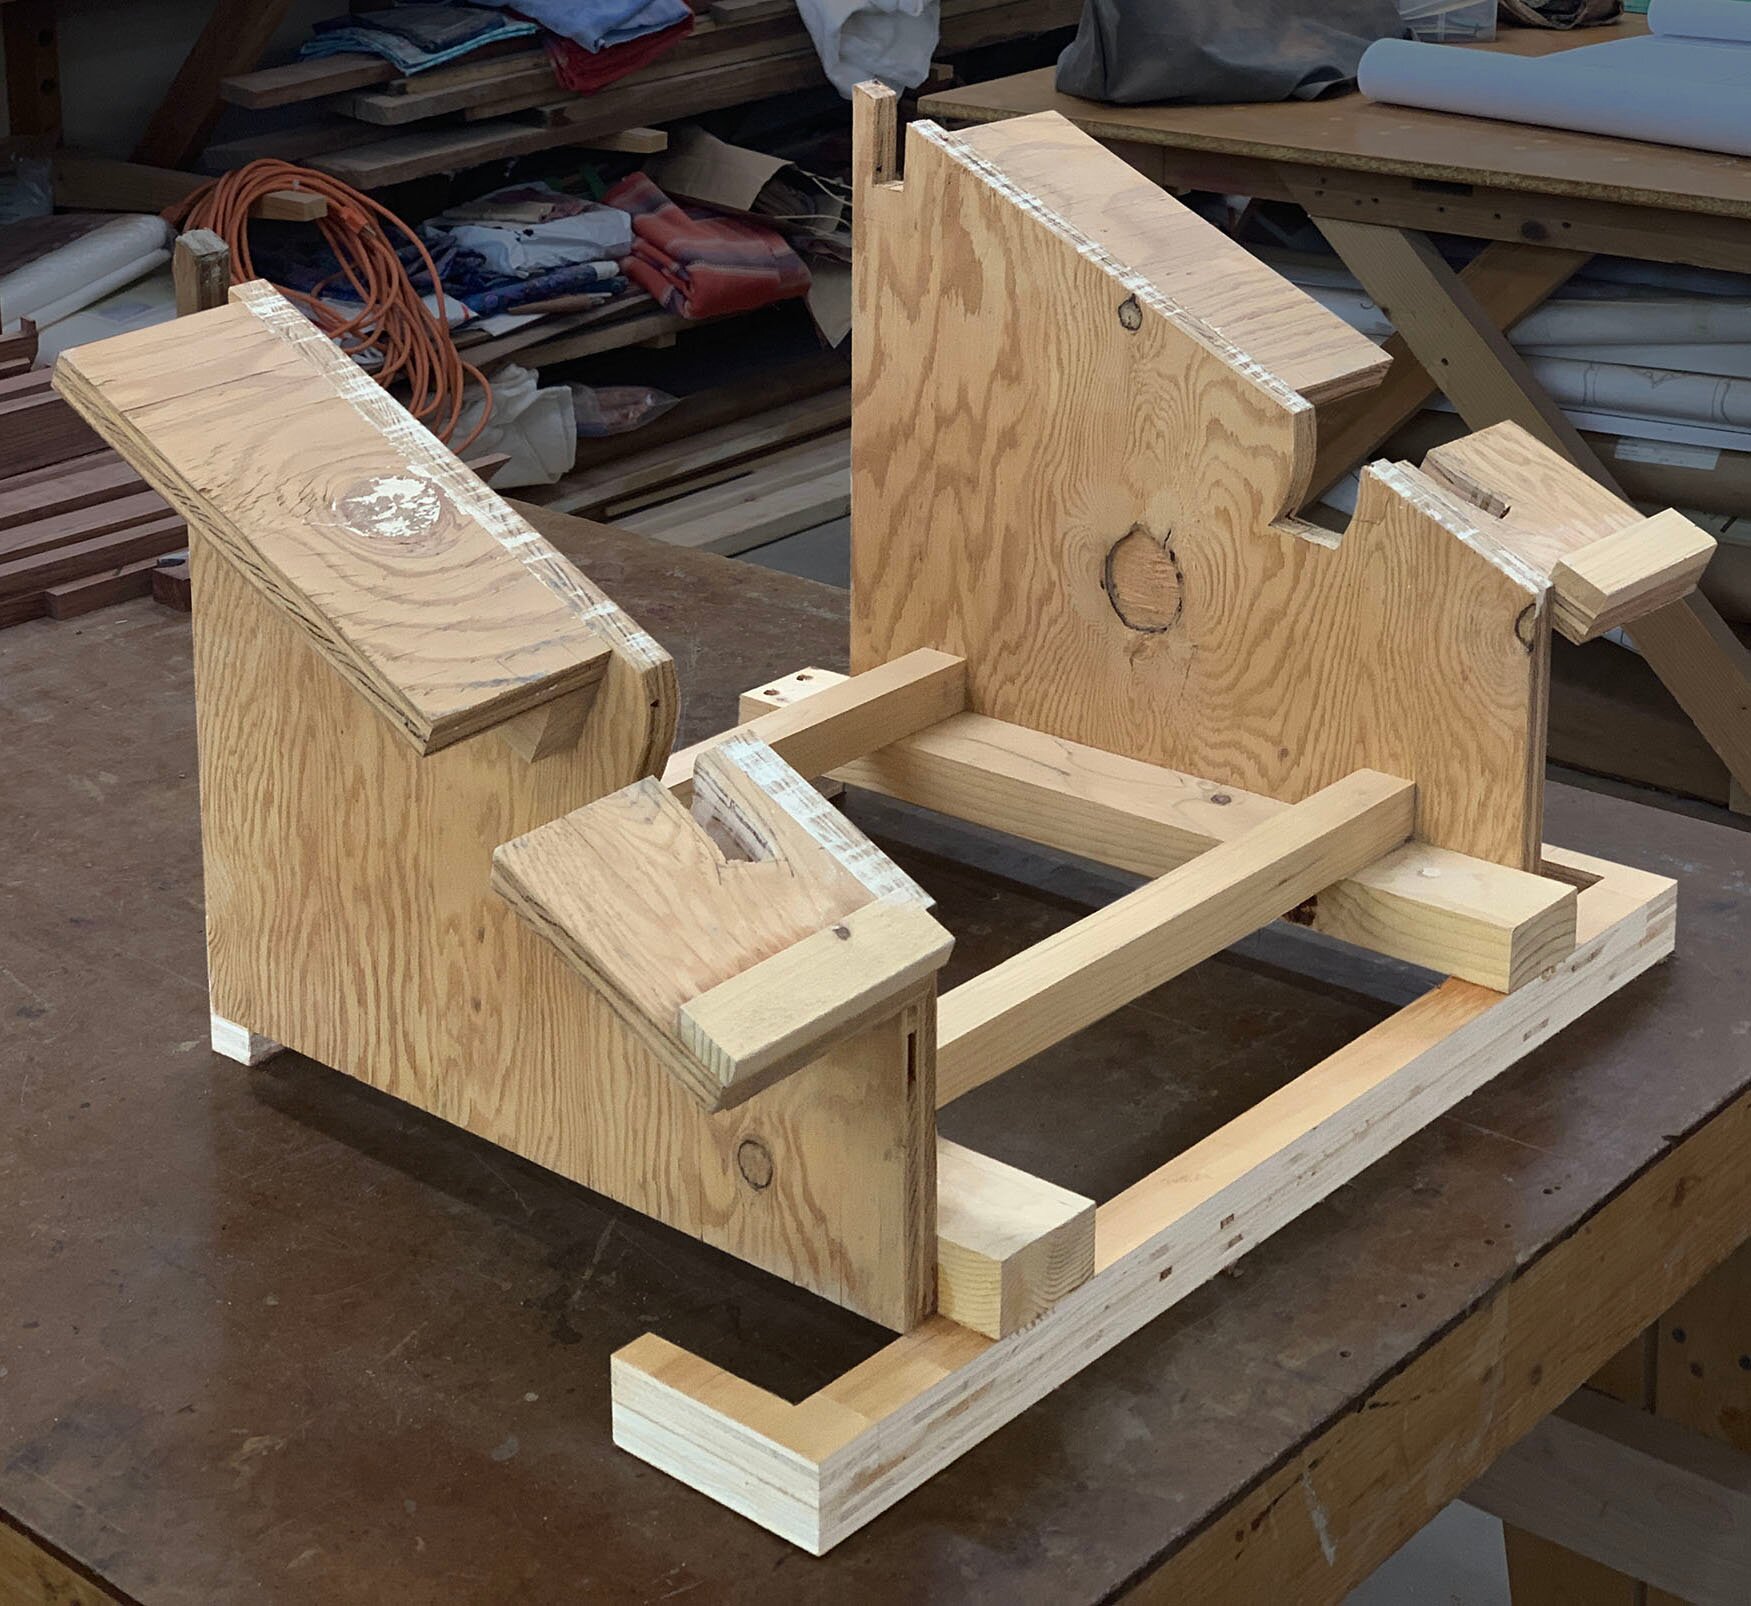
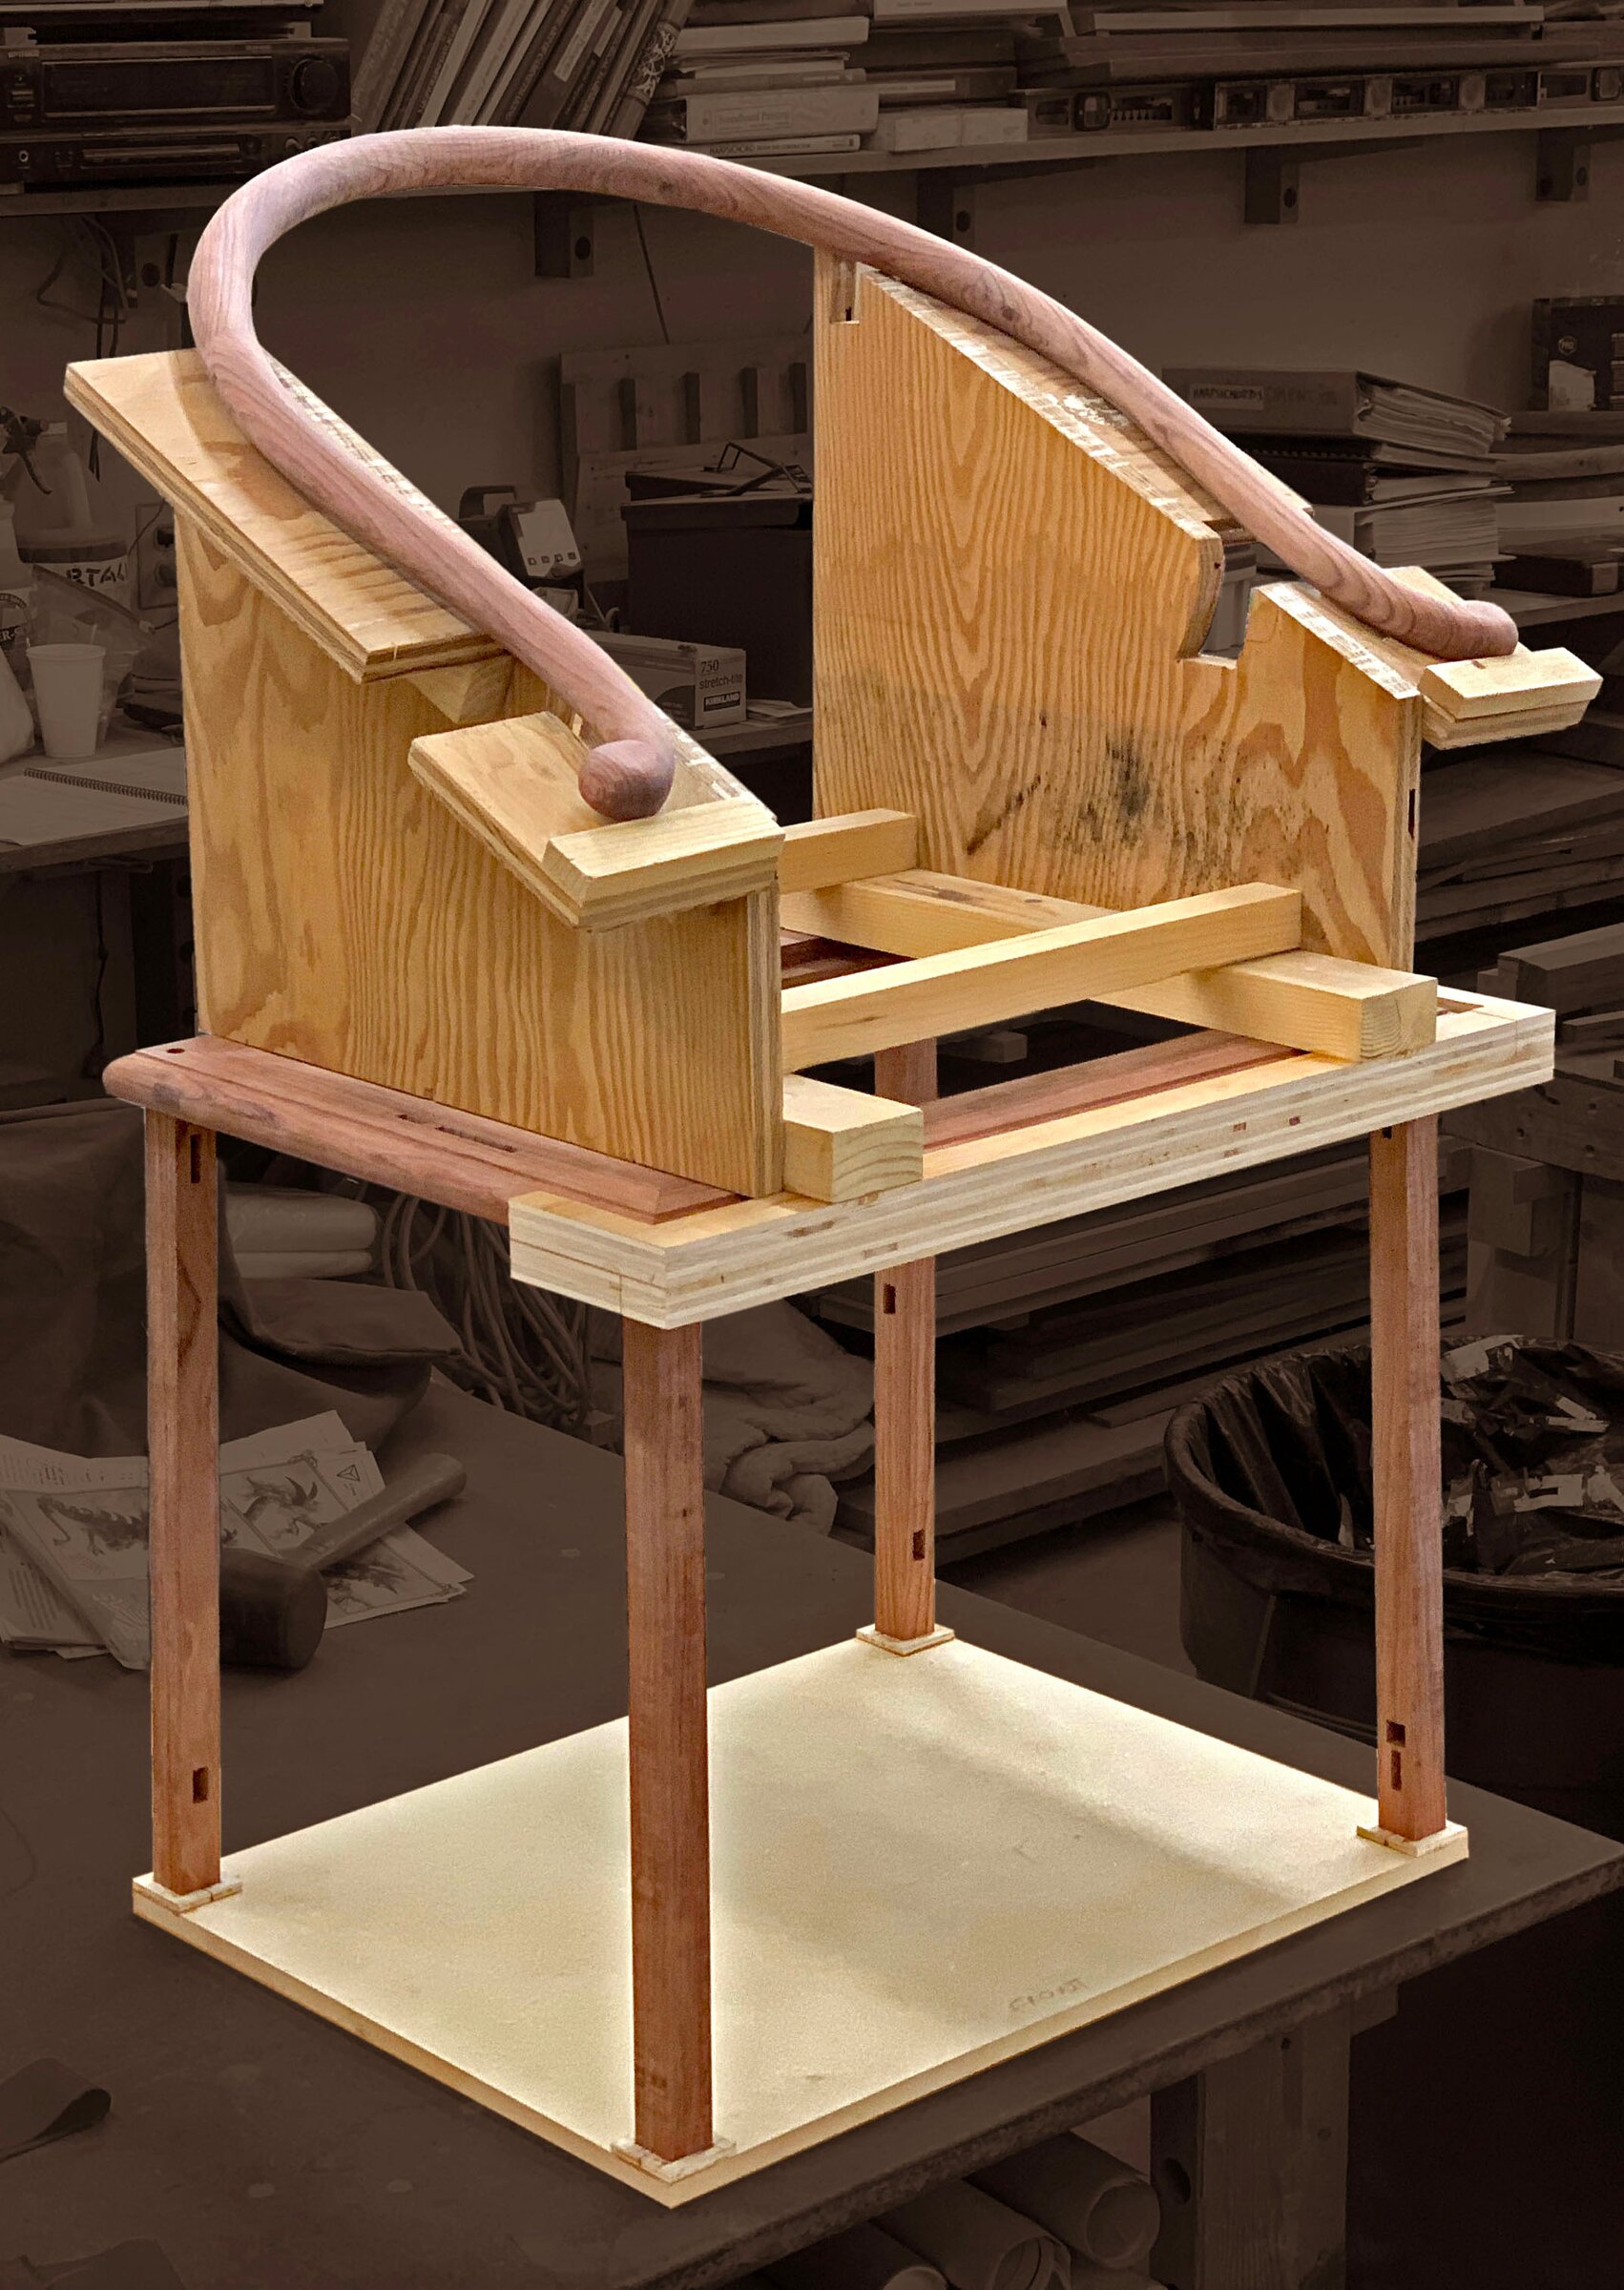
To fit the arm, we made a plywood jig from the side-view plan. Its upper edge followed the underside of the arm. Set on the base at the right height and slope, it held the arm in position while we located the front posts on the seat and the underside of the arm.



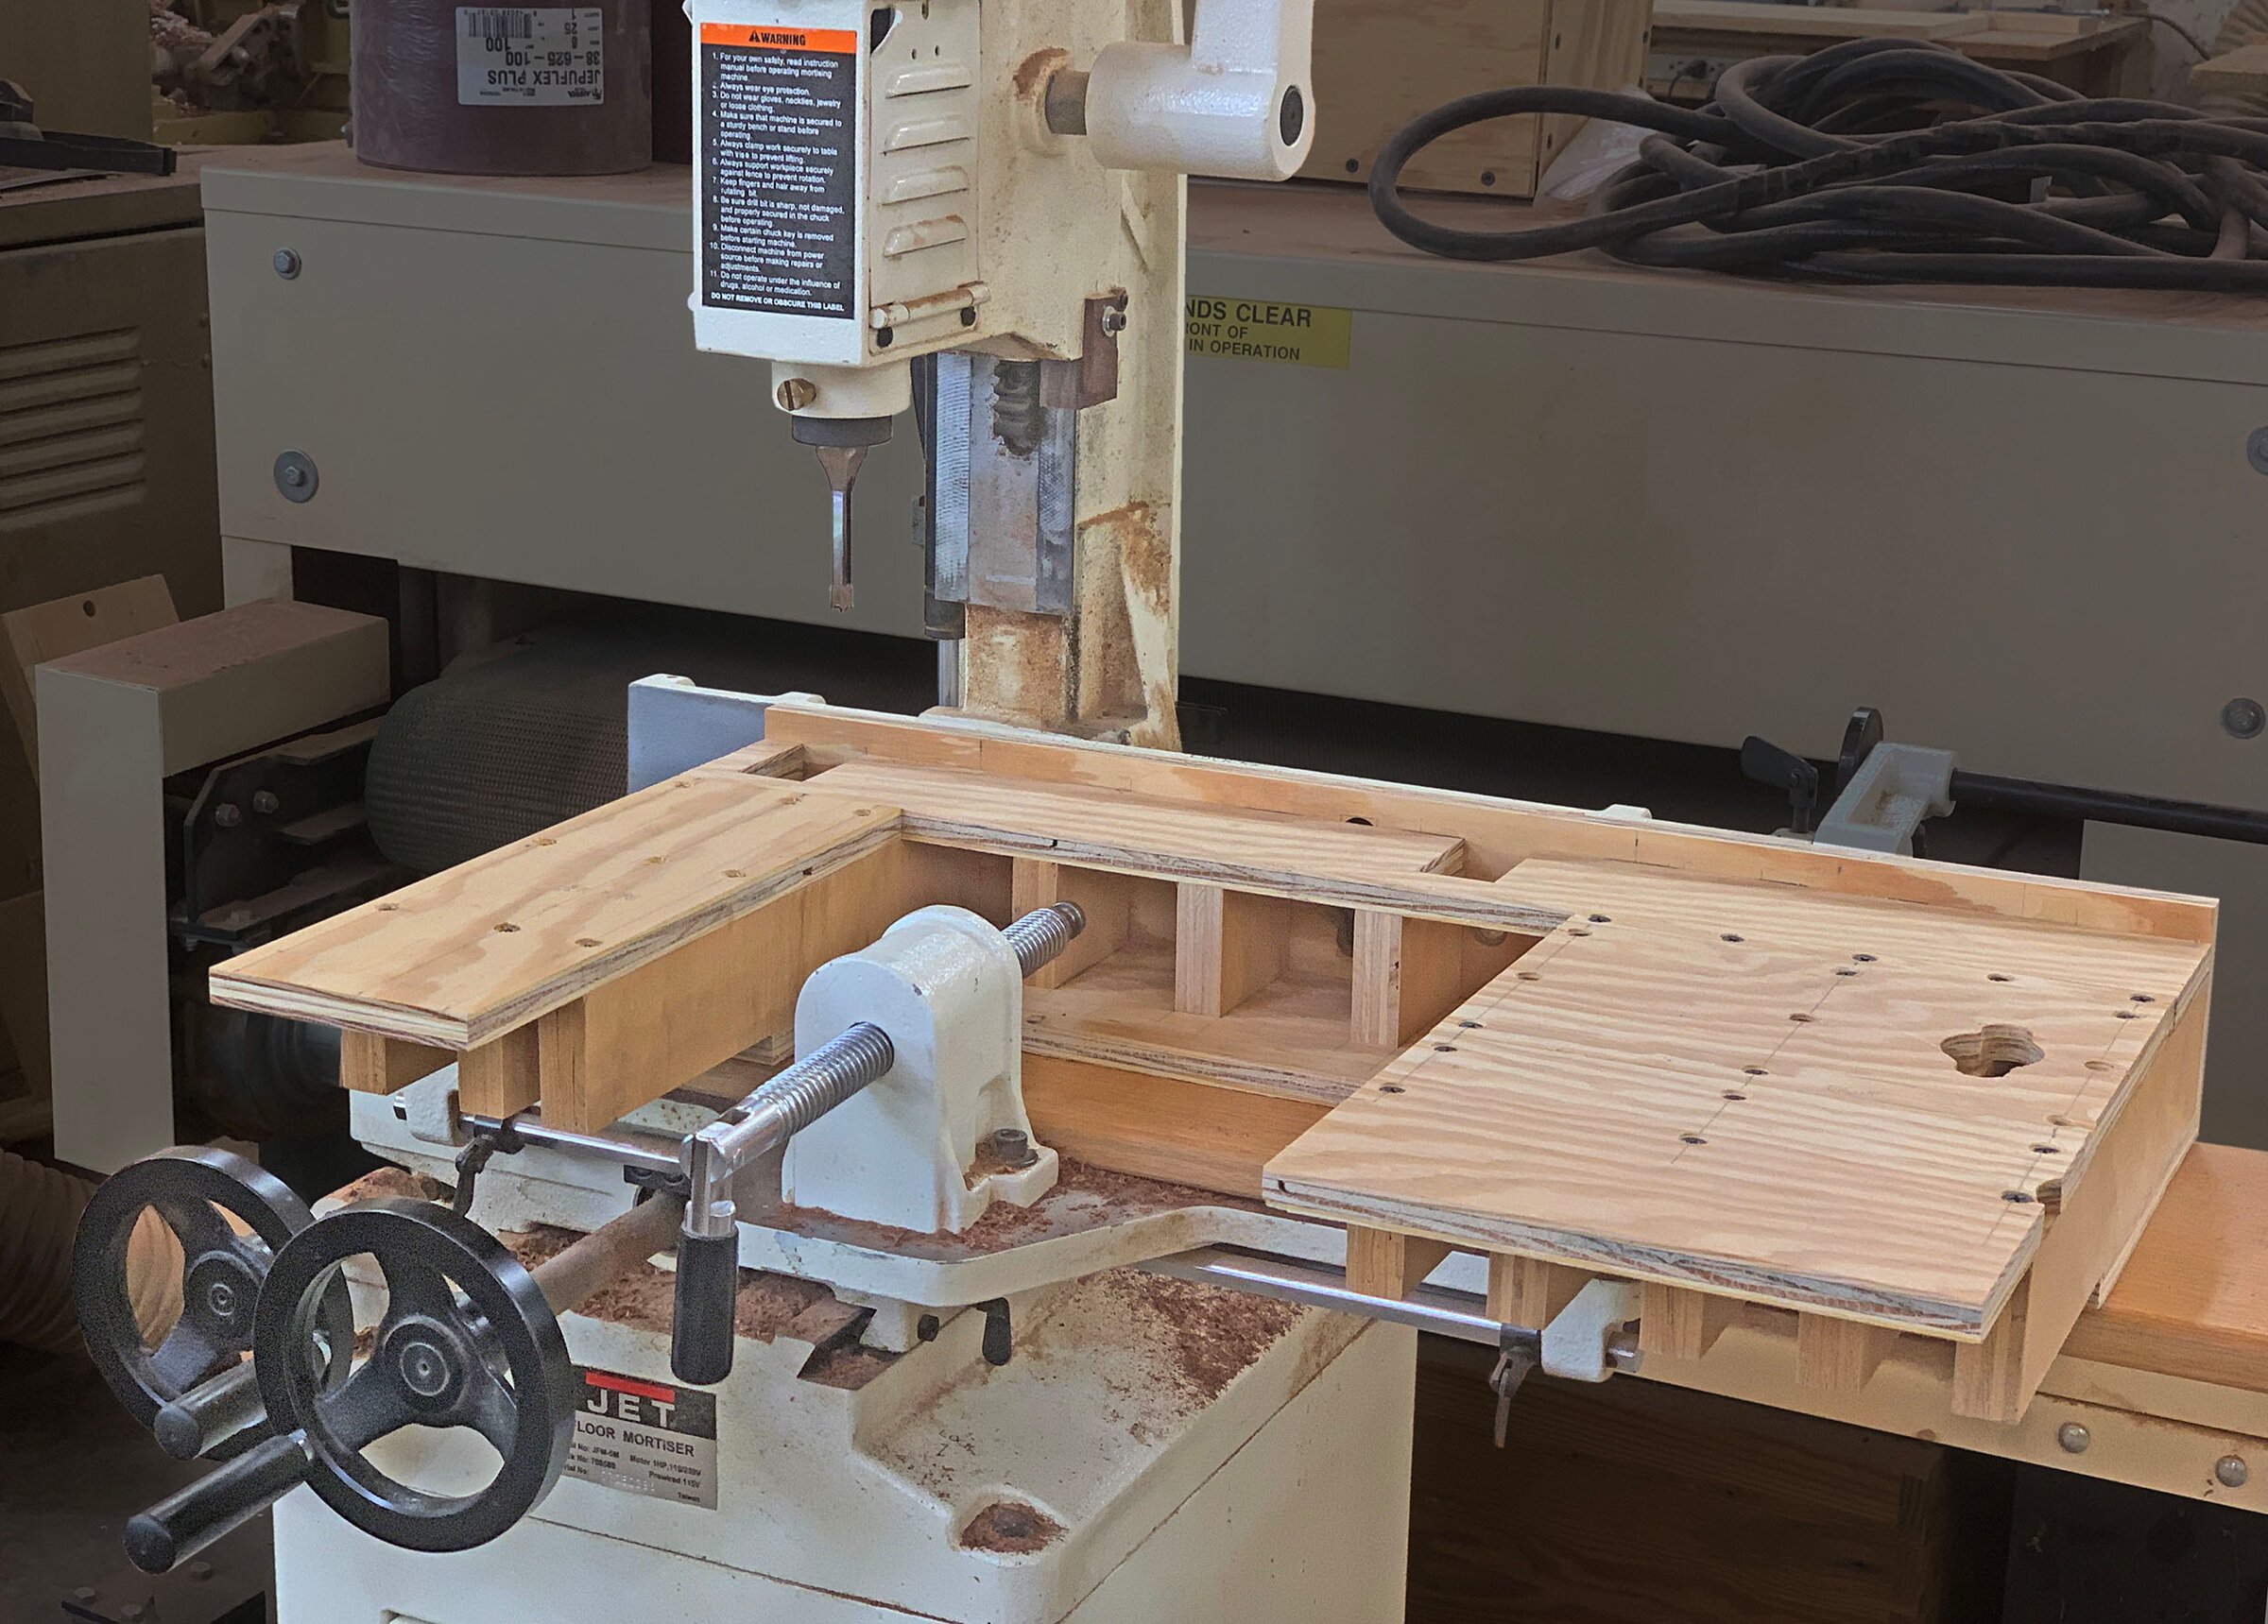
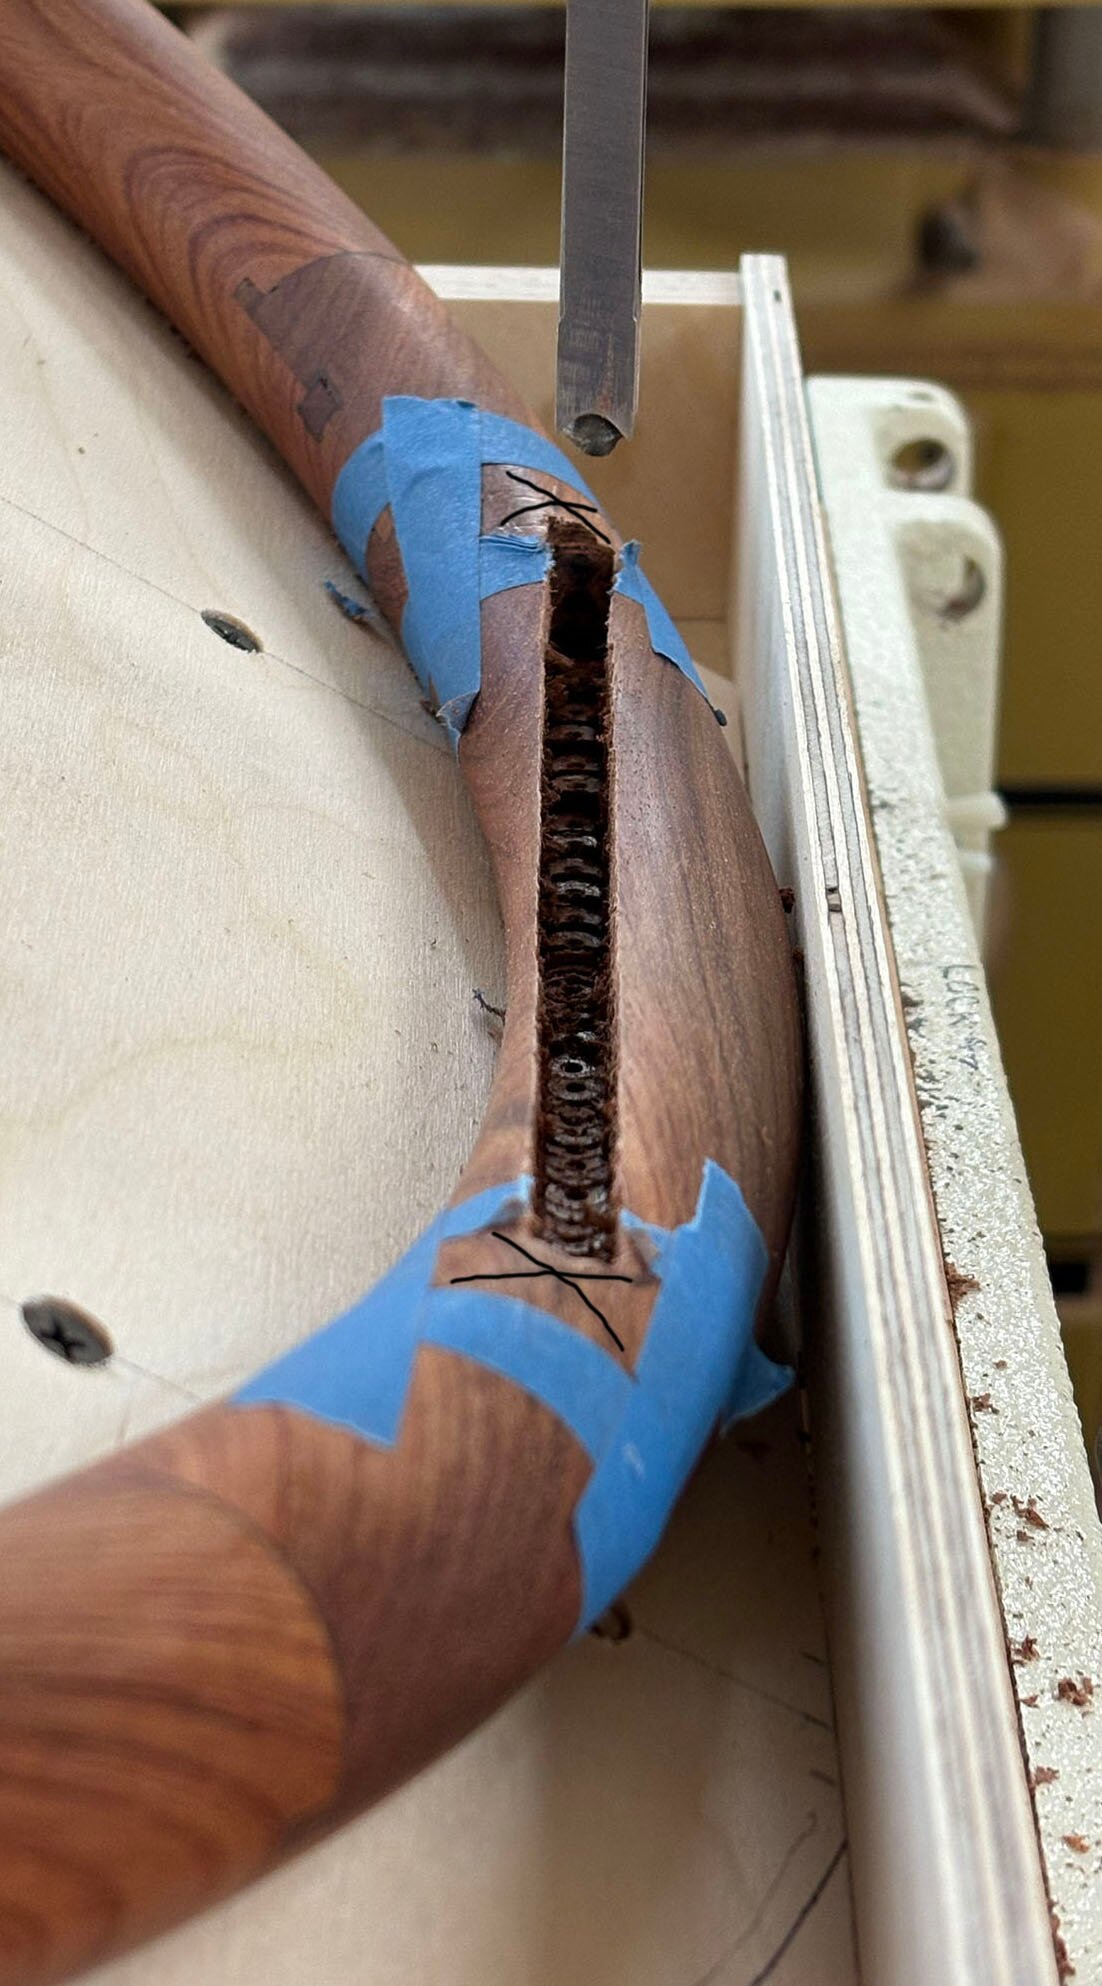
We cut the mortises on a hollow-chisel mortiser fitted with a plywood table and fences. For the back-post mortises, we clamped the arm to an angled cradle that held it at the arm’s slope.



The back posts
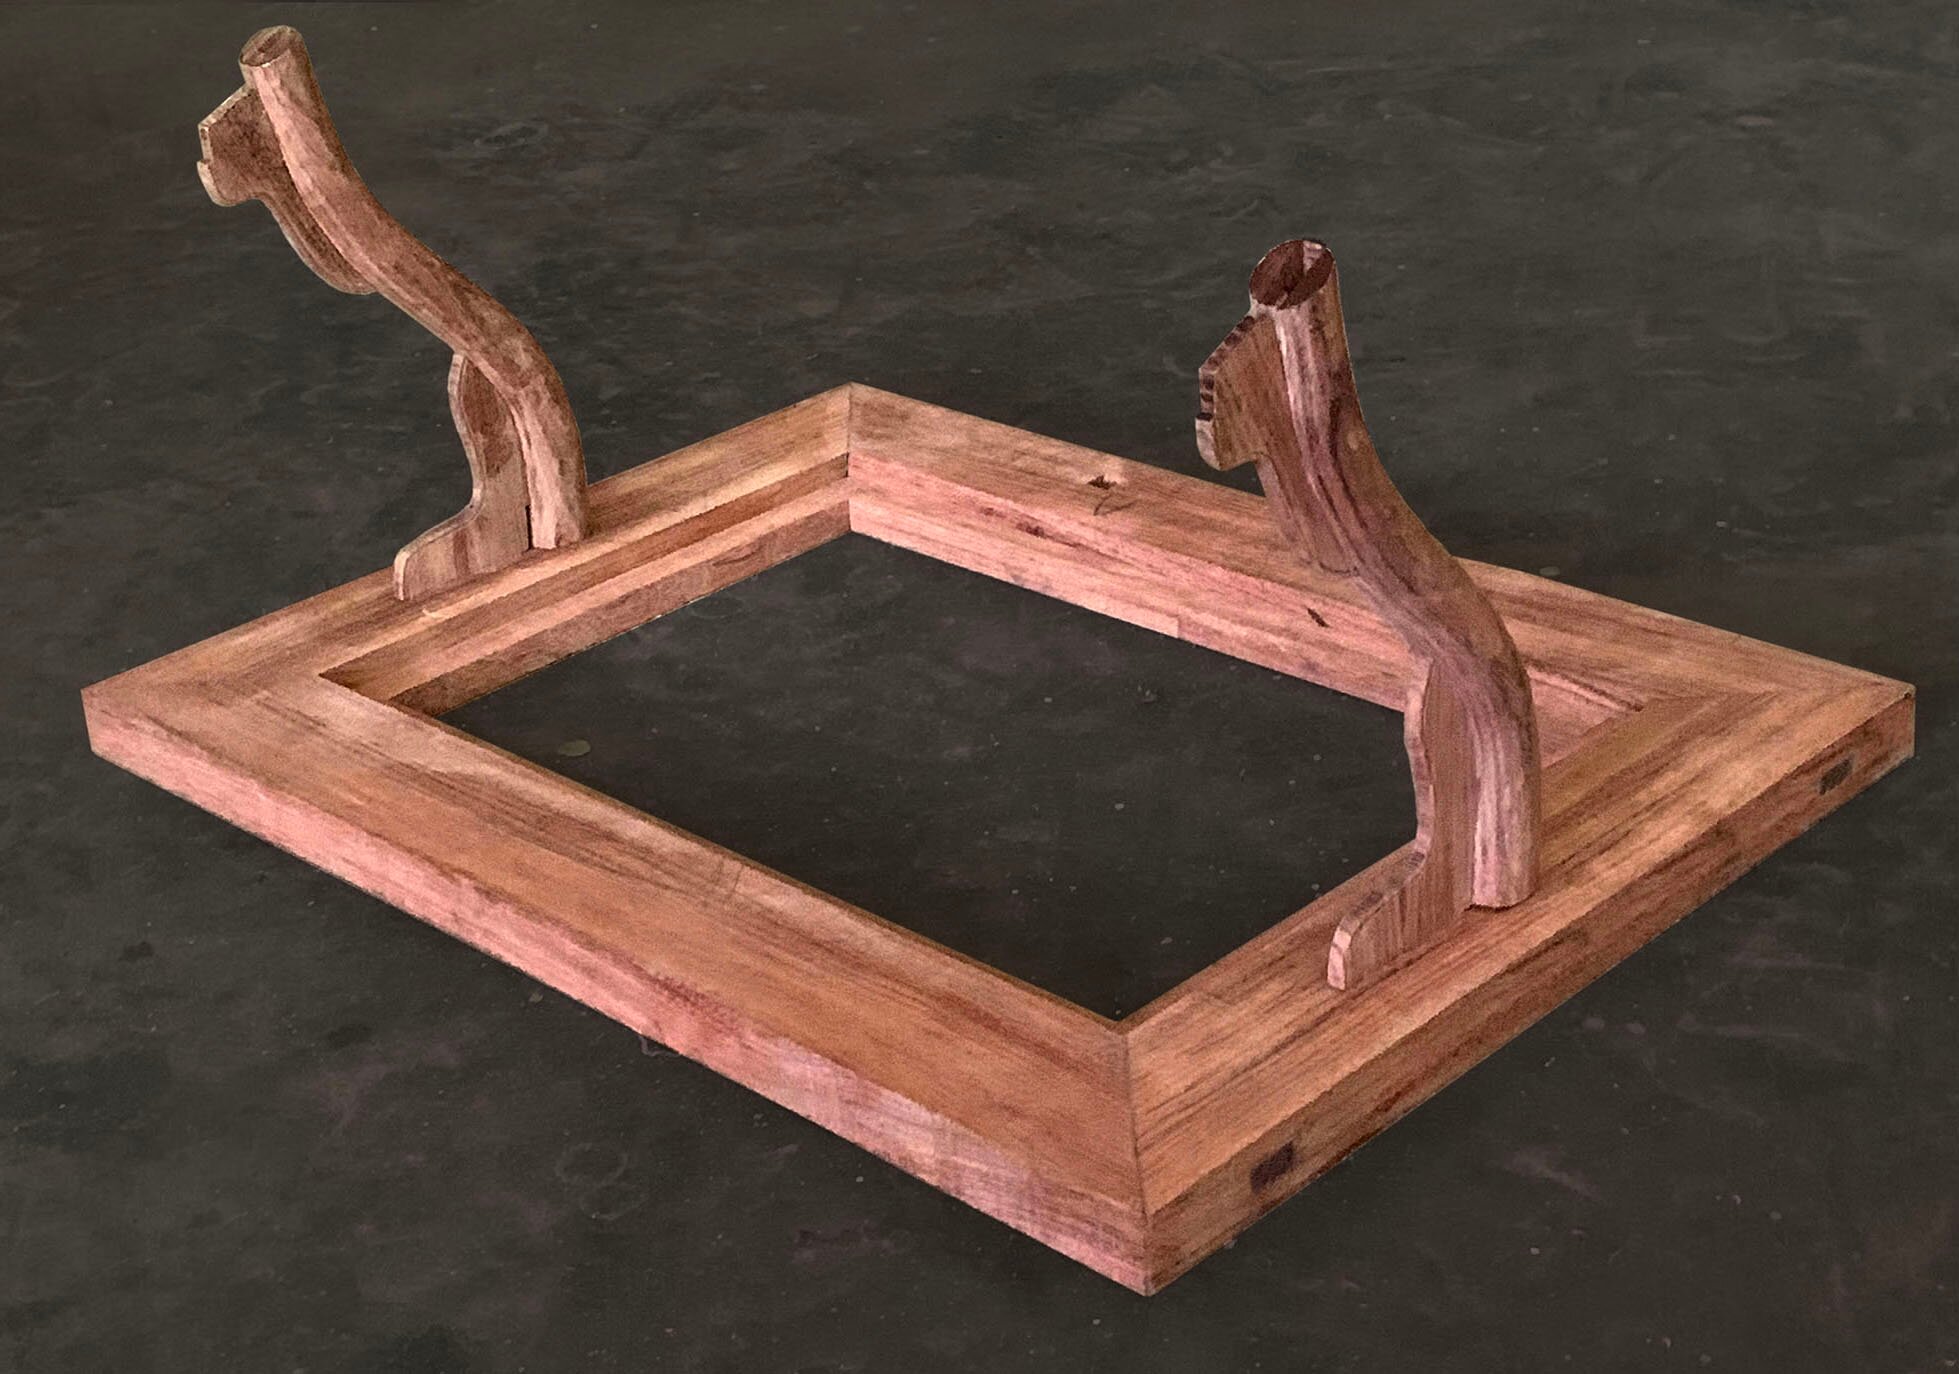
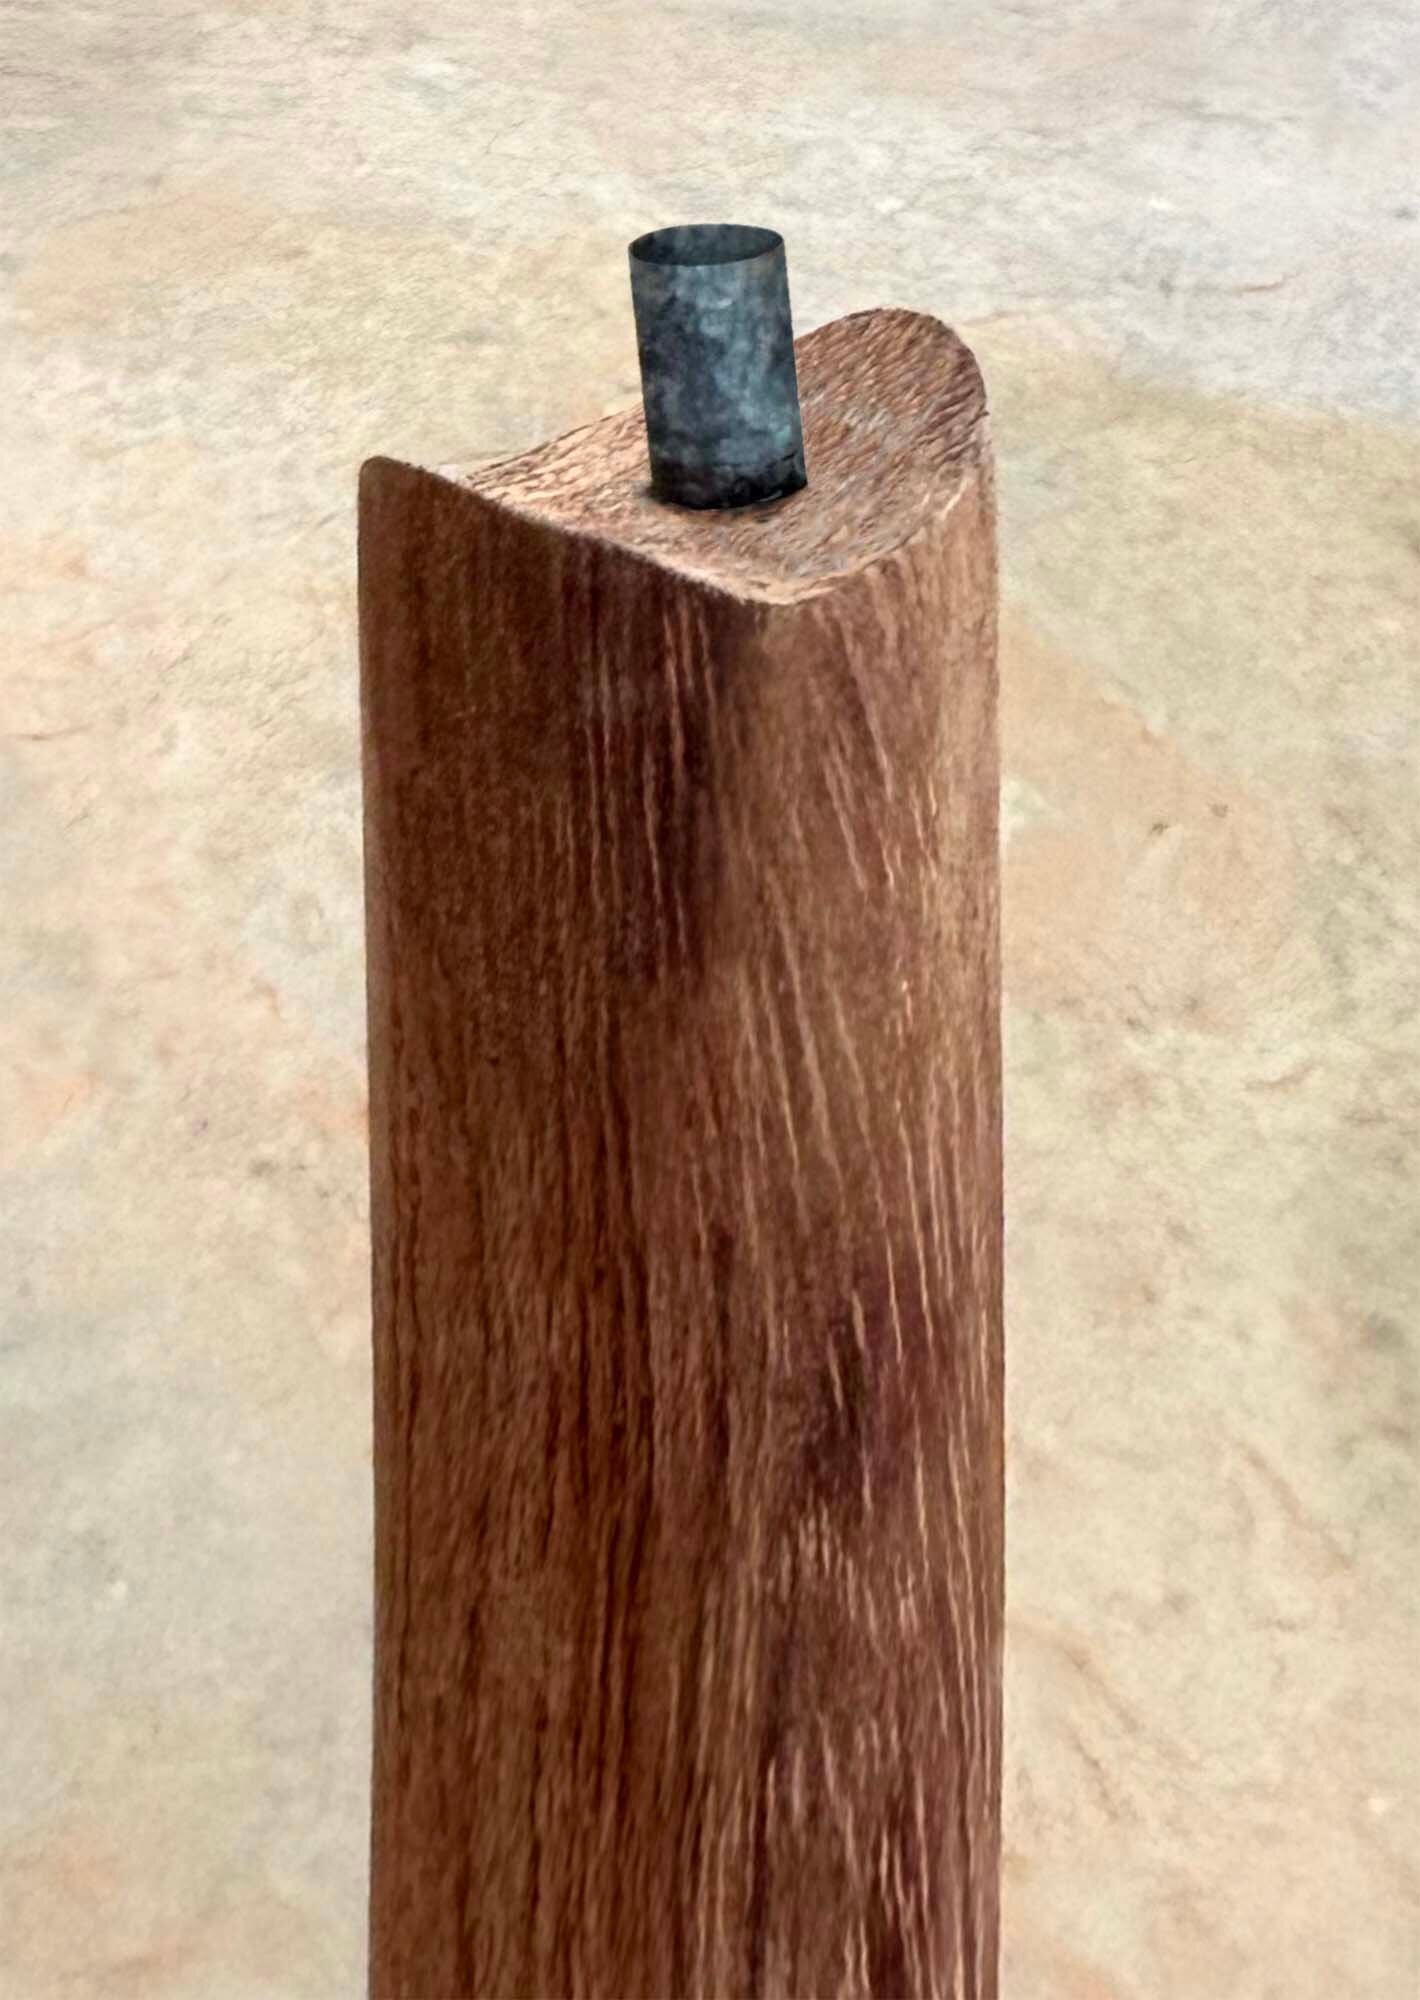
On the original, each back post runs through the seat frame and continues as a back leg. We made the posts and legs separately, joined by a carbon-fiber rod running through the seat frame. It was easier to build that way—maybe a silly place to save effort, given how much went into the rest of the chair.
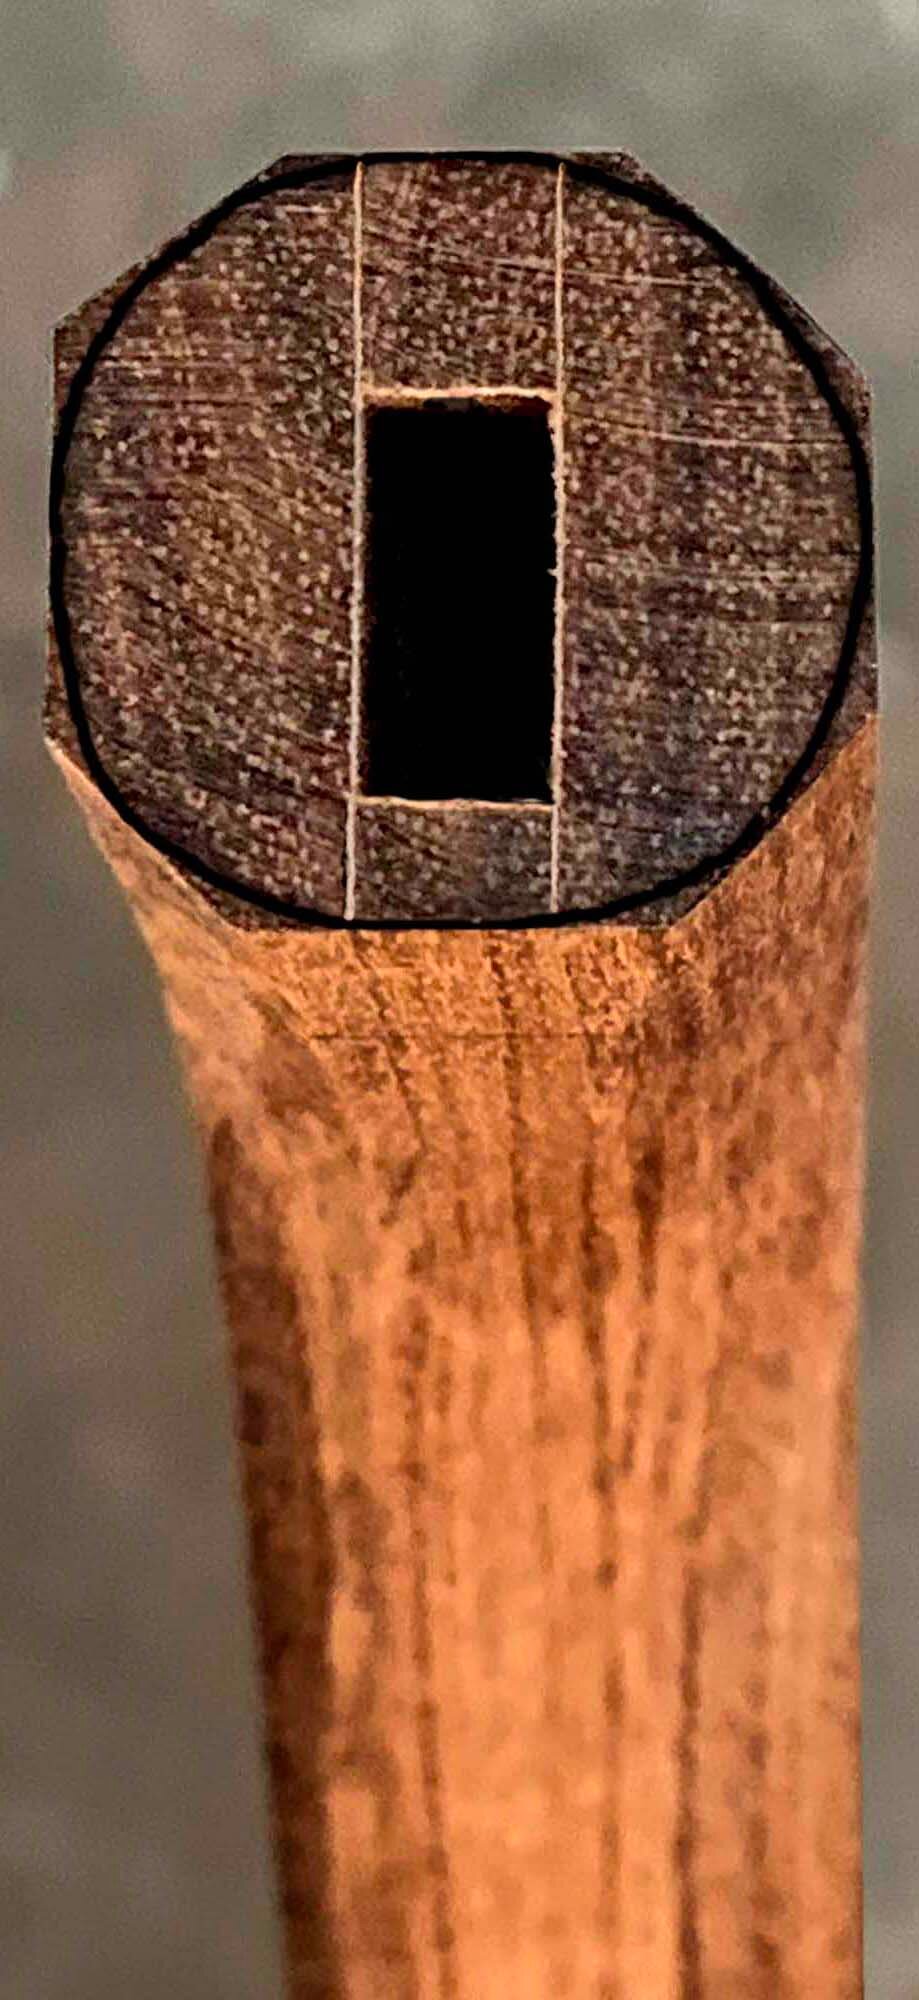
Each rod is 4 inches long, half in the post and half below it, and set in epoxy. We drilled the ⅜-inch hole into the end of the blank before shaping the post, then laid out the curves around it.

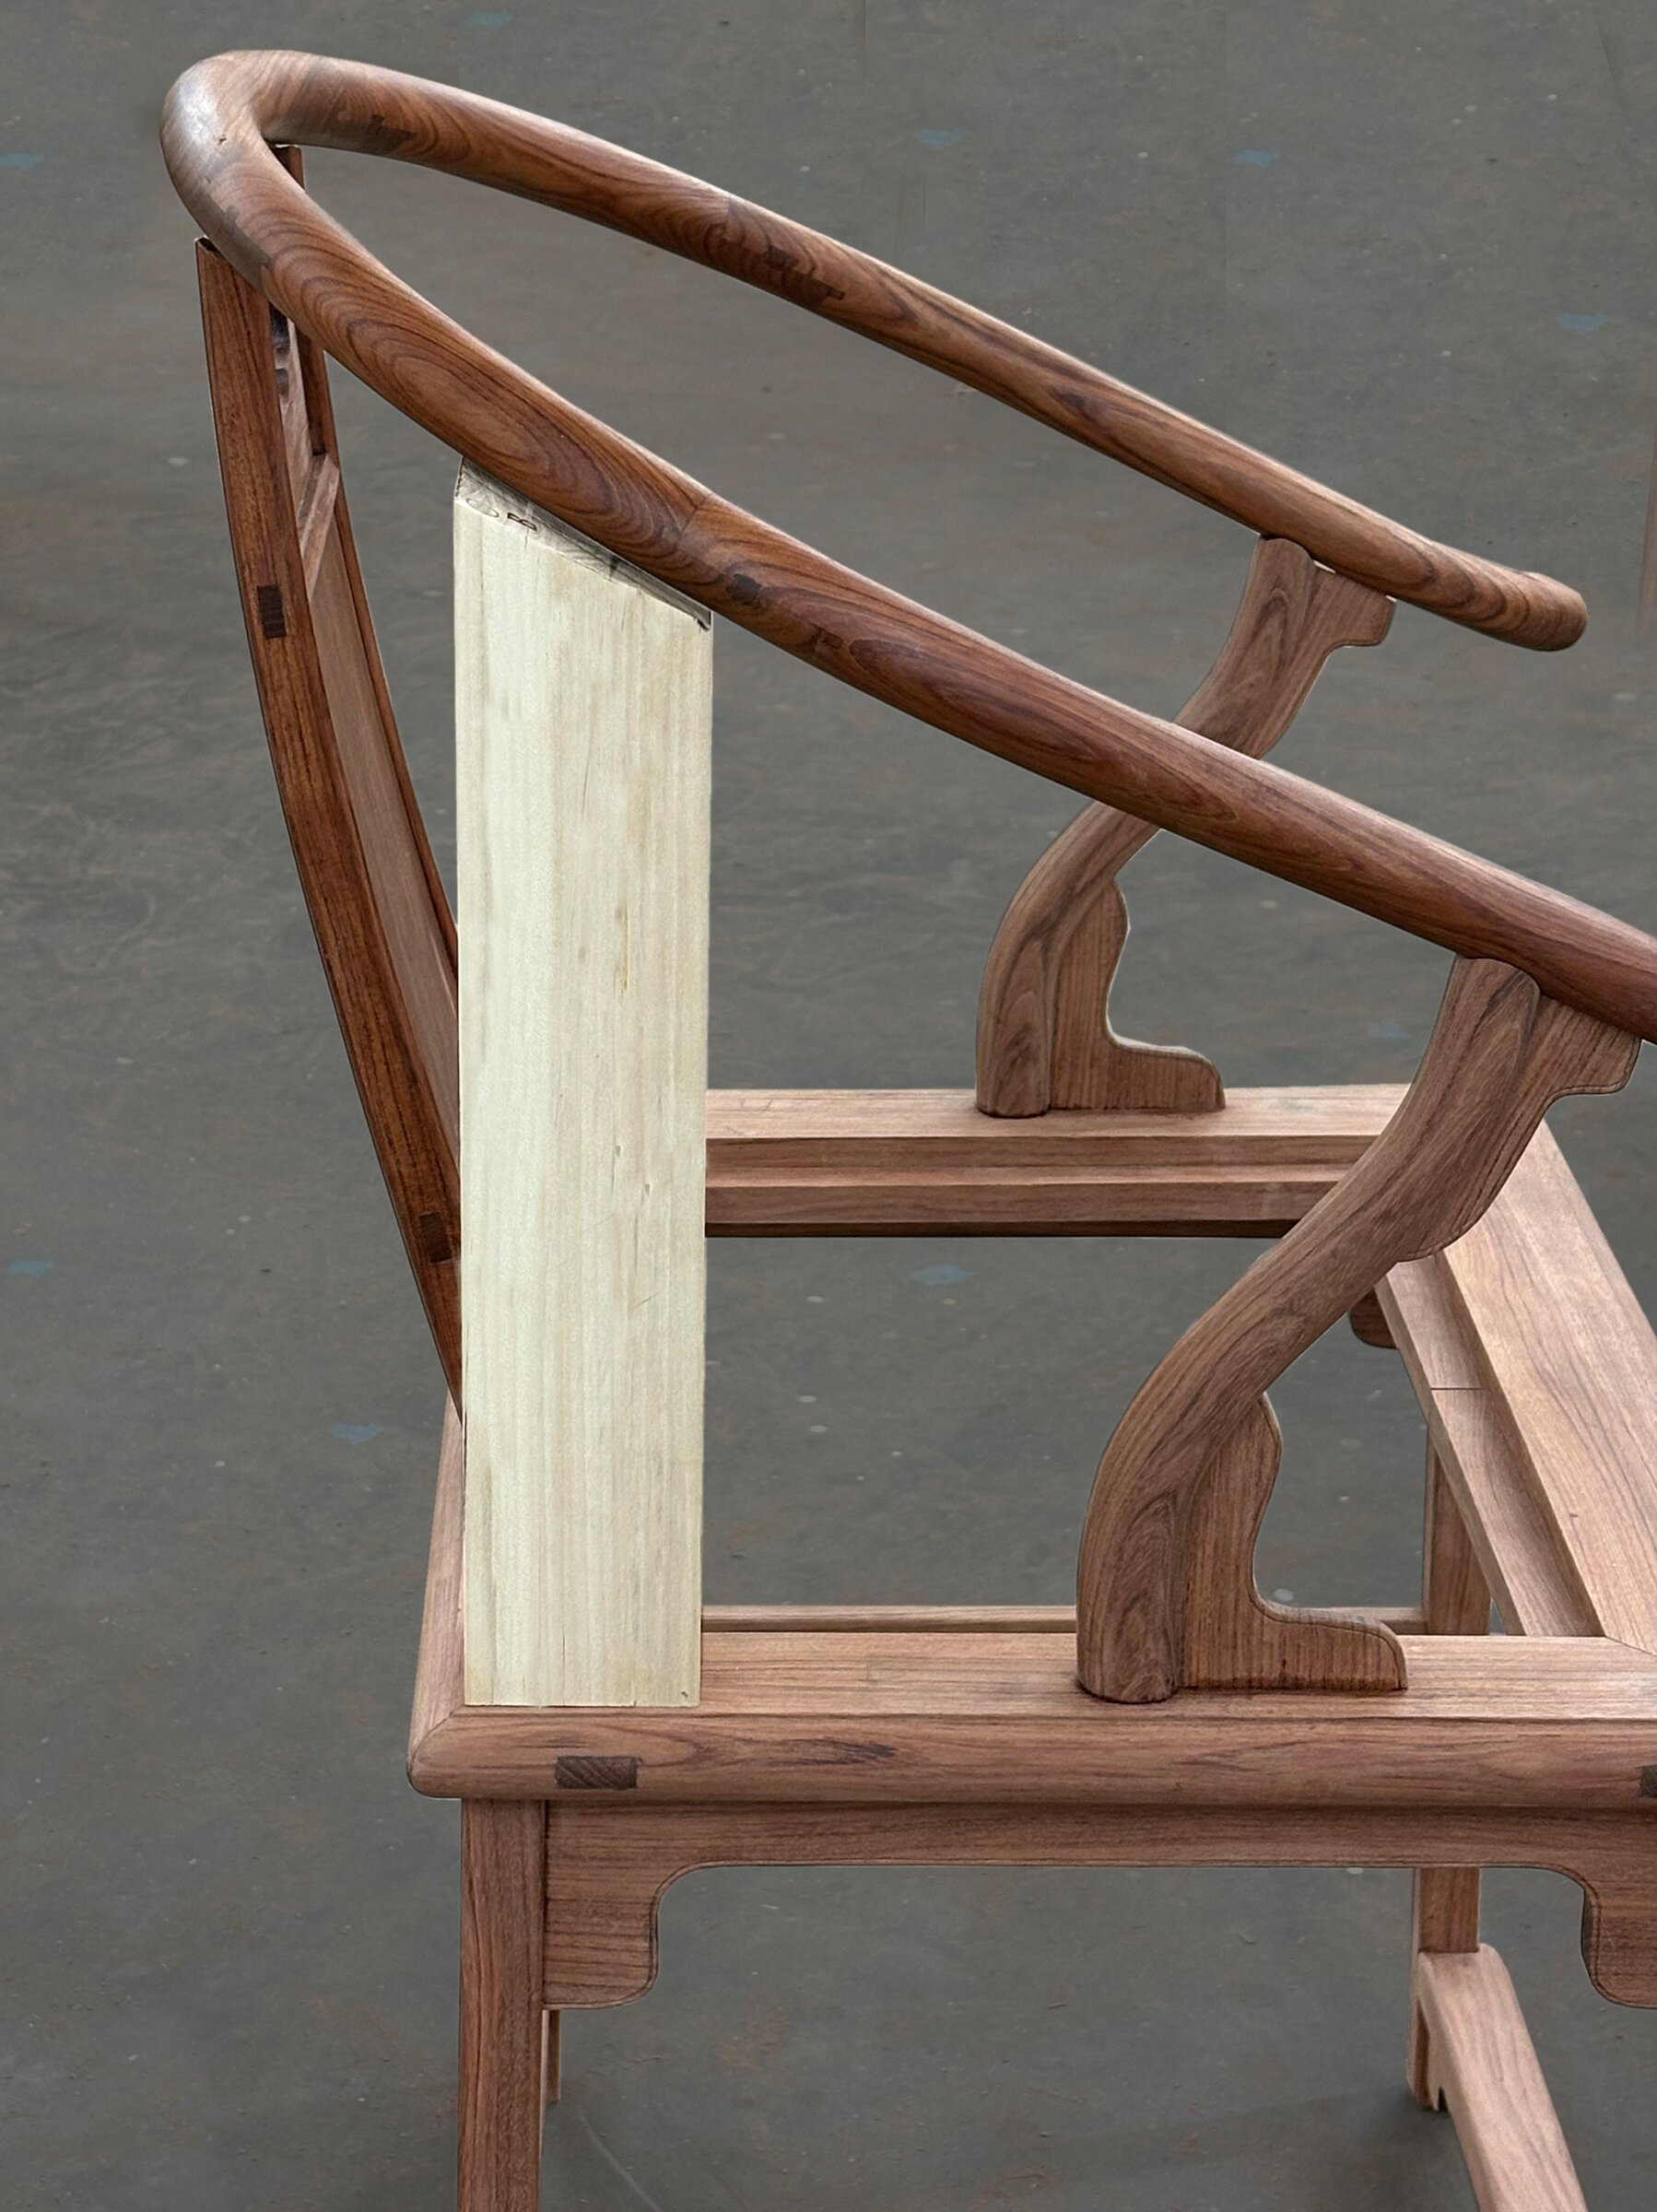

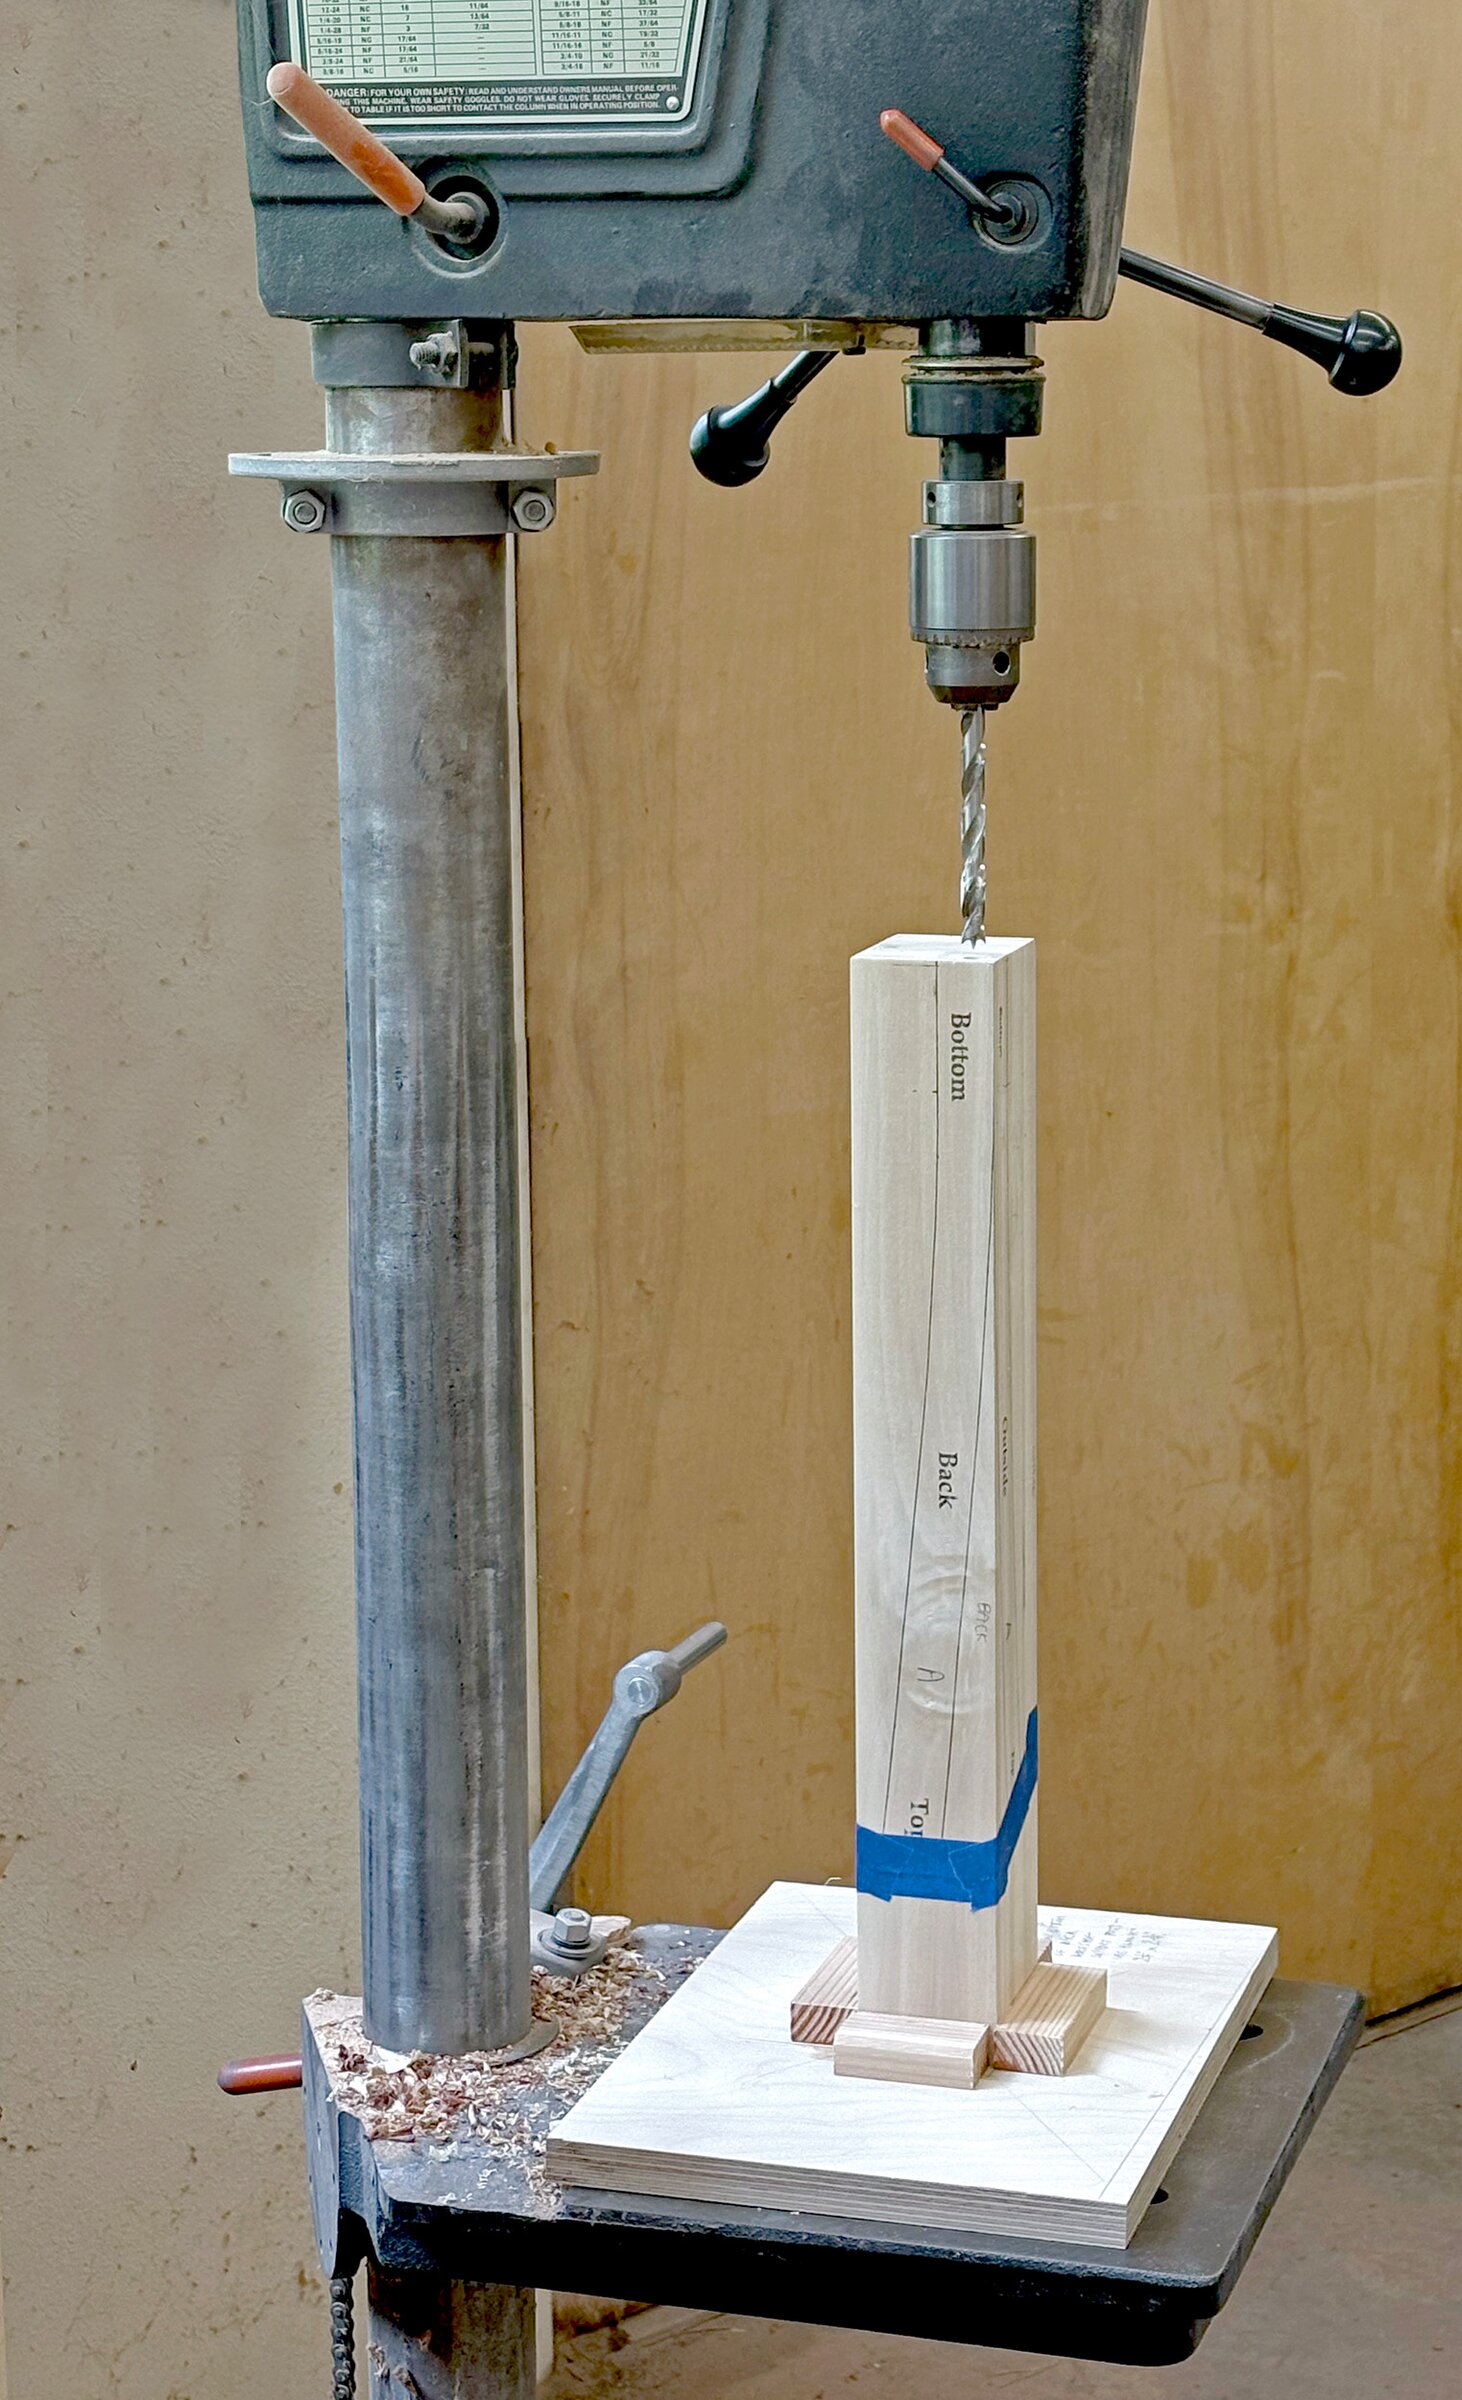
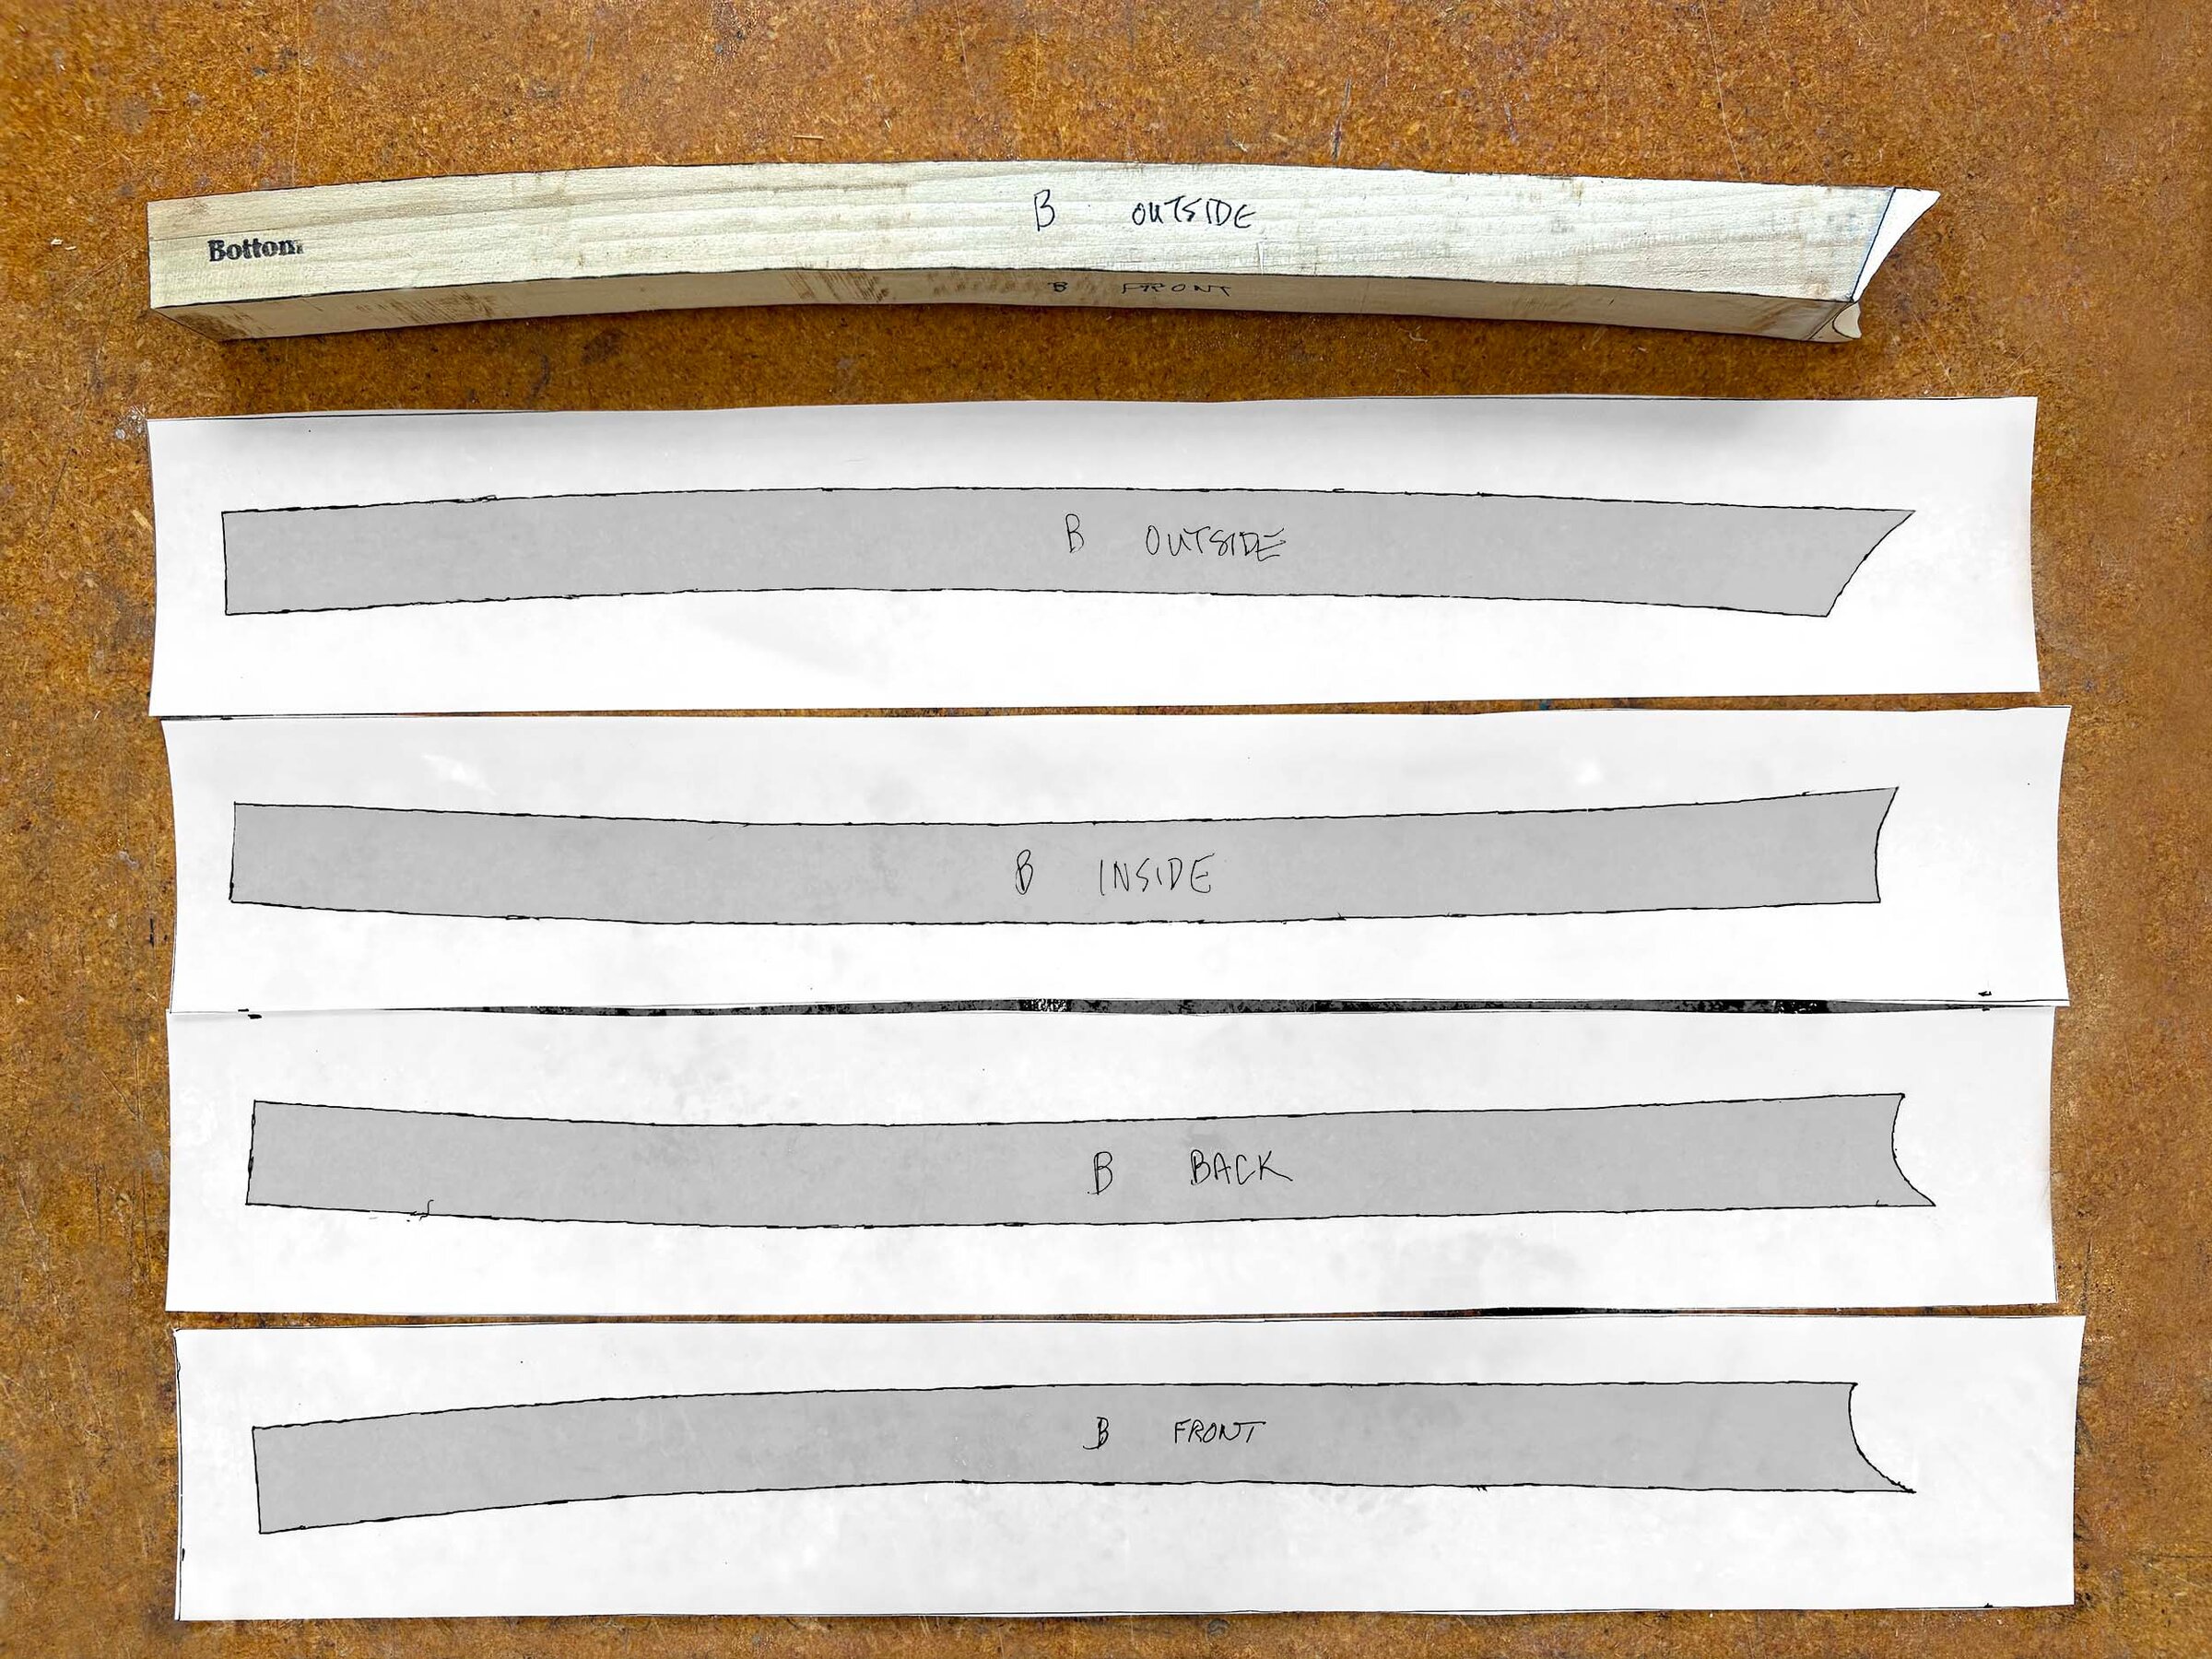
Each post leans and curves in two directions. We transferred paper patterns to each face of the blank, then sawed it one face at a time, like a cabriole leg.

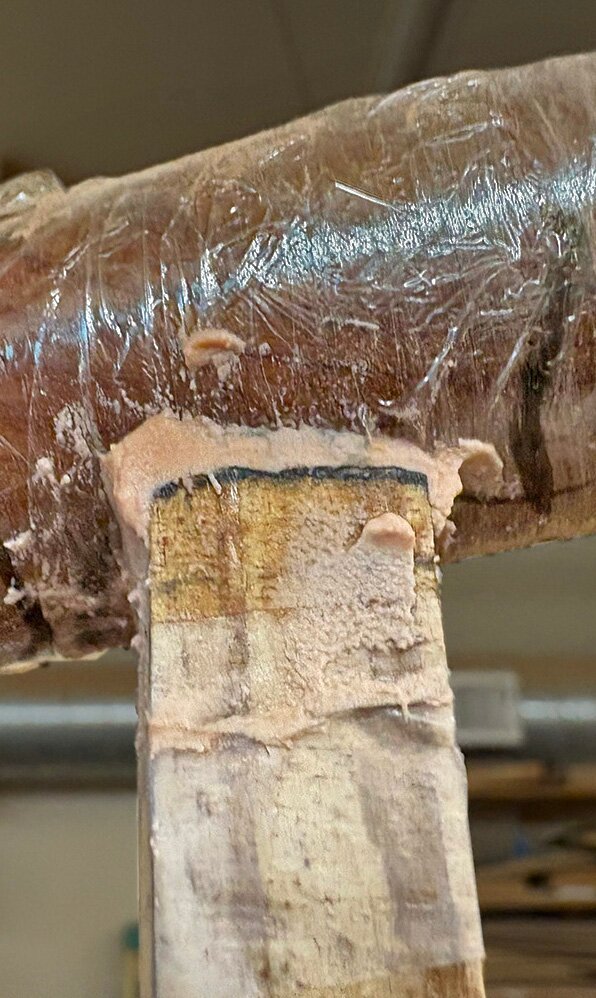
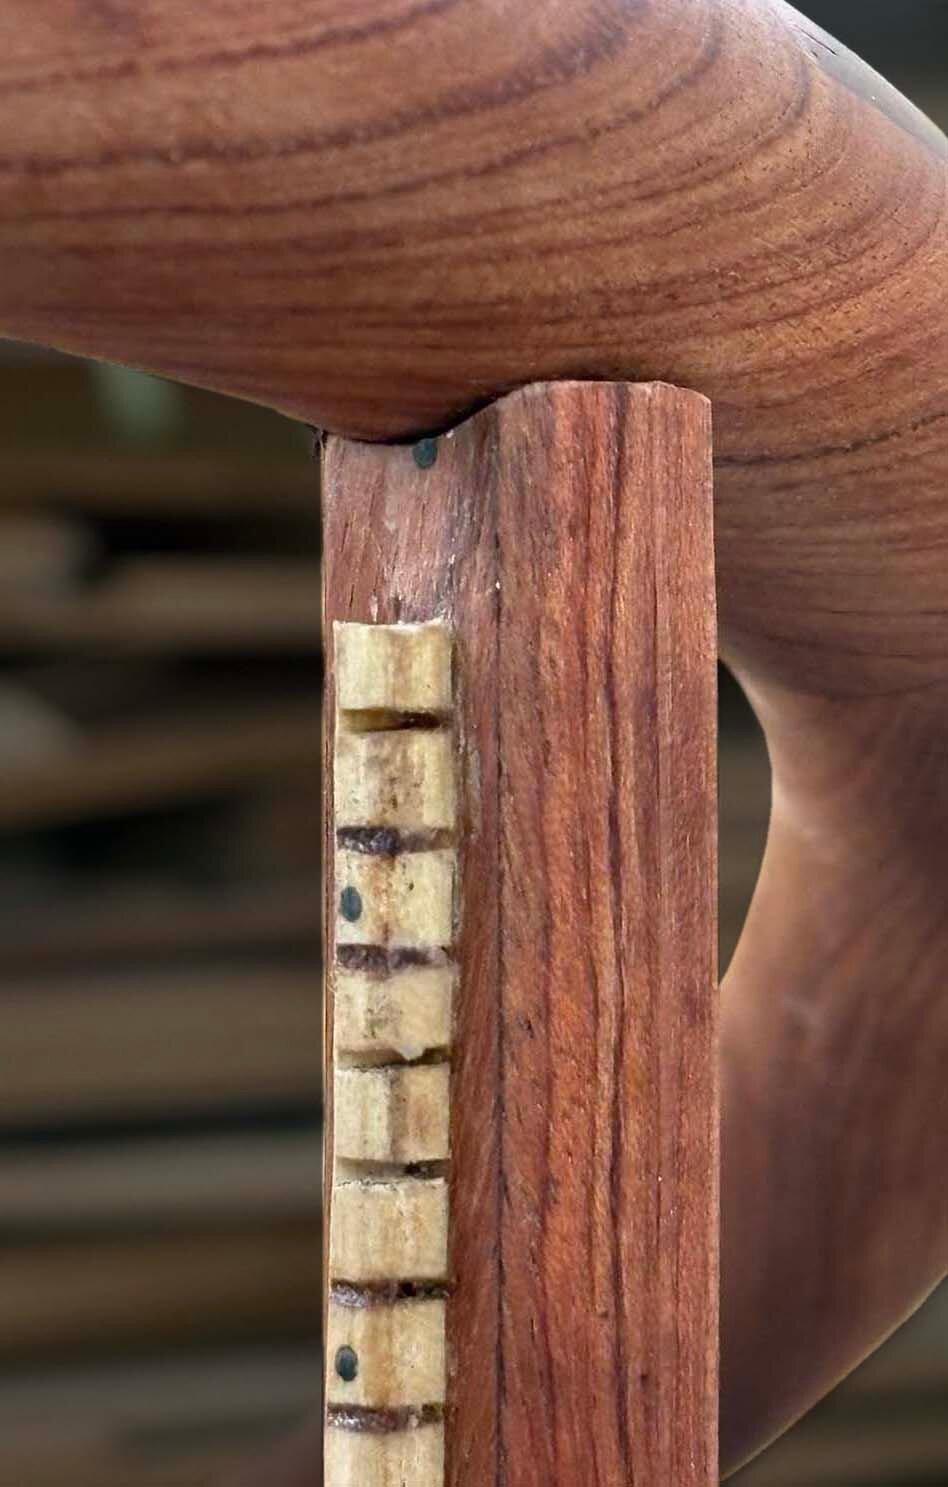
The hard part was the top, where a round post meets a round arm at a compound angle. We tried measuring, calculating, and drafting it first. In the end, we took the shape from the arm itself.
We stood a trial post in poplar beneath the arm. We wrapped the arm in tape and saran wrap, packed the top of the trial post with epoxy thickened with glass microballoons, and pressed it against the arm. When the epoxy set, it held the arm’s shape.
We sanded the epoxy flush with each side of the trial post, leaving a clean section of the curve on each face. We traced those sections onto the paper patterns, so the curves could be transferred to the bubinga with the rest of the post’s shape.
After sawing the post, while it was still square in section, we carved its top down to those lines with a Dremel. Then we rounded the post with a rasp.



The splat’s uprights meet the arm the same way.


Glue-up and finish
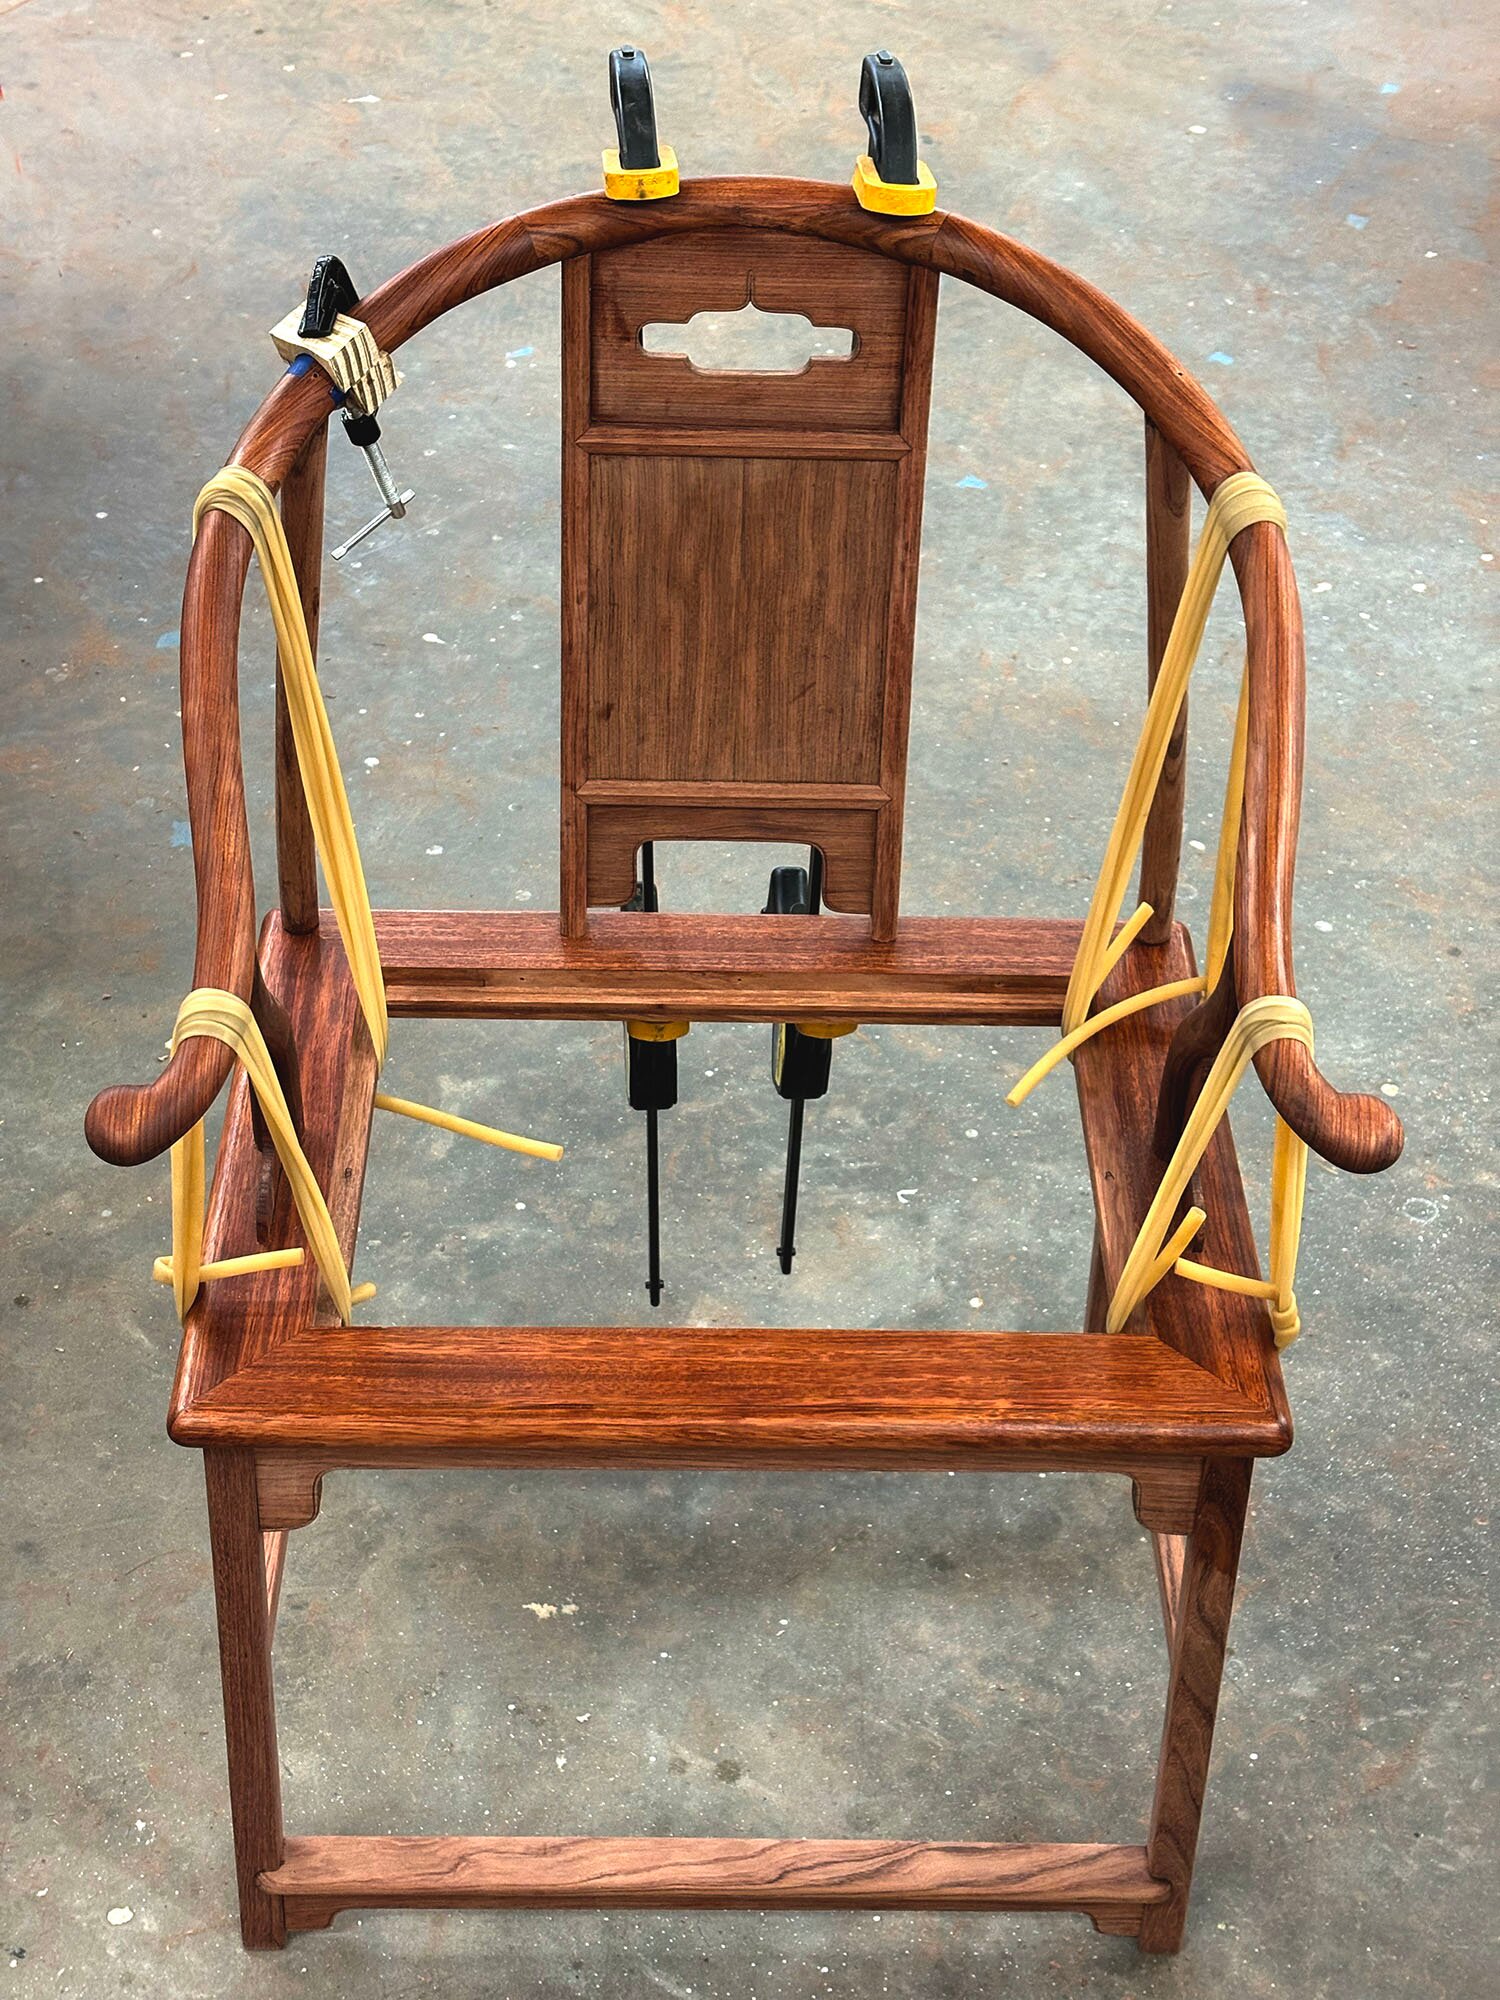
The upper chair went together in one glue-up: arm, front posts, back posts, and splat, held tight with surgical tubing.

We finished the chairs with Bartley’s clear gel varnish.
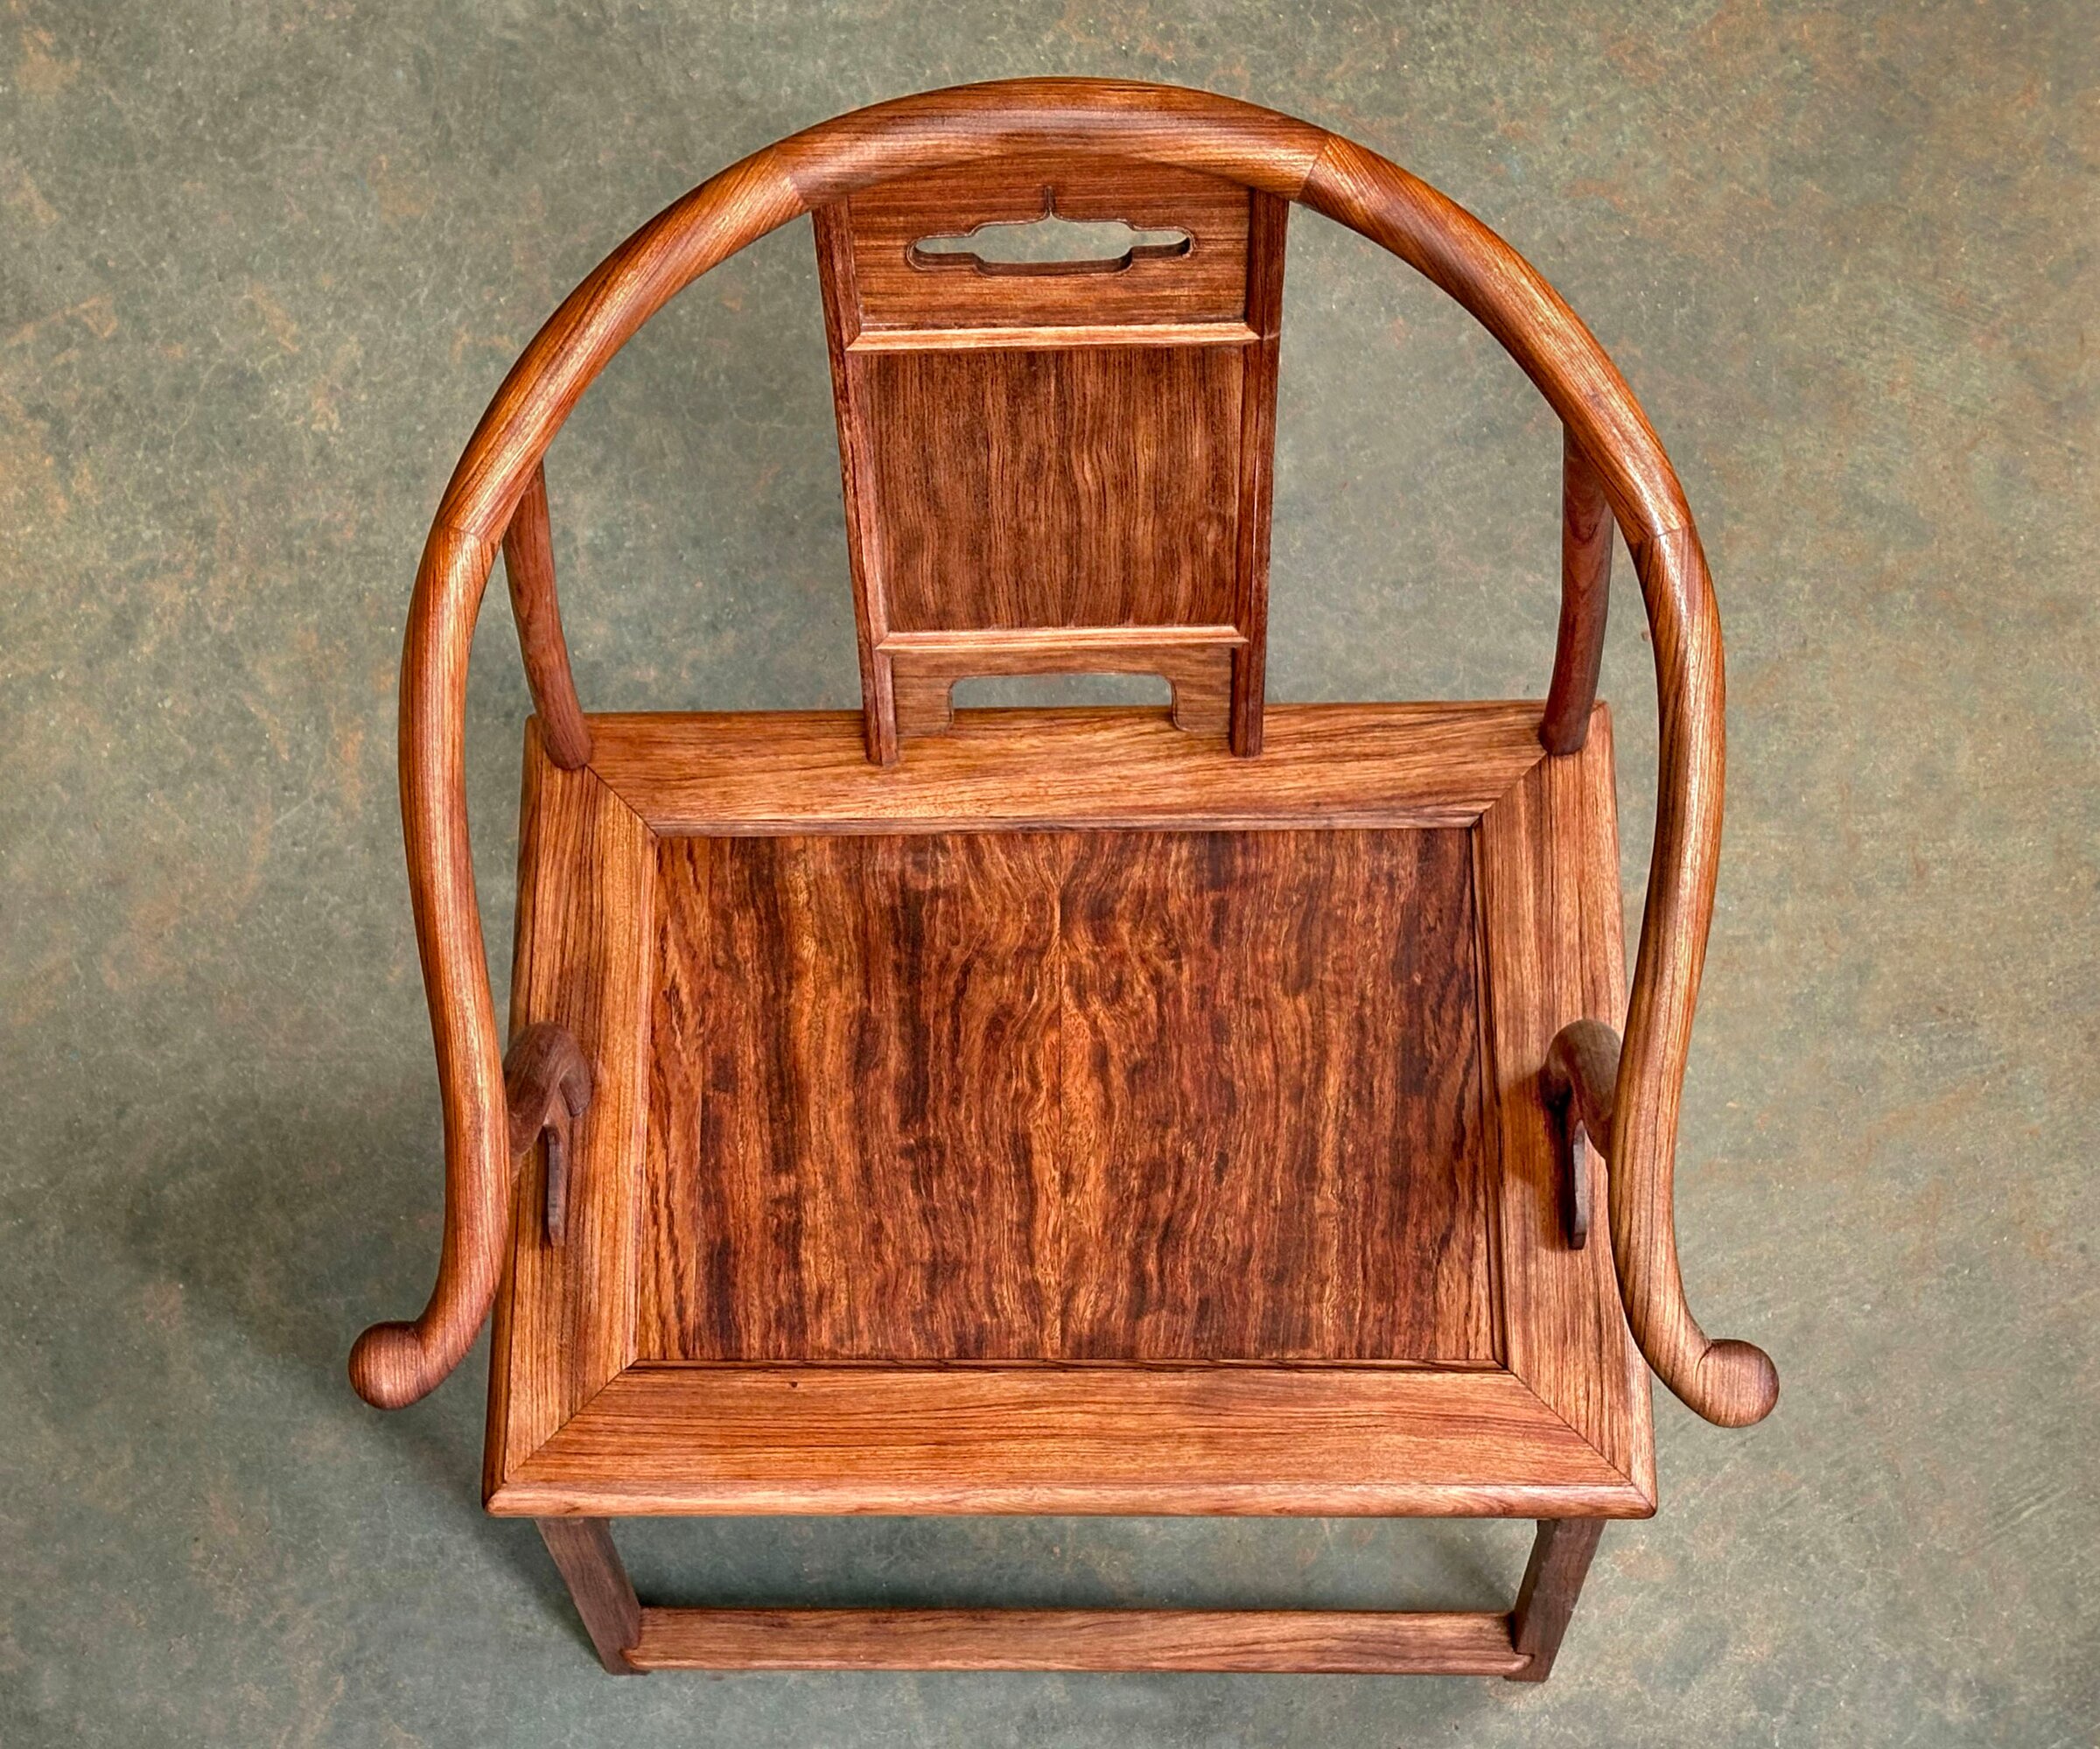
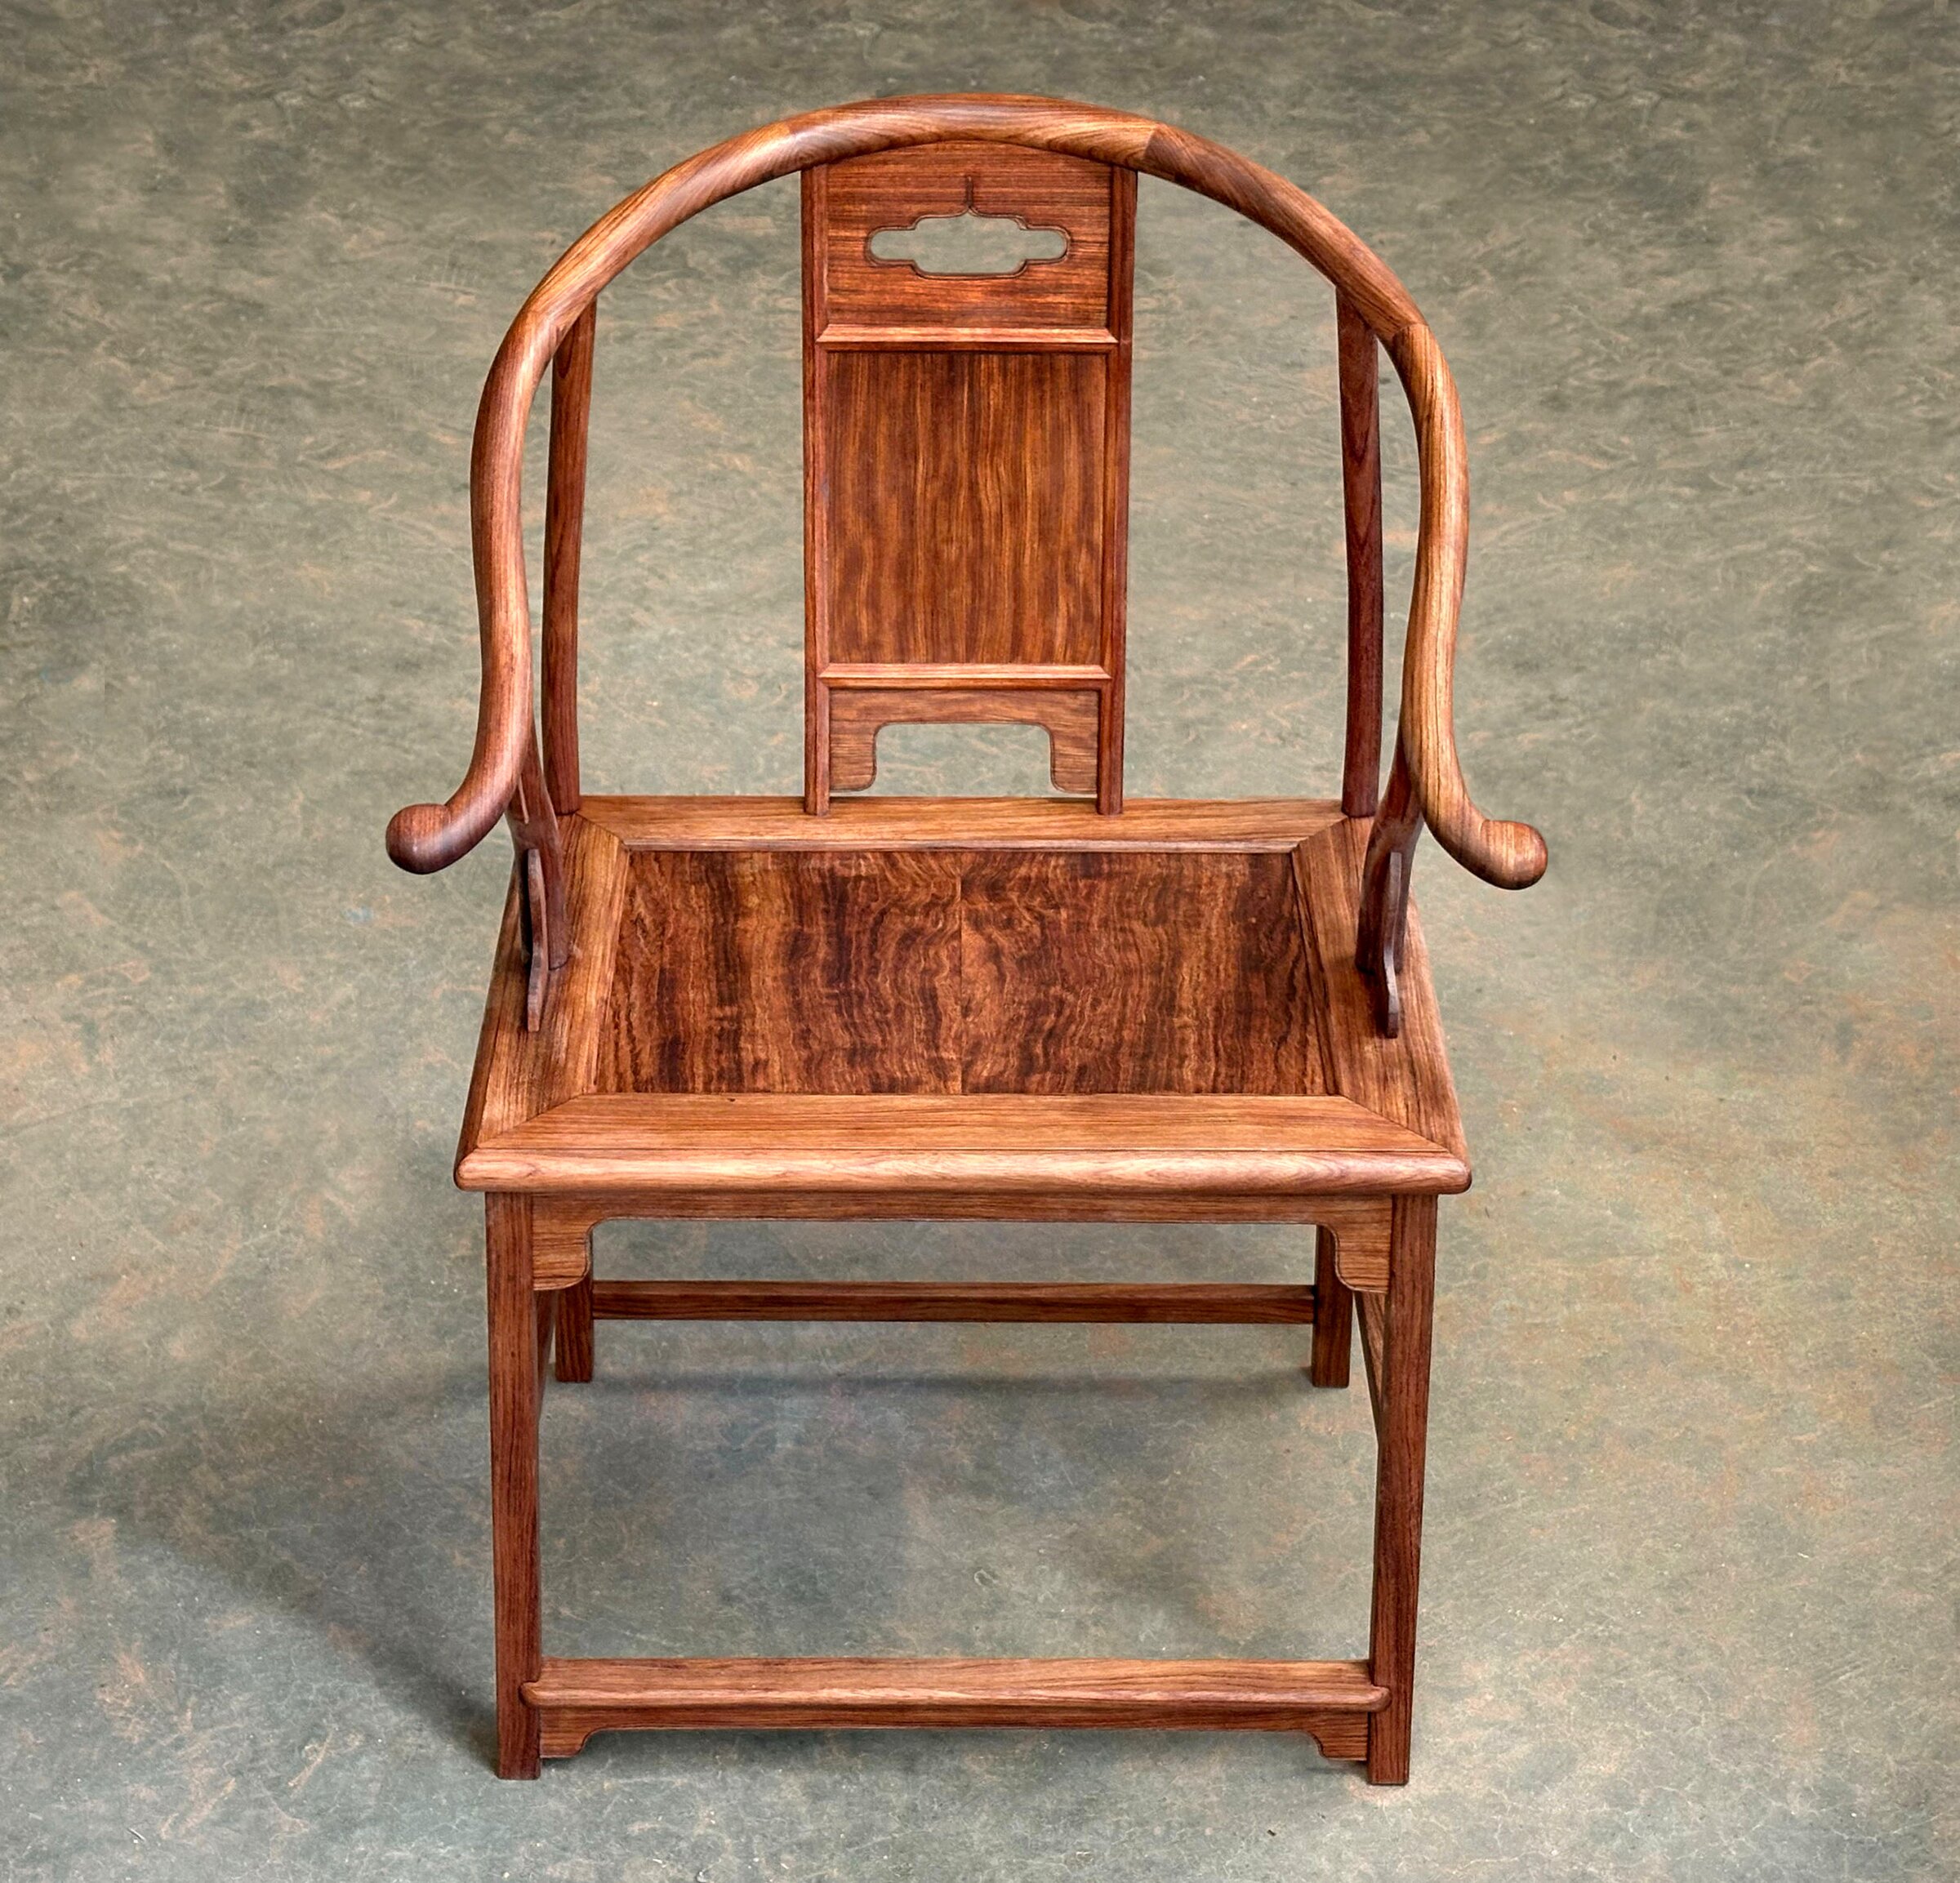
The chairs took more than a year, and they’re in our homes now, two each. The arm’s tilt is unlike that of most chairs I’ve come across, and it lets your shoulders relax naturally. Sitting in one, you feel grateful to the makers who worked out these curves some 400 years ago.


Kids Making It
If this post was worth something to you, please give to Kids Making It, a shop in Wilmington, North Carolina, that teaches woodworking to kids facing poverty and trauma. Donate
Sources
- The chairs at Christie’s: An extremely rare and important set of four huanghuali horseshoe-back armchairs, quanyi, The Collection of Robert Hatfield Ellsworth, Part I, New York, March 17, 2015
- Robert Hatfield Ellsworth, Chinese Furniture: Hardwood Examples of the Ming and Early Ch’ing Dynasties, 1971
- Gustav Ecke, Chinese Domestic Furniture in Photographs and Measured Drawings, 1944
- Wang Shixiang, Classic Chinese Furniture: Ming and Early Qing Dynasties, 1991
- Yeung Chan, Classic Joints with Power Tools, 2002
Tools used
- Powermatic 12-inch jointer and Powermatic planer
- SawStop table saw, with a tenoning jig
- Powermatic 14-inch bandsaw
- Woodmaster drum sander, 38 inches across, with sleds screwed to tabs
- JET hollow-chisel mortiser, with a plywood table and fences
- Delta drill press, an old one
- Router in the SawStop’s router table, with a bullnose bit
- JET oscillating spindle sander
- Belt-and-disc sander, with a jig on the disc
- Auriou hand-stitched rasps
- Veritas ¼-inch chisel
- Scratch stock, made in the shop
- Veritas awl, needle file, and a Dremel with a carbide burr, a cutoff wheel, and a sanding drum
- Clamps and surgical tubing
Press
Writing about the chairs? The press kit has the photographs, drawings, video, and facts.
Photographs by Charles Palmer